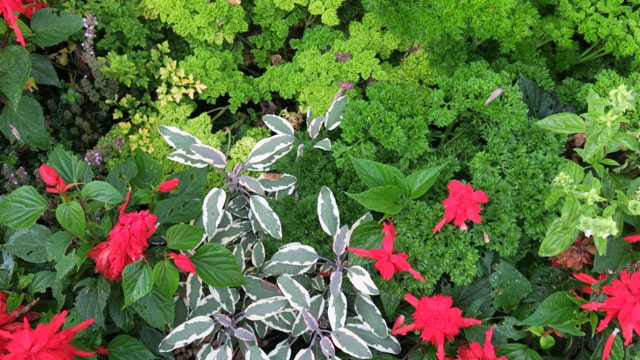
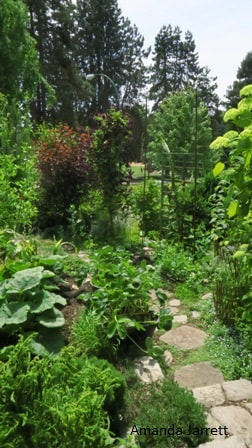
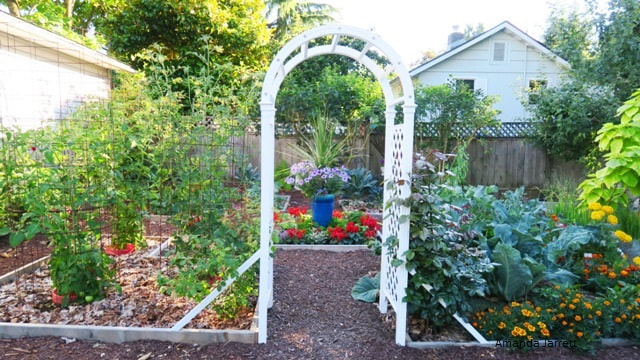
 If you are keen on growing edibles but aren’t enthusiastic about the look, installation or maintenance of a traditional vegetable garden, consider a French kitchen garden, referred to as a ‘potager’ garden. Leave it to the French to come up with an ornamental designer veggie garden that looks good no matter what time of year it is. What makes potager gardens so appealing and attractive is their symmetrical geometric beds. Within the beds, veggies, fruits, herbs, shrubs and even fruit trees are planted formally to conform to the geometric shaped beds.
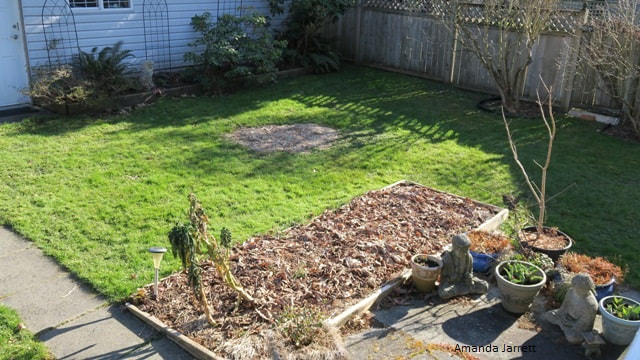
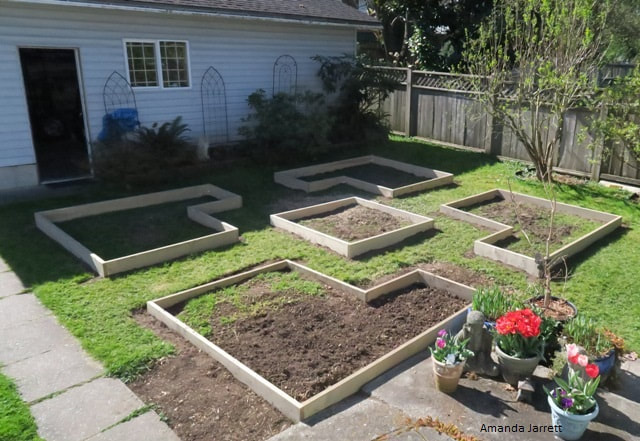
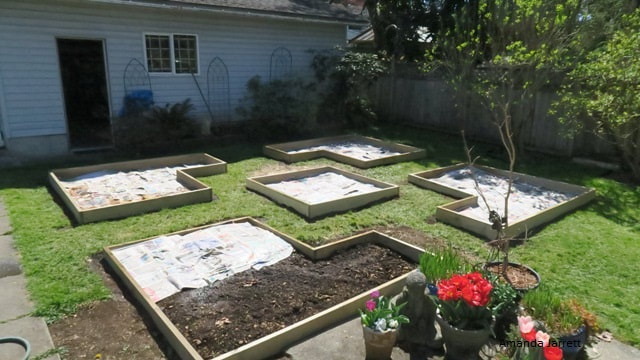
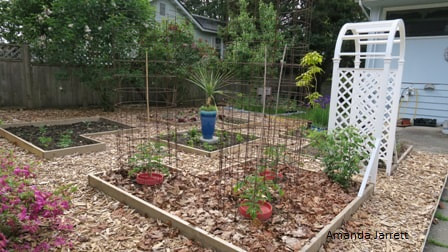
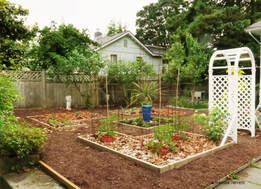
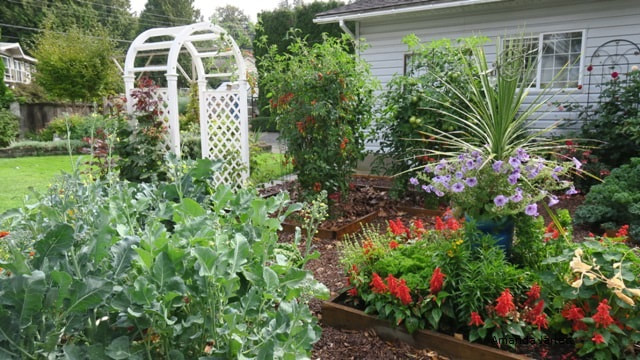
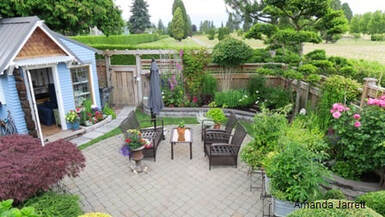
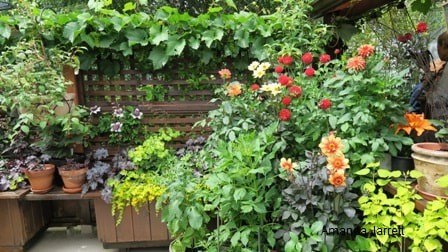
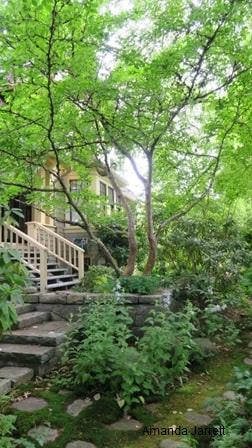
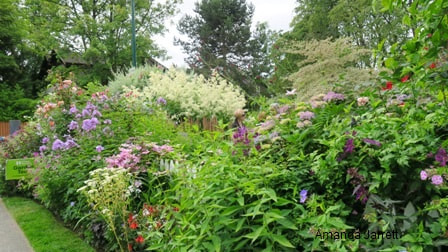
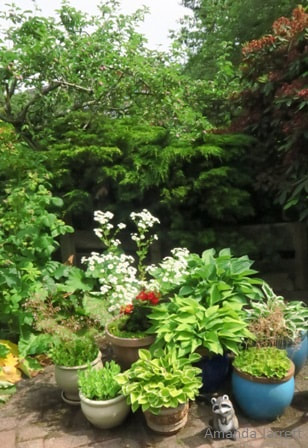
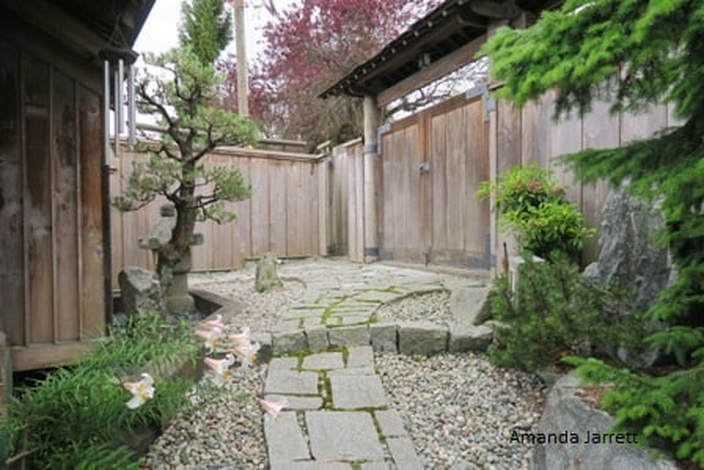
 The Plan. The garden was measured and divided into four quadrants with a square bed in the middle for a focal point. The beds, referred to as parterres, are usually framed by small hedges such as clipped boxwood, or even herbs such as thyme. Dwarf and espaliered fruit trees, herbs, artichokes and other perennial edibles are not just there to harvest, they are there for their form and elegance. Plants are selected not just for their taste, but for their shape and beauty. Edible and non-edible plants are combined for a functional aesthetically pleasing garden. I’ve always loved the look and convenience of a potager garden, so when it was obvious we needed more gardens space to grow more veggies, reinventing this French Renaissance style of garden seemed like a fun project. 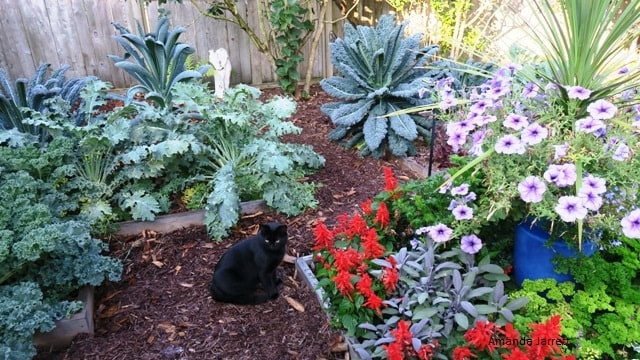 Chloe, our very attractive black moggy, loves the new garden. The budget for this French kitchen garden was minimal, so was the labour. Although we would have loved to use pavers for the paths and stonework or brick to make the geometric beds, we took a more economical route with mulch for the paths and wood for the beds. It isn’t as elegant as a traditional potager garden, but I think the essence still prevails.
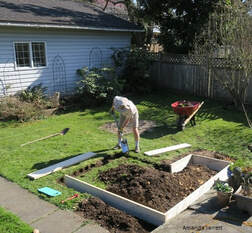
The area was measured and a plan was made to accommodate four beds with a central bed in the middle. The beds are exactly the same shape and size. Generous three foot wide paths provide access, convenience and mimic classic potager garden style. I'm a firm believer of sheet mulching, so no grass was removed except to install a trench for the wooden frames for each of the beds. The frames were made from 2' x 10" pine boards, treated with an organic wood preservative. We tried to purchase cedar, but due to the pandemic, it was not available at the time.
I watered inside the beds, that were still full of grass then laid an inch of newspaper on top. I was careful to overlap the layers of newspapers to totally smother the grass. The newspaper was thoroughly wetted then compost rich soil was added to each bed.
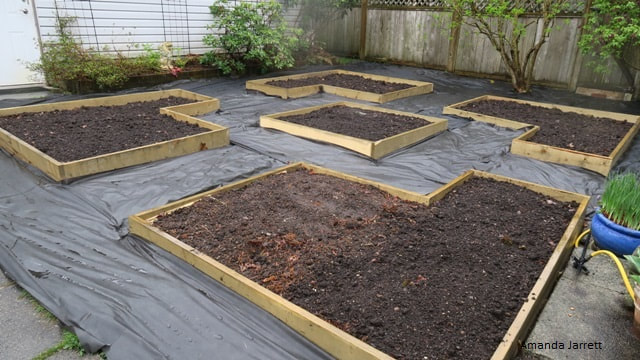
To make the mulched paths, landscape fabric was pinned down with coat hanger wire that was cut into four inch pieces and curved into U-shapes. Cedar mulch was ordered but when the it was delivered it was too pale, too big and too coarse, and certainly not suitable for what I had in mind. After contemplating it for a while, I bit the bullet and bought bags of non-cedar mulch since I couldn't find any fine cedar mulch locally. The darker and finer mulch was laid on top of the cedar mulch to create a thick 4 inch layer. The cedar should slow down decomposition of the non-cedar mulch (hopefully), prevent the lawn from infiltrating the paths. It will also be nice and soft to walk on. Weeds if they do manage to appear, will be easy pull out.
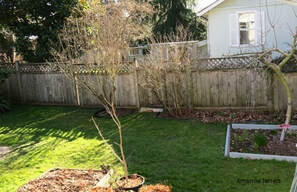
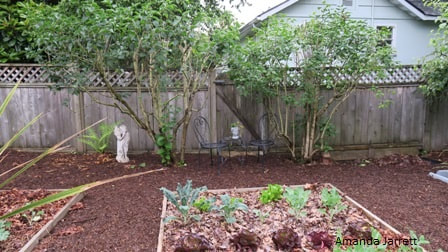
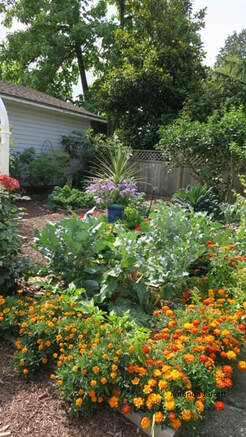
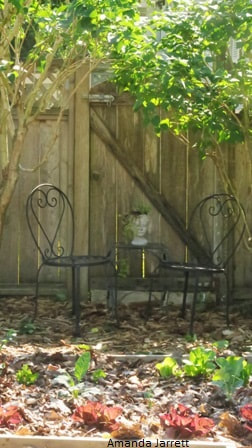
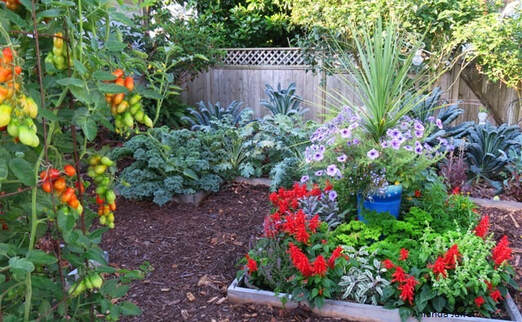
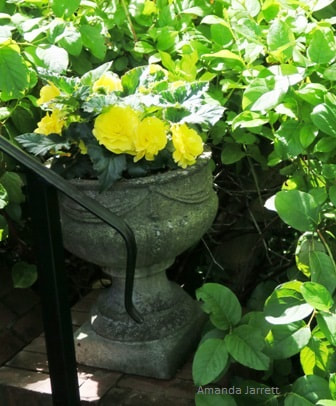
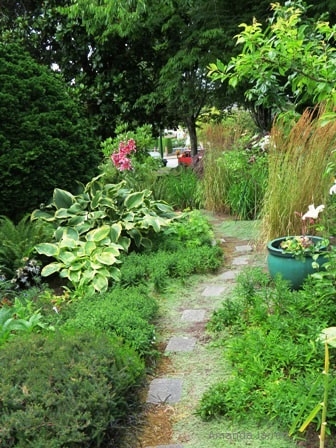
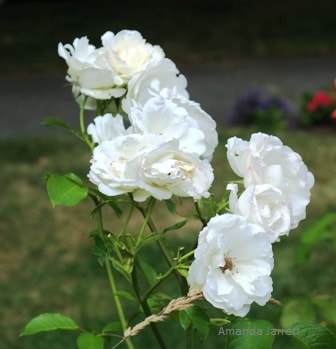
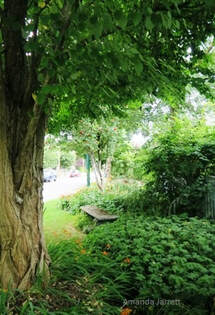
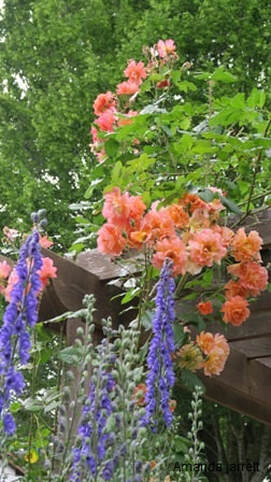
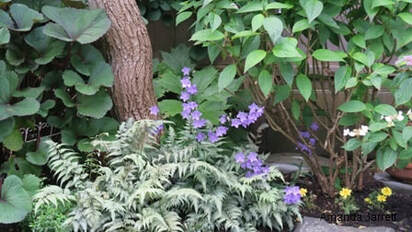
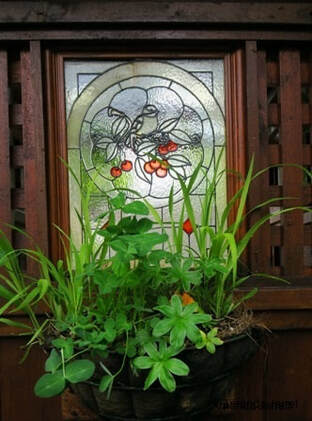
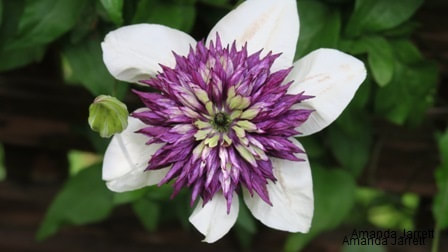
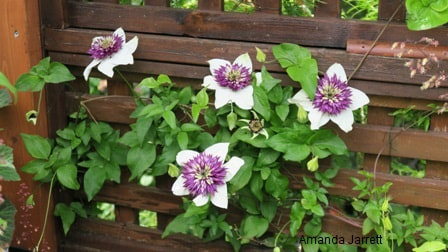
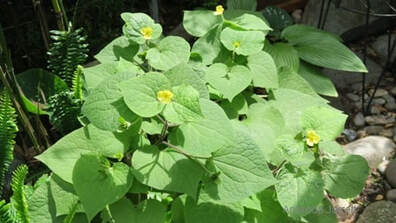
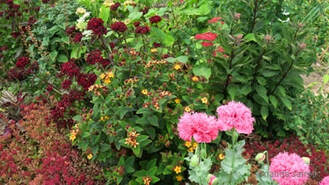
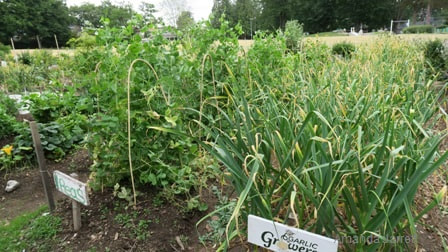
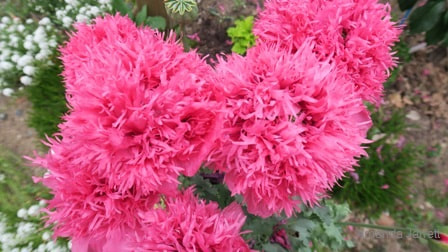
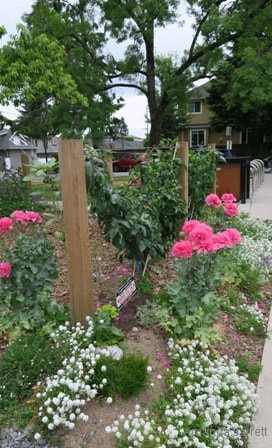
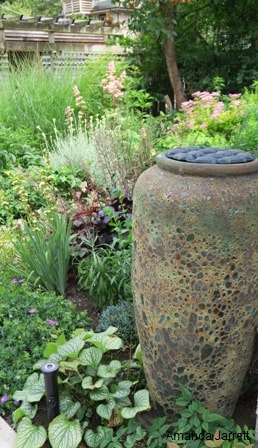
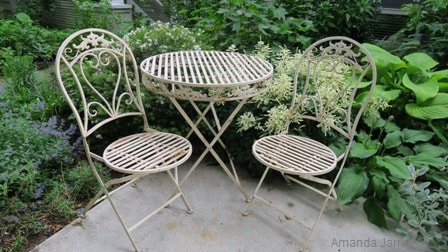
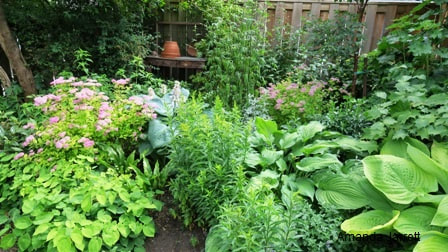
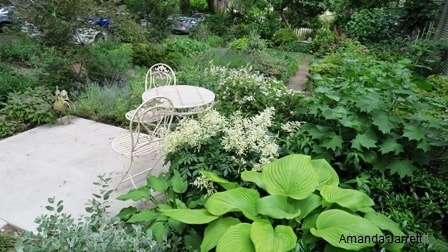
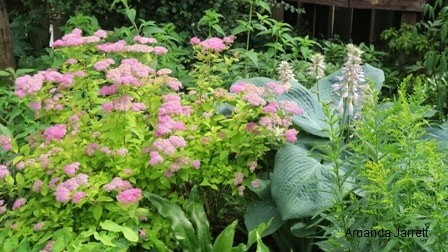
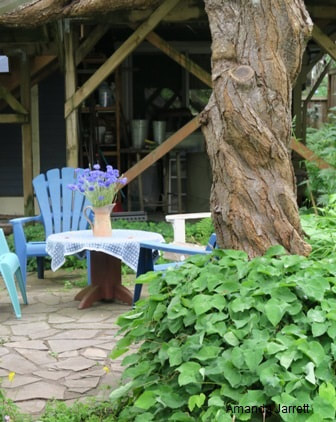
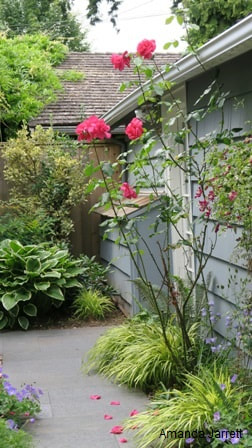
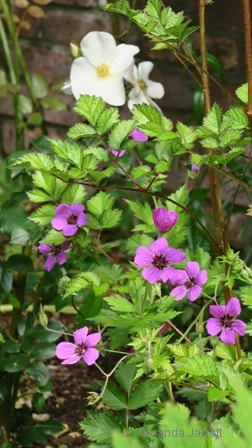
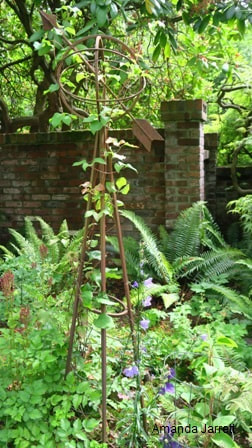
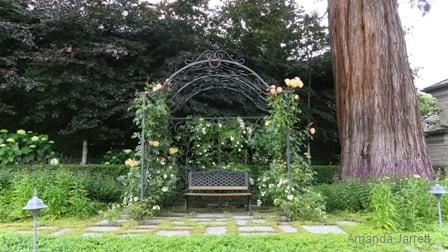
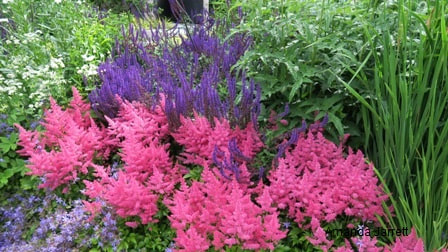
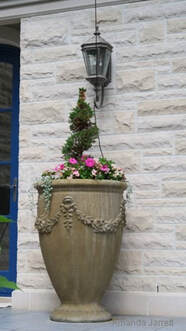
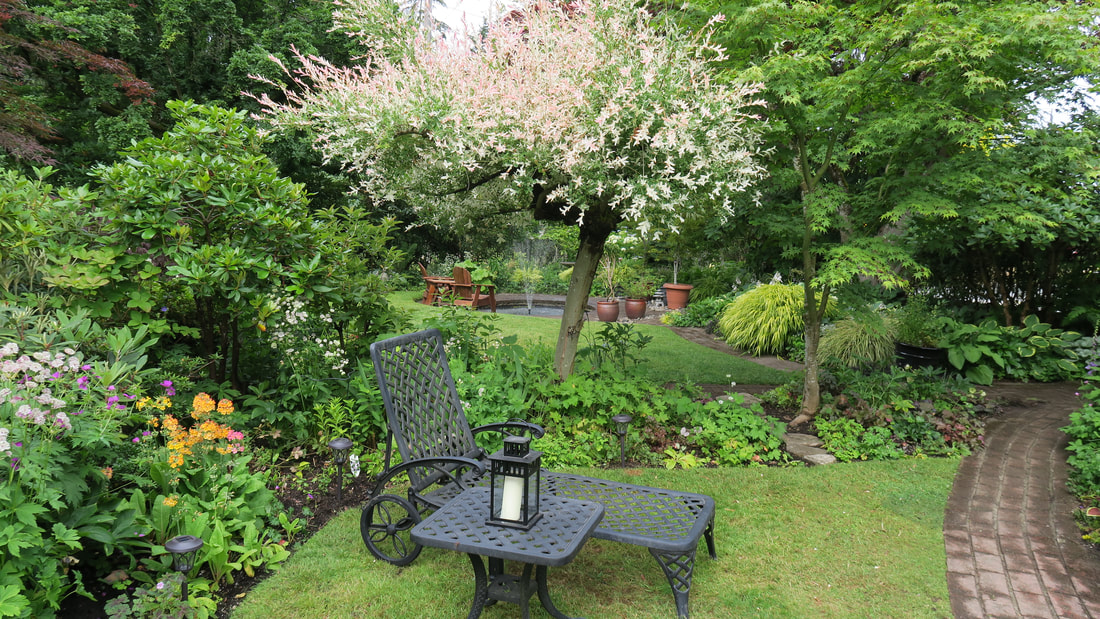
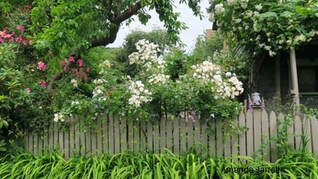
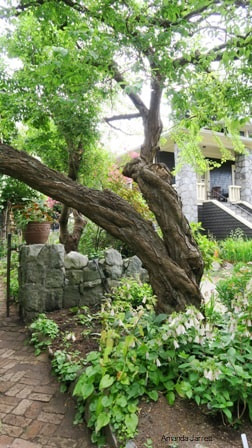
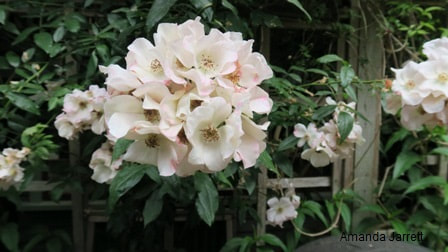
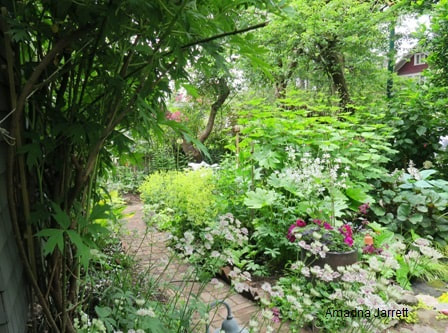
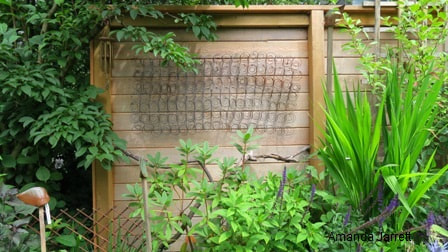
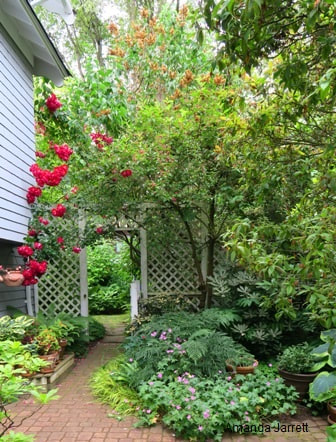
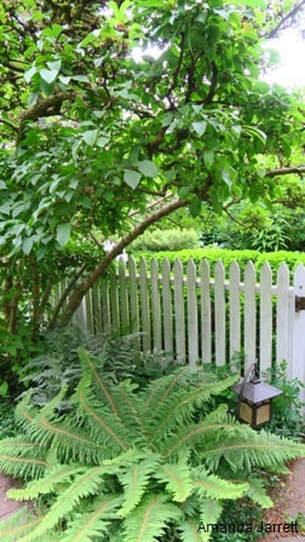
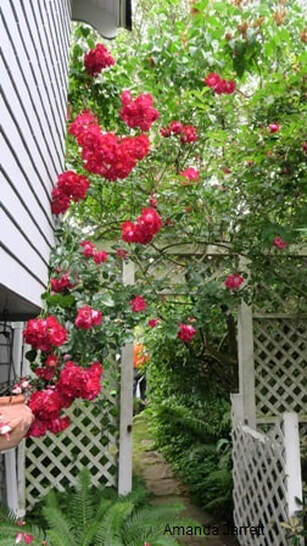
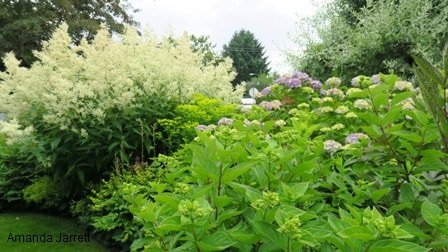
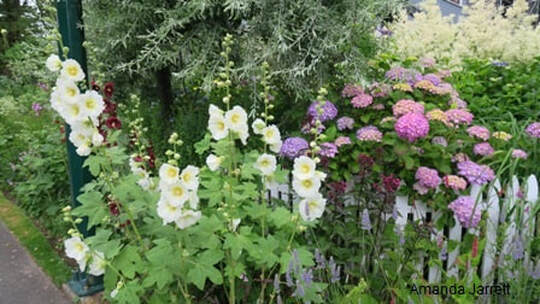
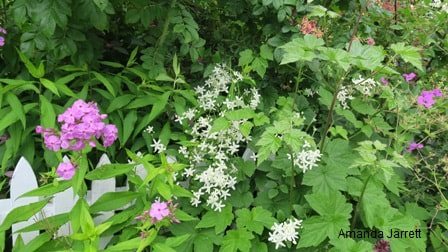
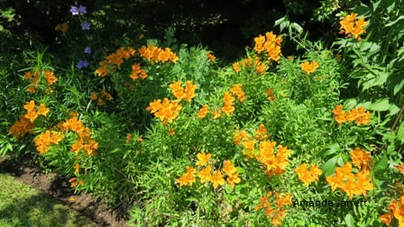
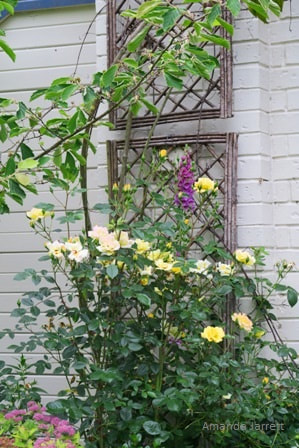
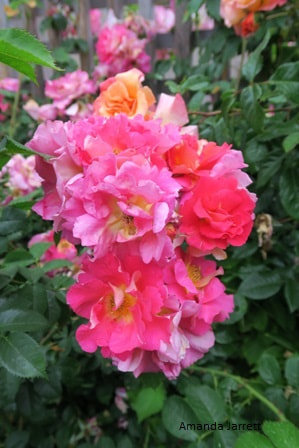
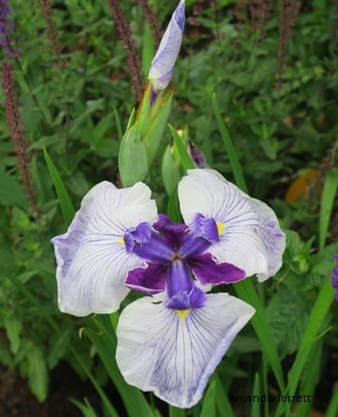
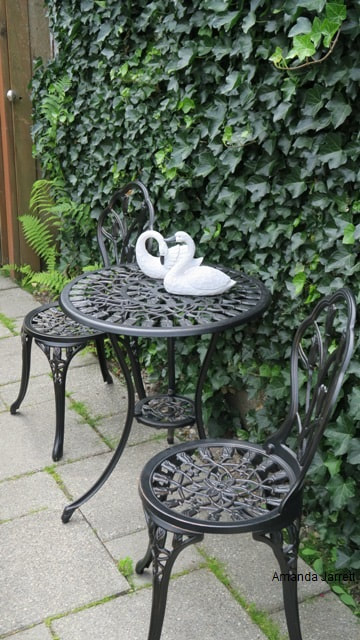
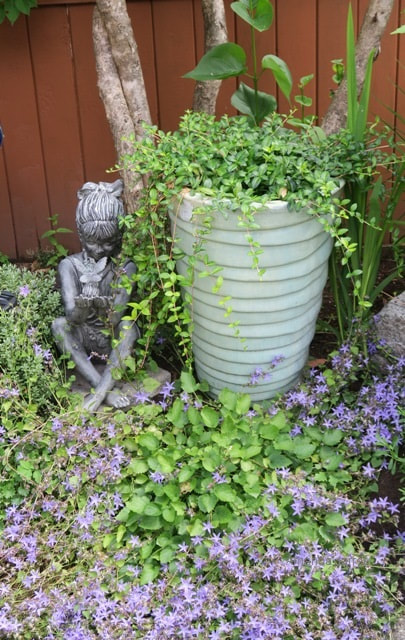
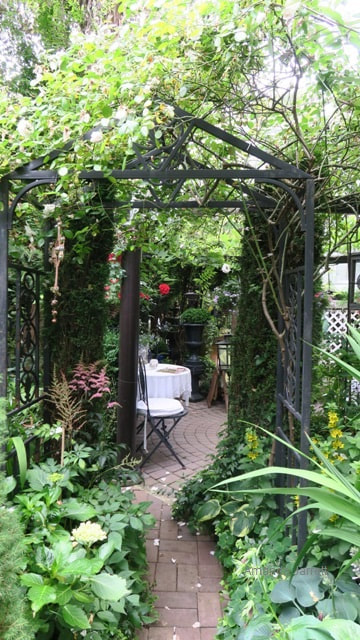
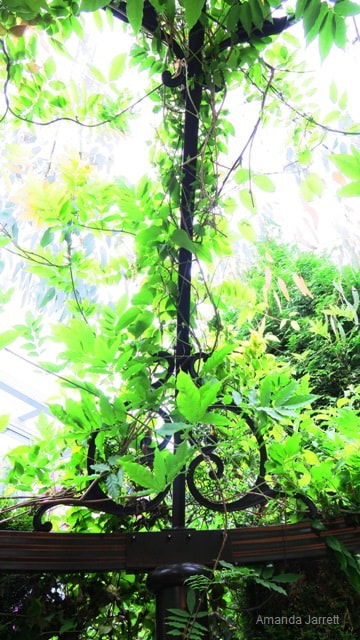
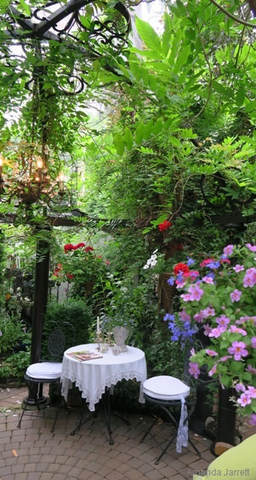
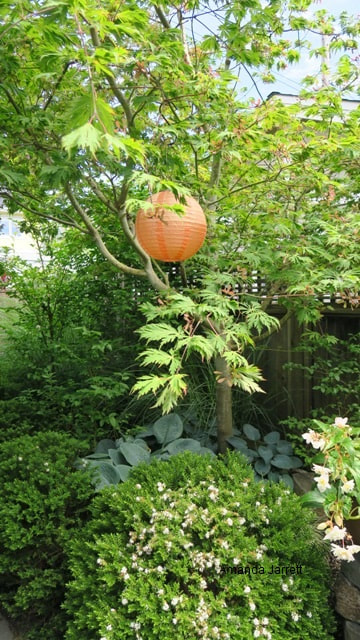
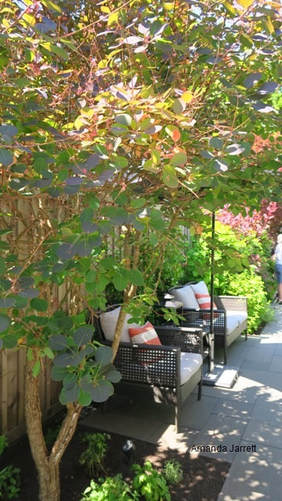
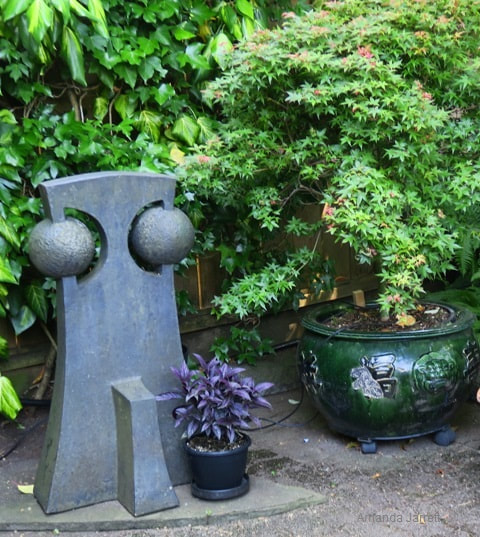
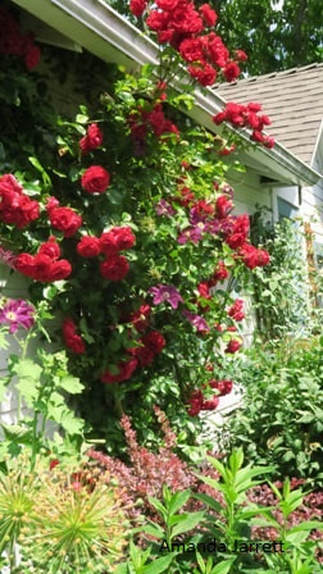
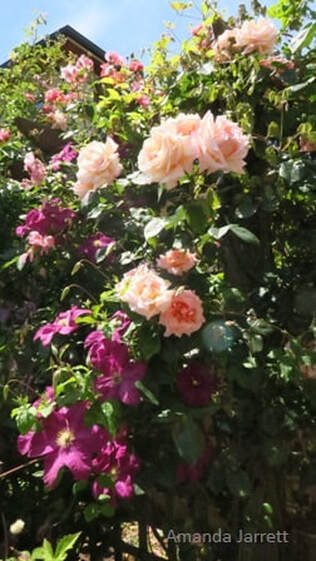
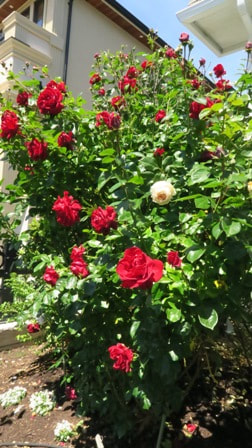
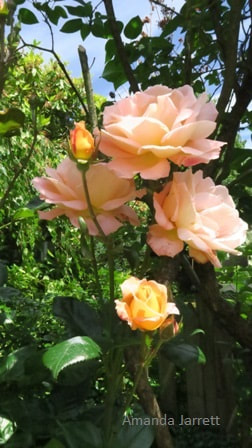
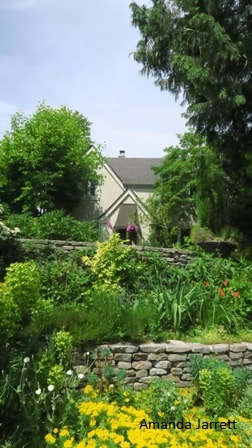
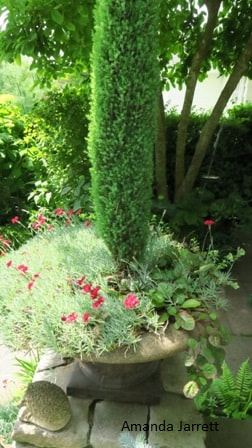
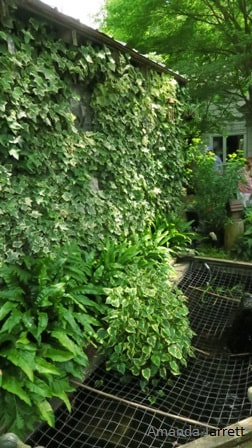
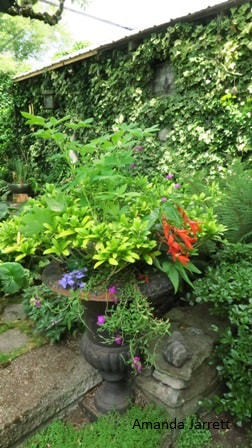
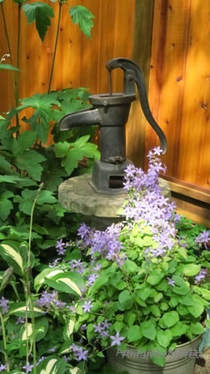
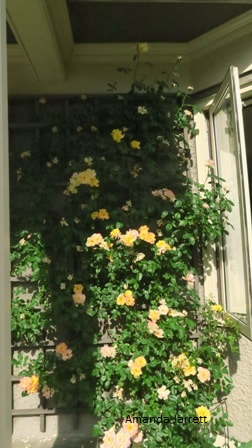
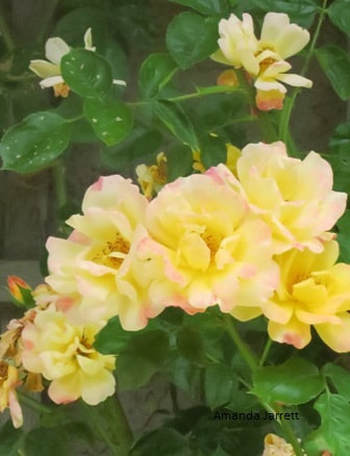
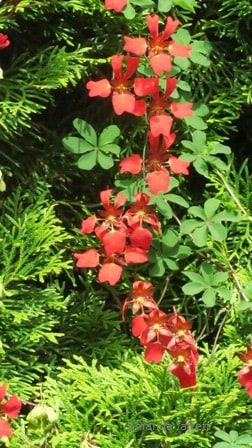
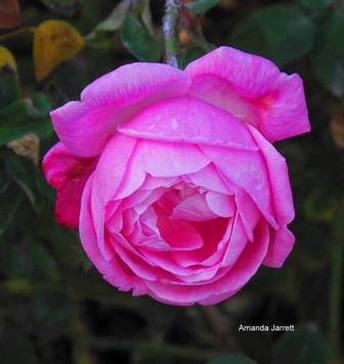
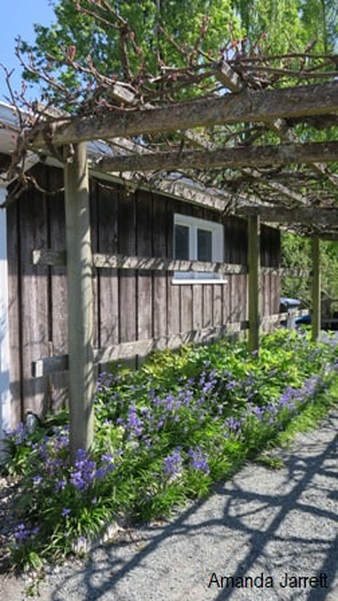
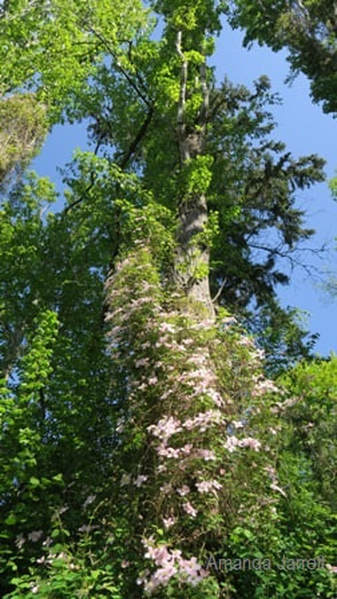
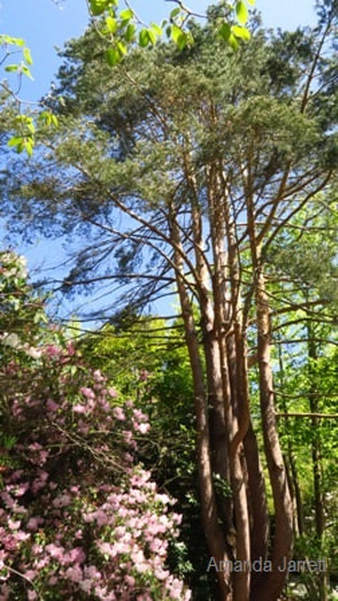
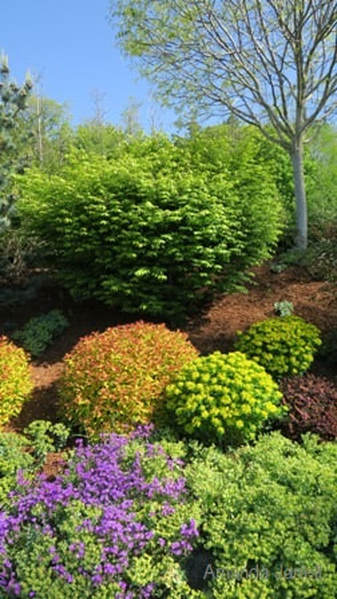
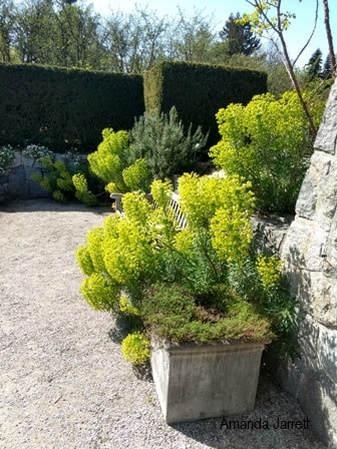
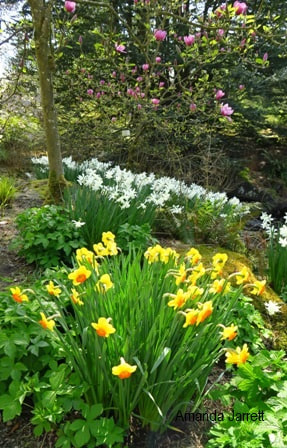
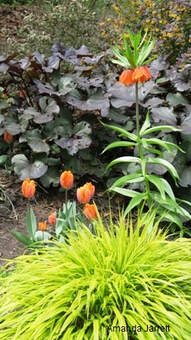
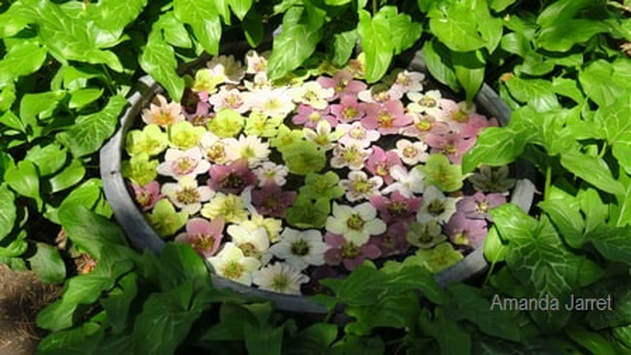
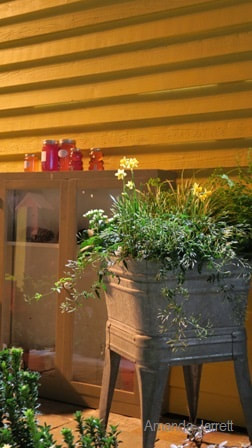
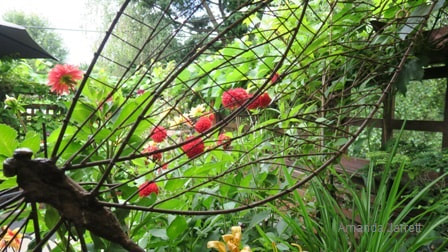
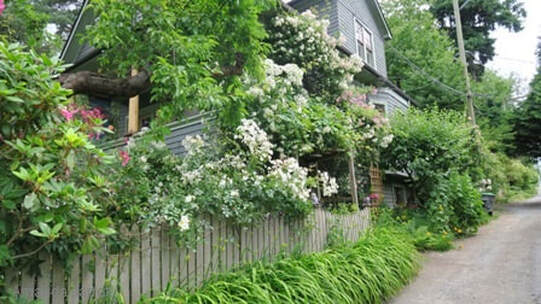
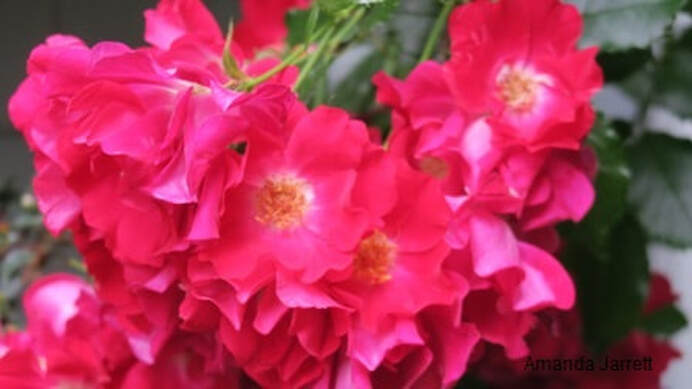
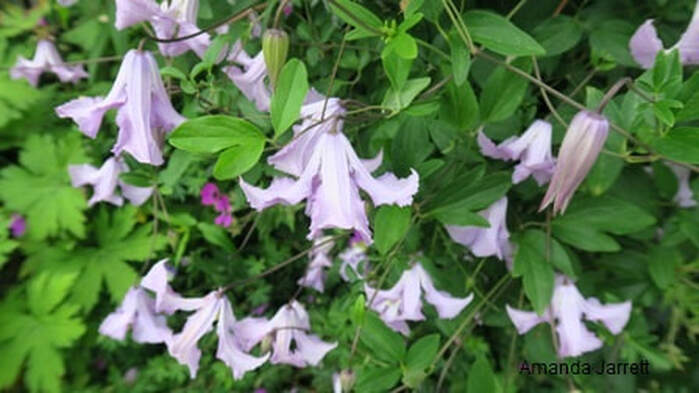
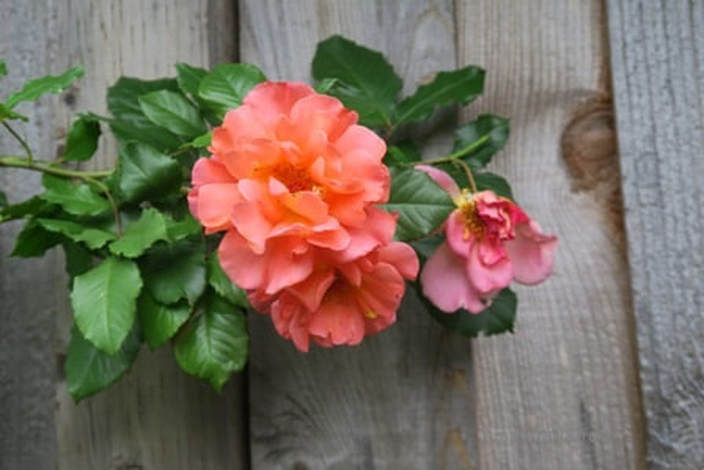
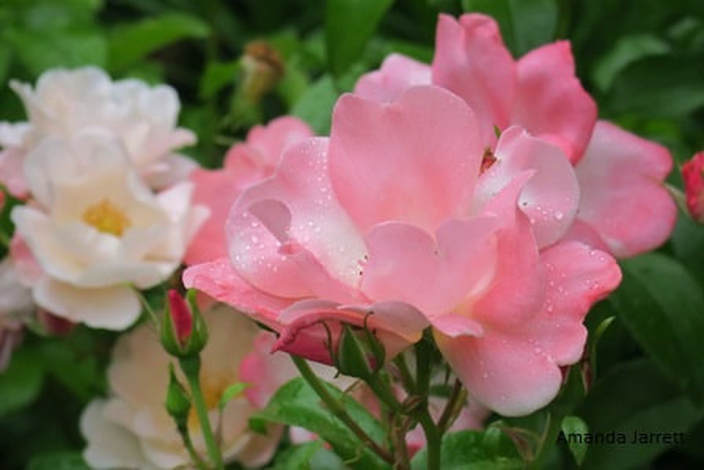
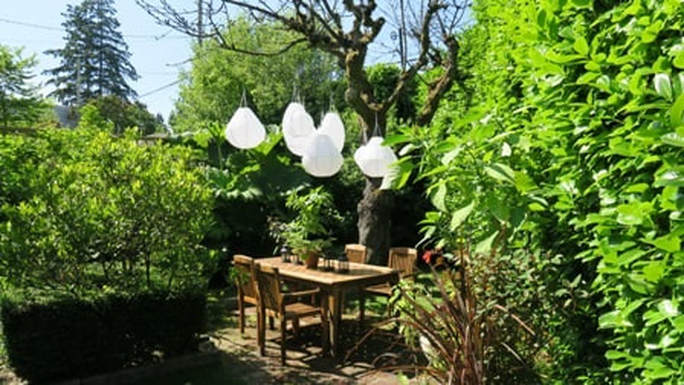
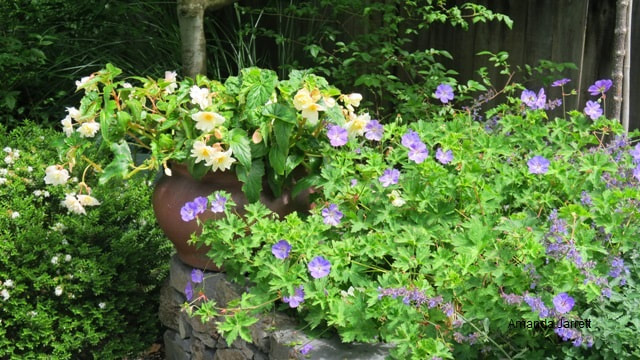
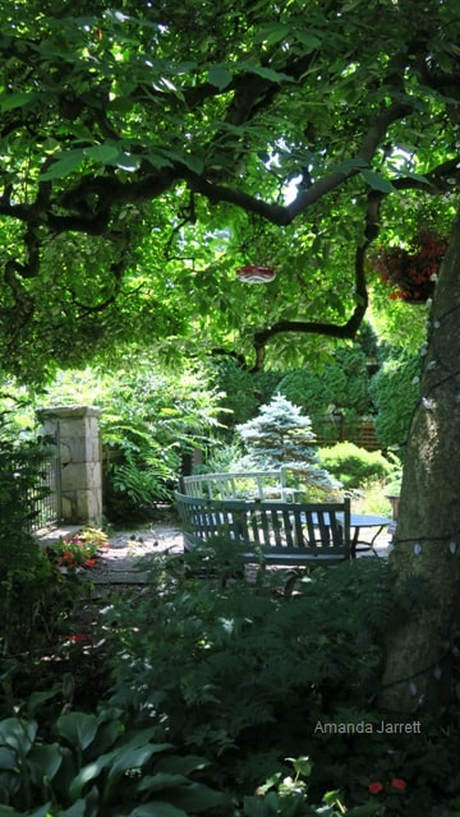
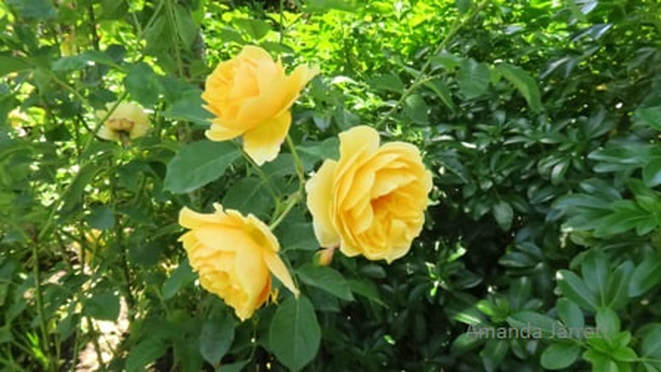
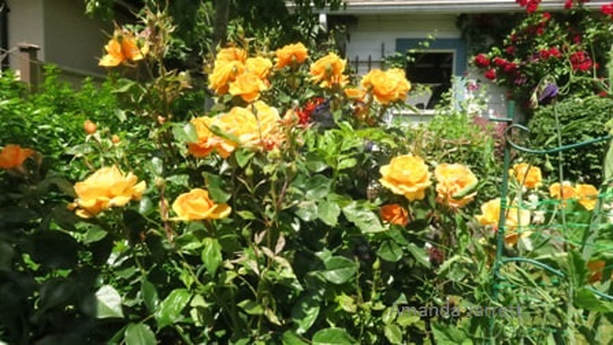
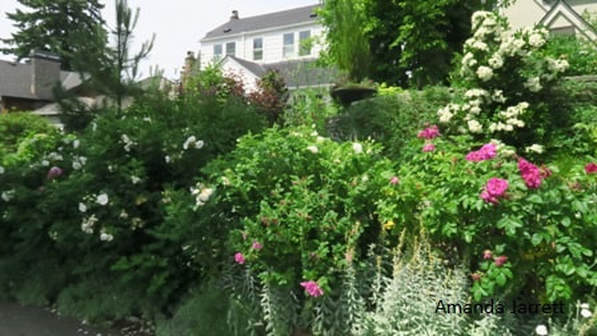
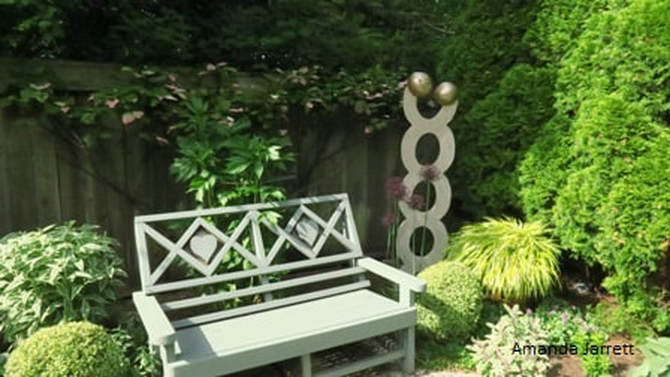
Although the potager beds encompassed only part of the back garden, the mulch was extended to the fence. The whole idea of this project was to reduce maintenance, so keeping small strips of grass wouldn't work. Extending the mulch made a more generous garden, which incorporated the two large lilacs, that now are more noticeable and are more of a feature than just background noise.  A petite bistro set to view le jardin. 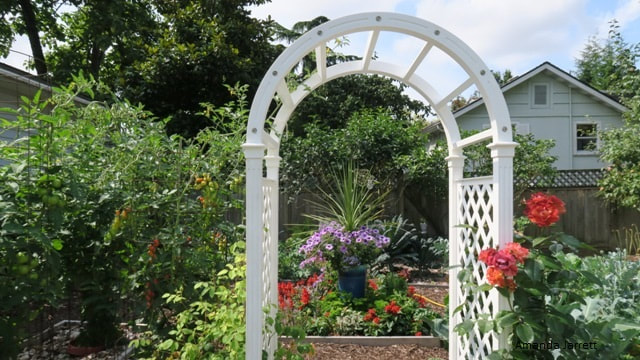 An arbour acts as an entrance to the garden. A climbing rose is added to each side of the arbor to add colour, blossoms and fragrance. 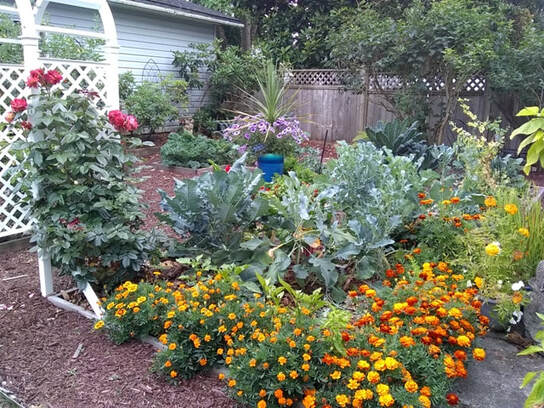 Marigolds surround one bed that holds peppers, broccoli, cauliflower and Swiss chard. The rose on the arbour is called Tropical Lightning.
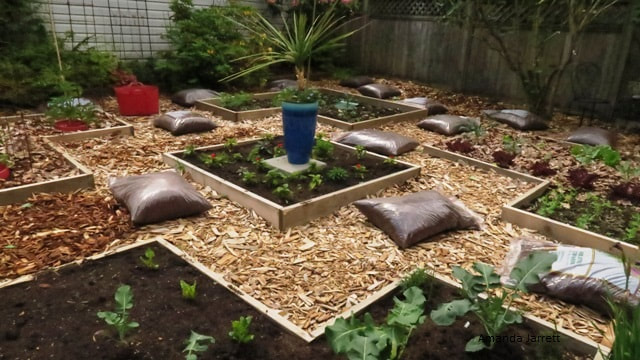
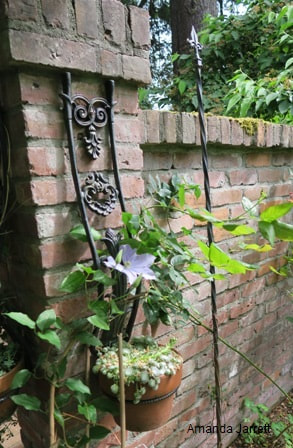
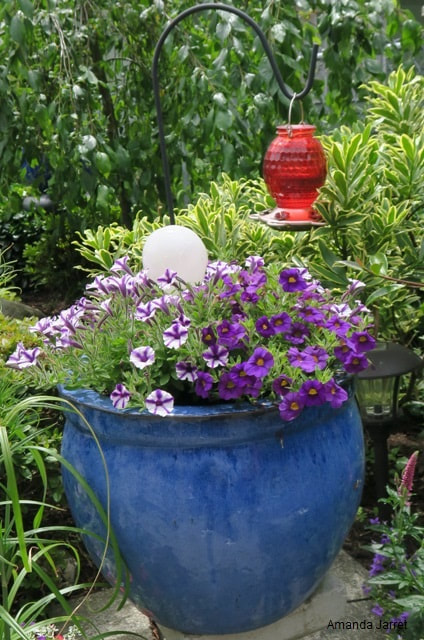
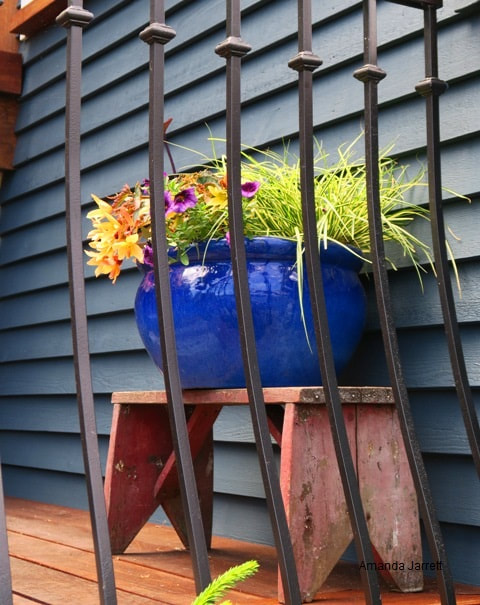
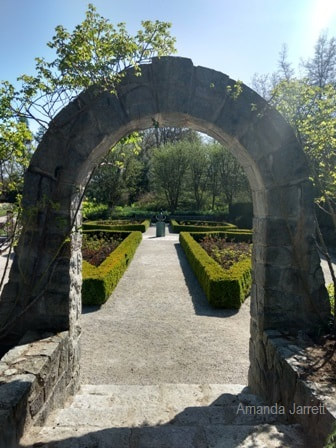
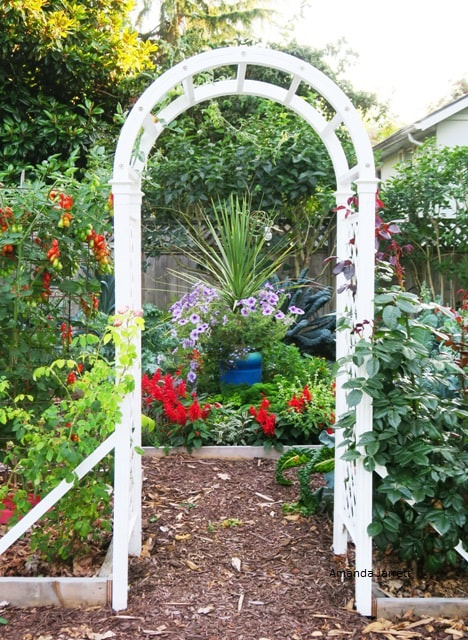 The garden was designed so the arbor frames the blue planter in the centre.
0 Comments
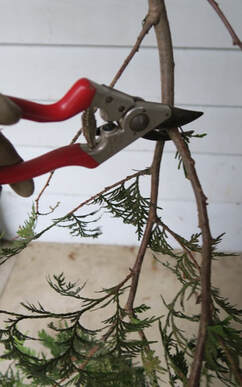
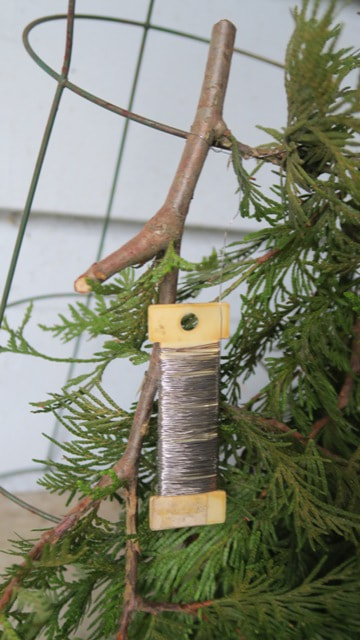
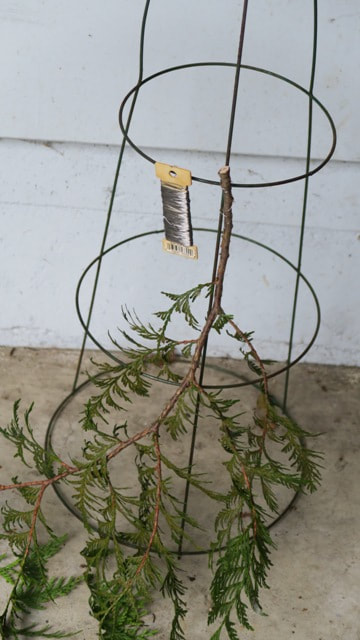
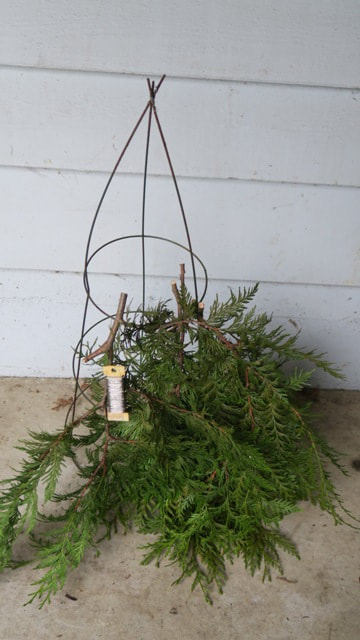
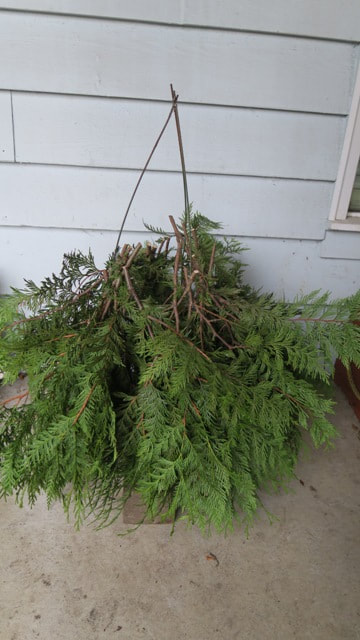
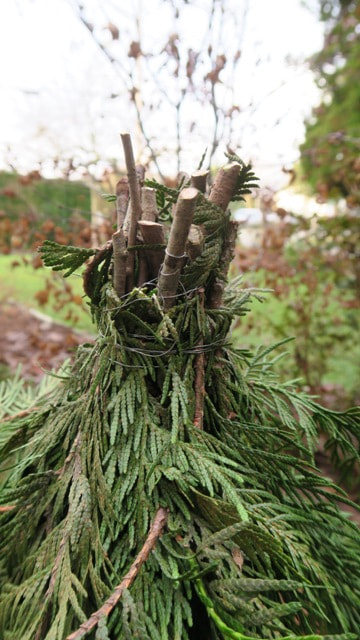
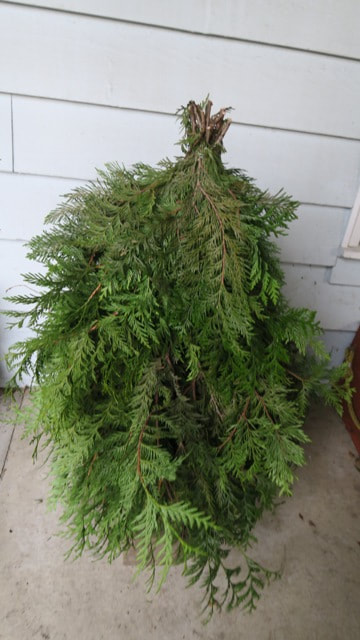
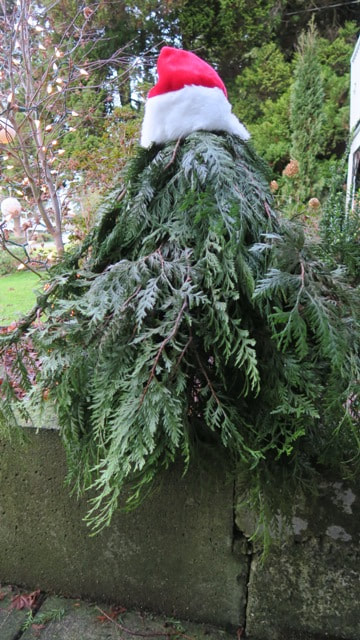
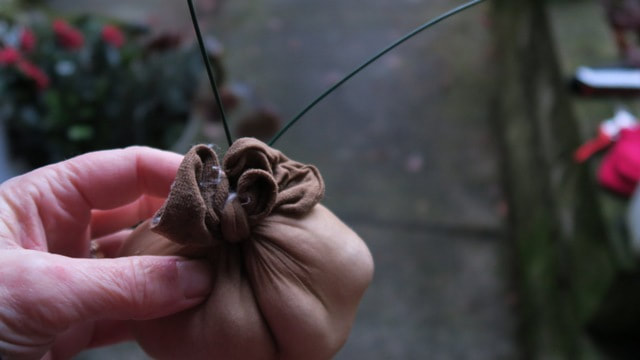
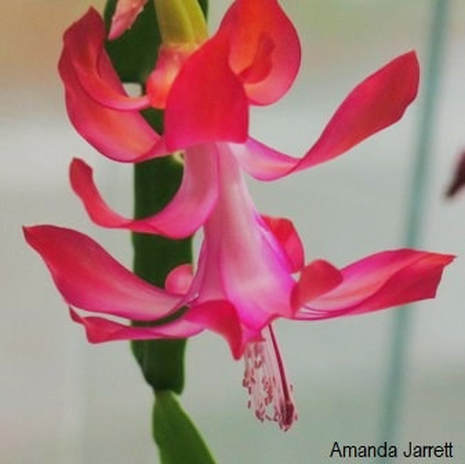
 It's easy and fun to make this Christmas elf. This Christmas elf is an easy and fun craft that doesn't need expensive supplies or a great dill of skill and doesn't take a long time to complete. Follow the process with help from the pictures below.
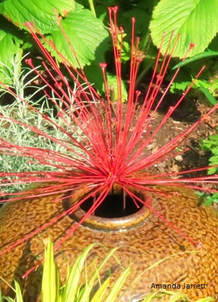
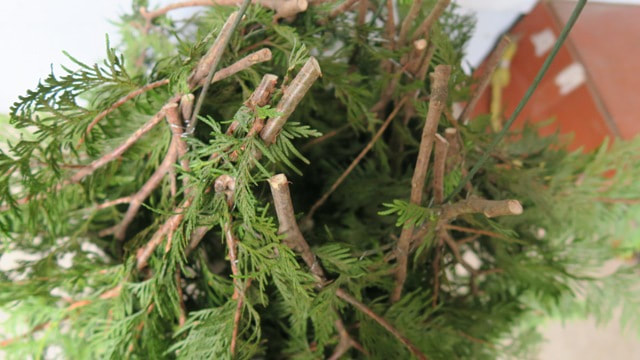 A close-up of the many stems secured to the form.
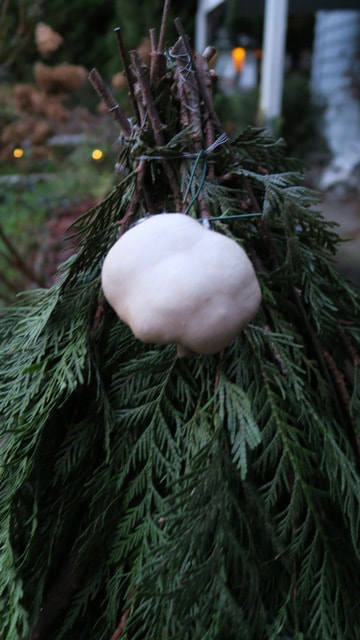
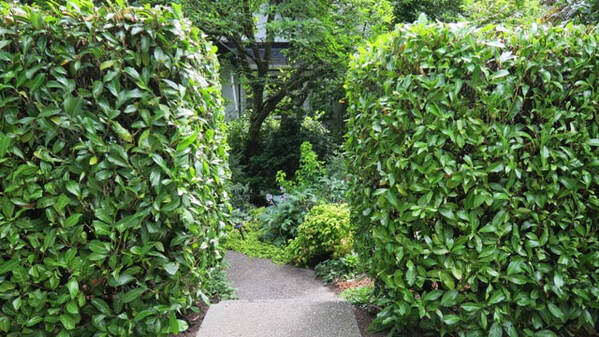
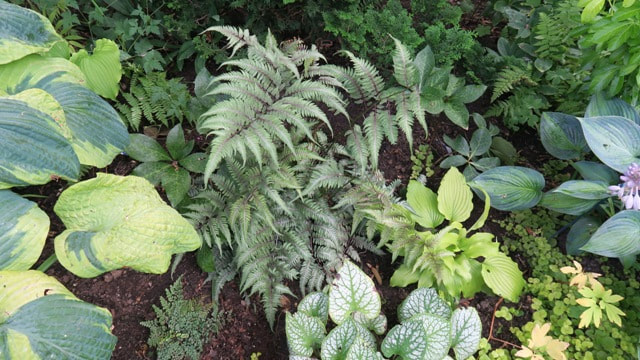
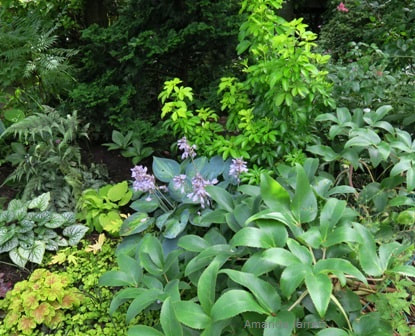
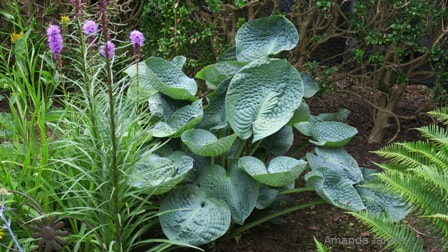
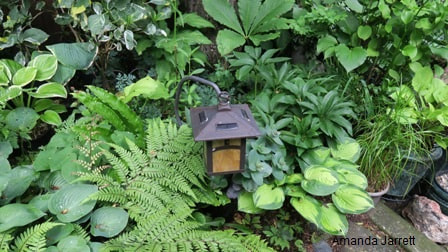
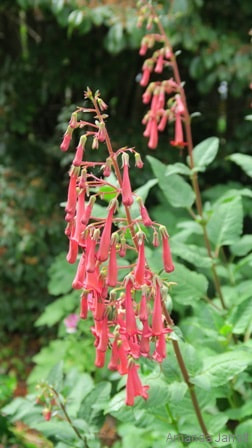
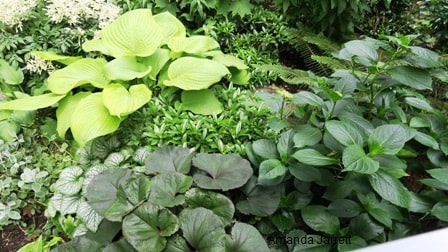
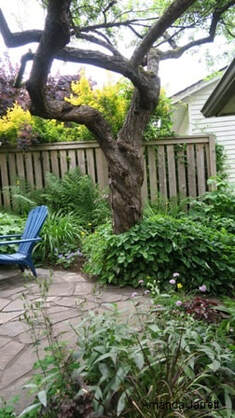
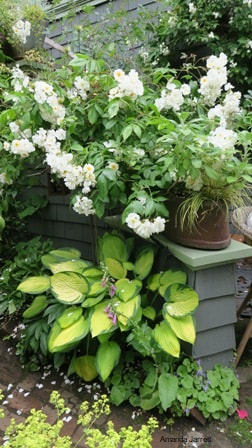
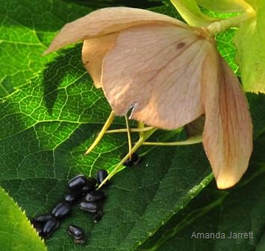
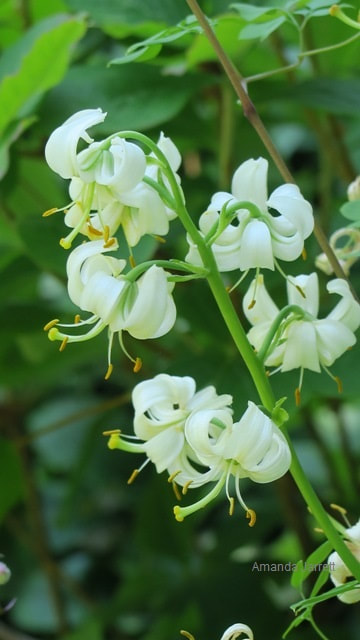
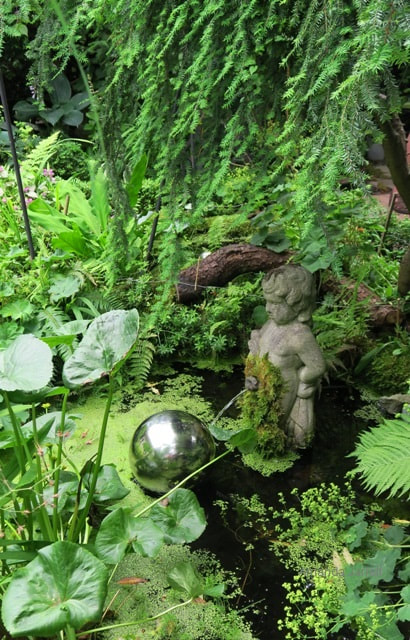
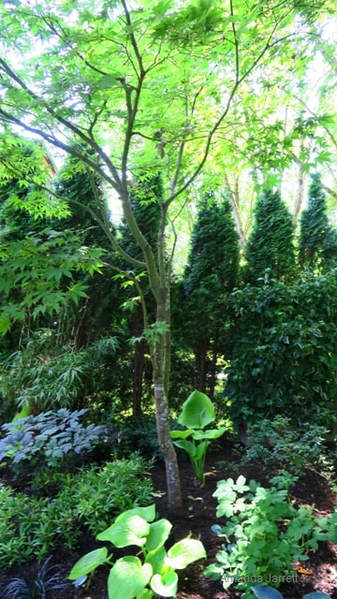
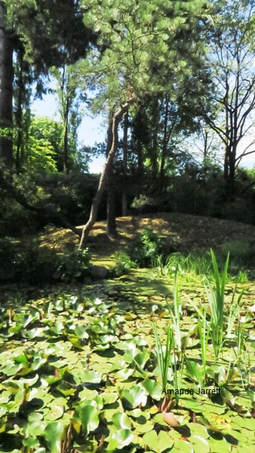
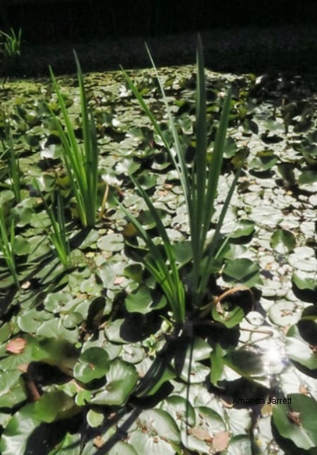
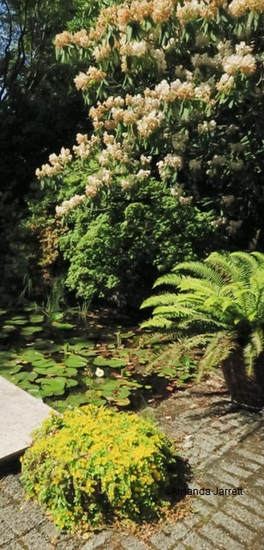
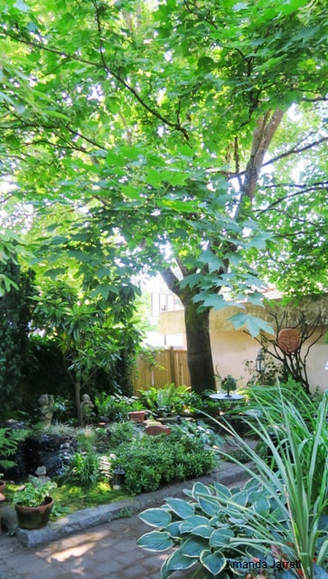
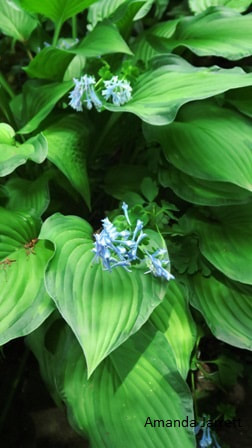
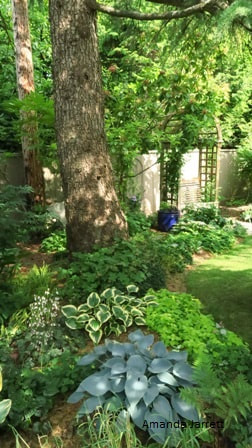
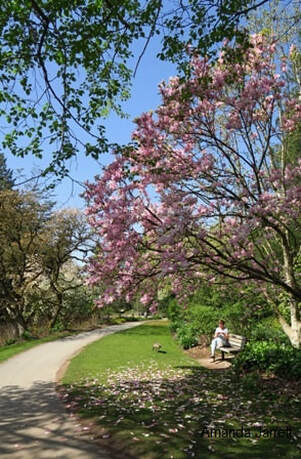
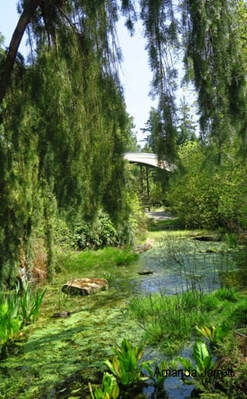
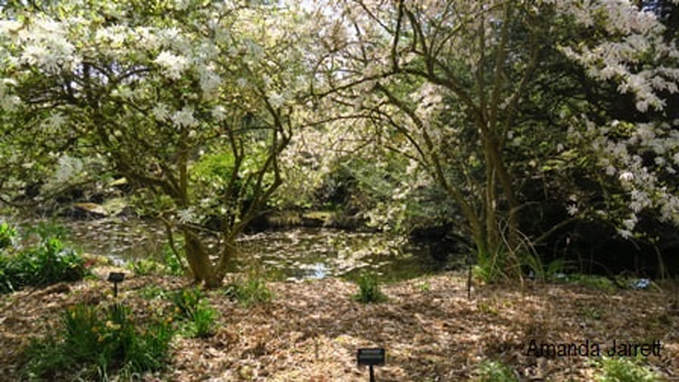
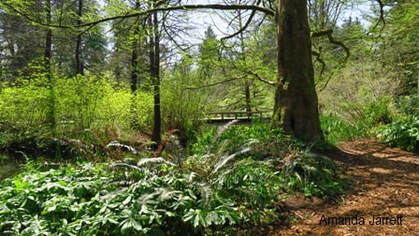
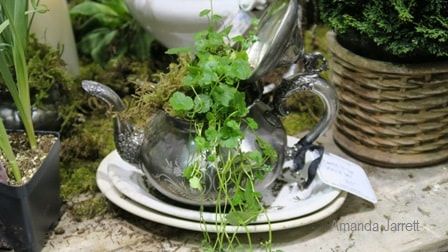
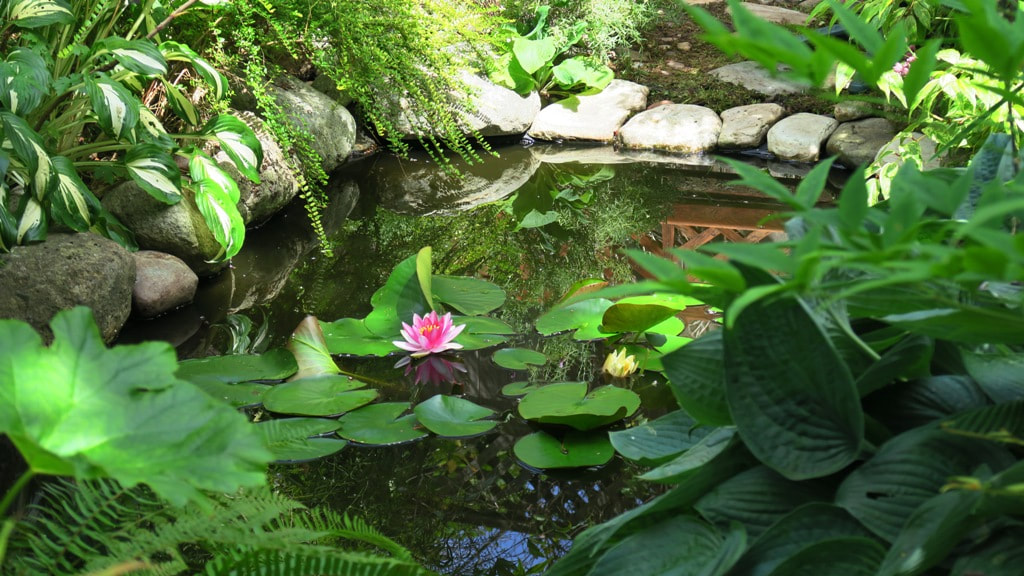
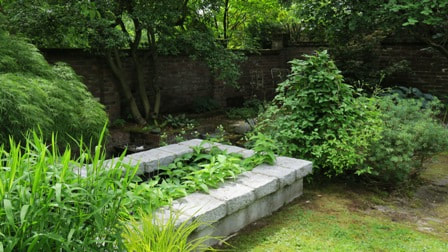
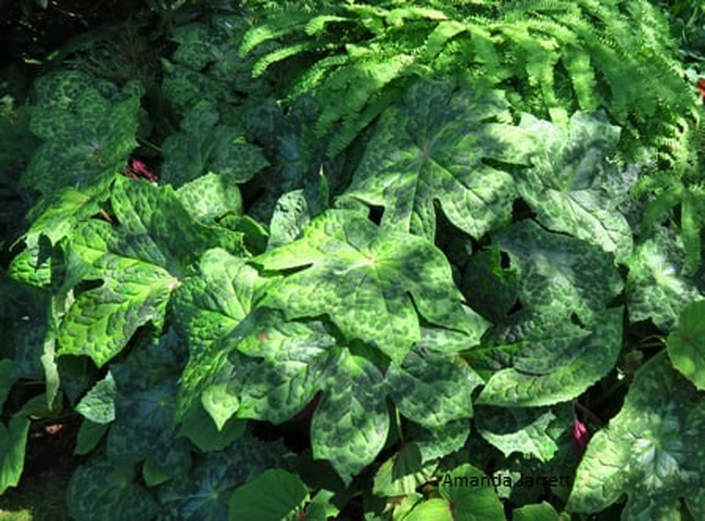
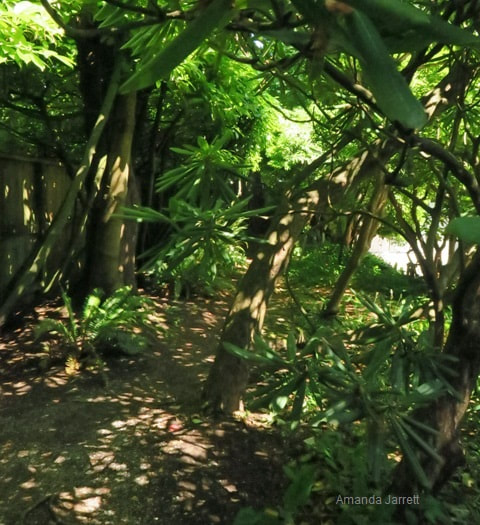
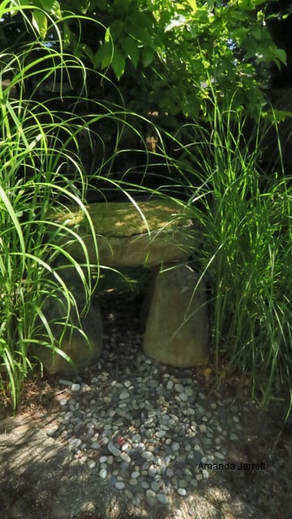
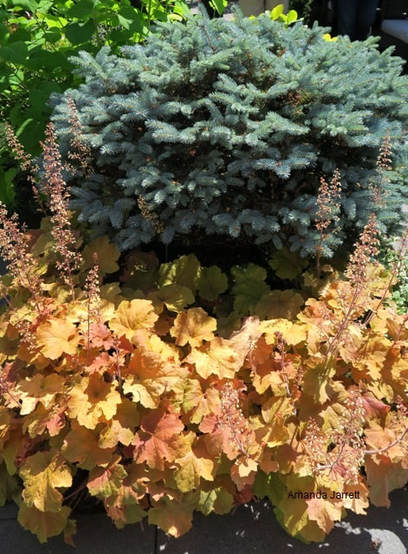
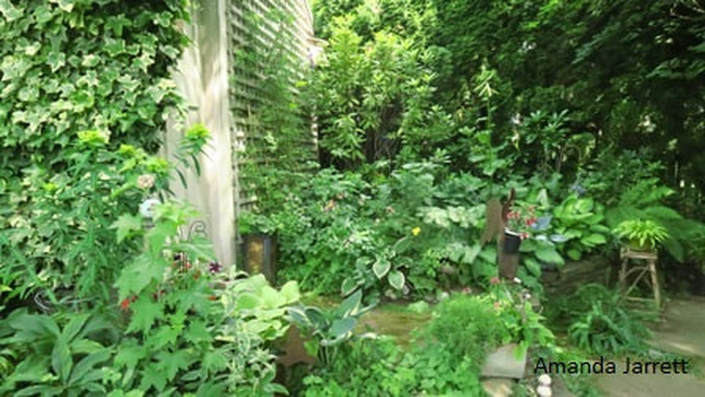
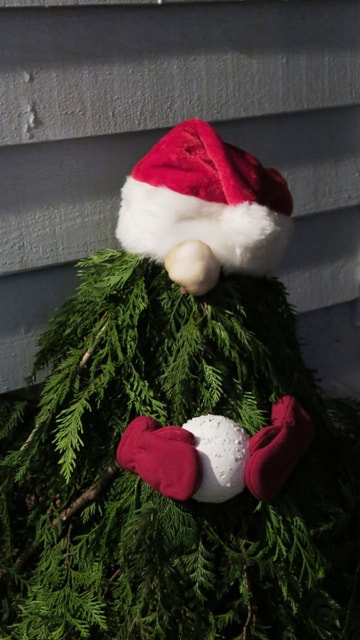 Attach the fake snowball with a hot glue gun and admire your Christmas elf. 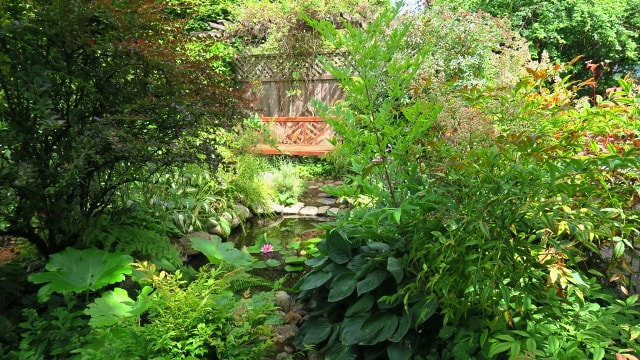 A secluded little pond was a pleasant surprise in Garden #1. It was a mild and sunny day that greeted us as we toured four gorgeous, and totally different gardens in Vancouver, British Columbia. Some of the members of the Dunbar Garden Club had opened up their gardens for other members of their club to attend. It was an afternoon well spent. With my camera in hand I am always looking for pleasing plant and colour combinations - and unfamiliar plants. Of course I am not alone as other plant nerds are pretty stoked too! Yes, we do exist. We tend to congregate at garden tours - and plant sales. Hope you enjoy this pictorial essay of this summertime garden tour. Cheers, Amanda Garden #1 - A Secret Garden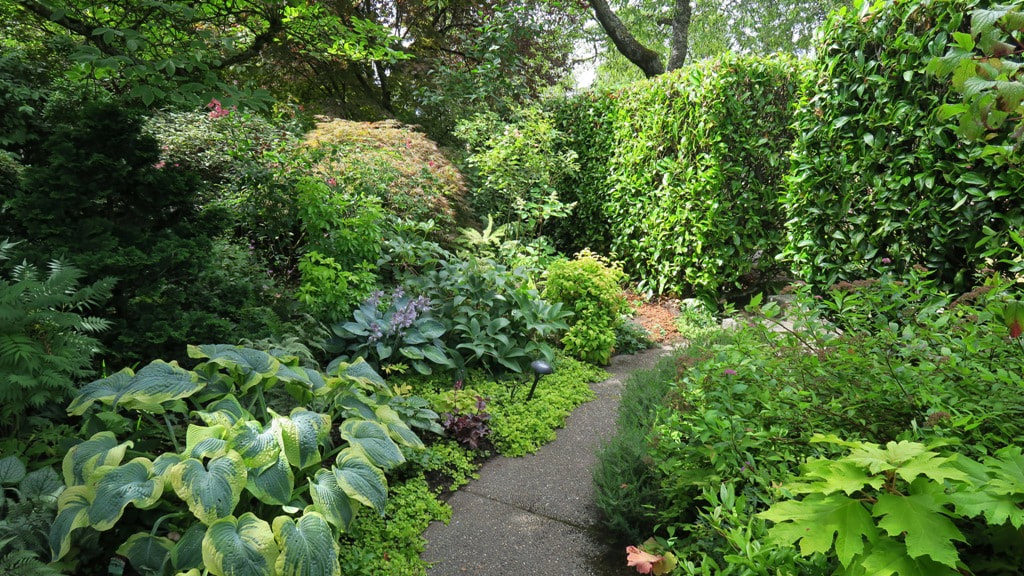 This jewel of a garden is hidden from the road by a large English laurel hedge. Behind a tall English laurel hedge hides a little green gem of a garden. Like a miniature forest, plants are layered with a multitude of shrubs and perennials. Tucked away, behind the hedge and among the flora, is a perfect little pond donning a flawless pink waterlily. A large magnolia acts as a bold and broad anchor that oversees the plants underneath. There’s no sign of a lawn as none is needed, but there is a path. It weaves its way to the side garden; it’s a short trip, but with every step there’s something to see. All sorts of perennials and shrubs intertwine in a sea of greenery punctuated by gentle colours of maroon and pink. This shady garden is permeated by shafts of light that finds its way through the leafy canopy. The conditions are ideal for the many hostas that make a bold statement among the more delicate flora. Strategically placed plants with chartreuse foliage brings a lightness and energy to this intimate and natural landscape.
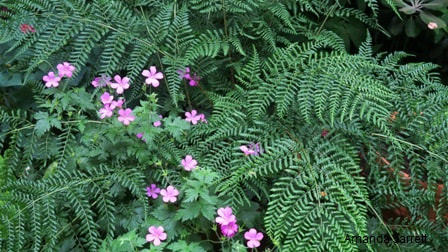
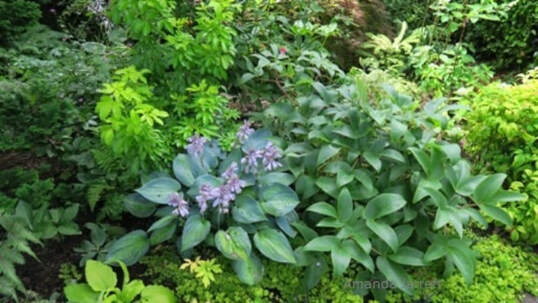 Plants of varying shapes, heights and textures work together in this many coloured green collection. 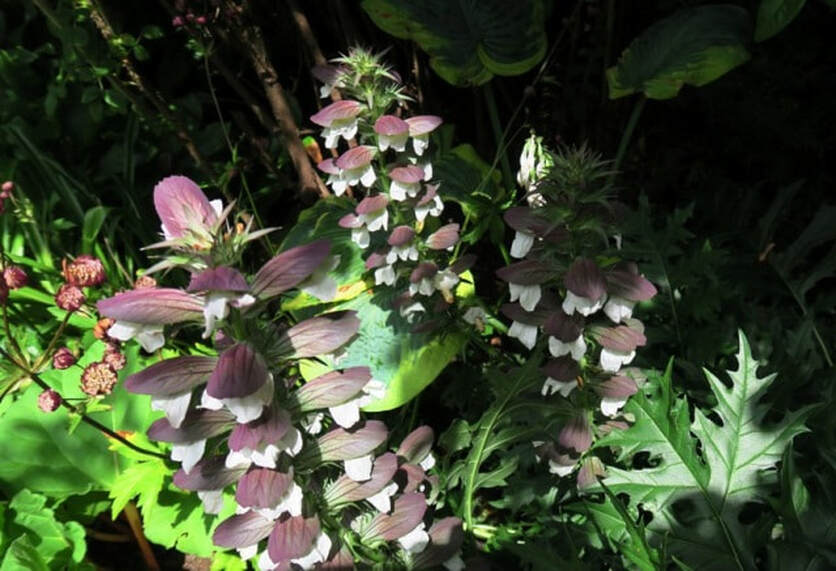 Shafts of light breaks the shade enough to allow this Bear's Breech to flower.  Different layers of plants gives the garden a natural and peaceful feel.
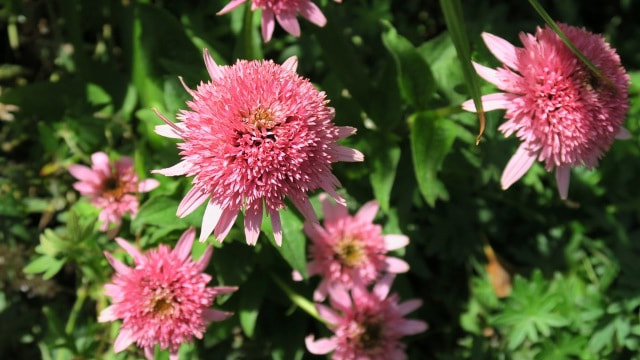
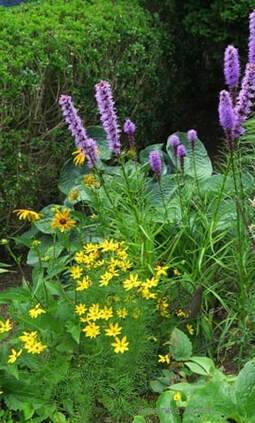
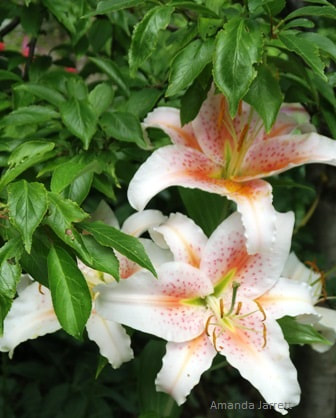
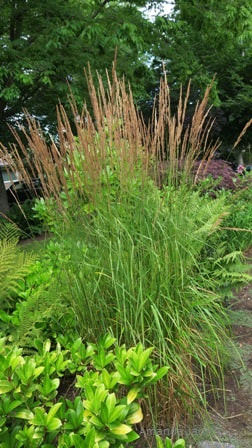
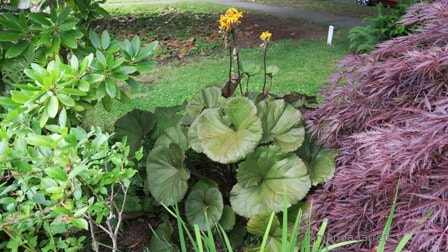
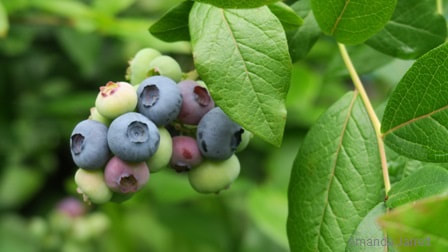
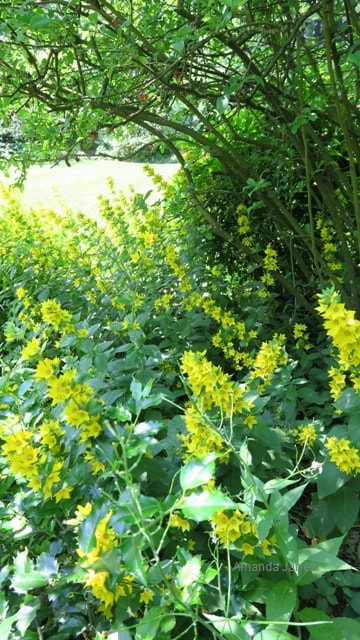
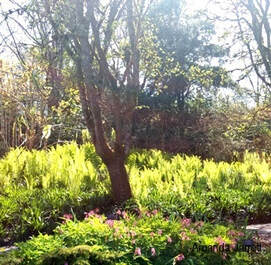
 The small pond is a serene spot. Garden #2 - Flowers Galore Where once a chafer ravaged lawn once stood, bodacious lilies, bright ligularia and bold hostas now grow. Rising above the flowers, and amid the strategically placed ornamental grasses, roses and a host of perennials are placed for close inspection. A winding path allows intimate views of the many dazzling lilies that hug the curves. Each plant has its own space in its own place despite the fact it all looks very loose and natural. The vertical stems of Karl Foerster Reed Grass (Calamagrostis x acutiflora 'Karl Foerster') adds a striking contrast and drama among the many flowers. This vertical element stops the eye so each plant is seen and admired. A few edible plants have been included. Blueberry shrubs are a pleasant surprise as they are used effectively as an ornamental and are a quite pretty with their deep blue ripened berries. This informal mix of perennials, punctuated with roses, shrubs, edibles and grasses is an effective way of making each plant special.  A gentle path offers intimate views of the surrounding plants.
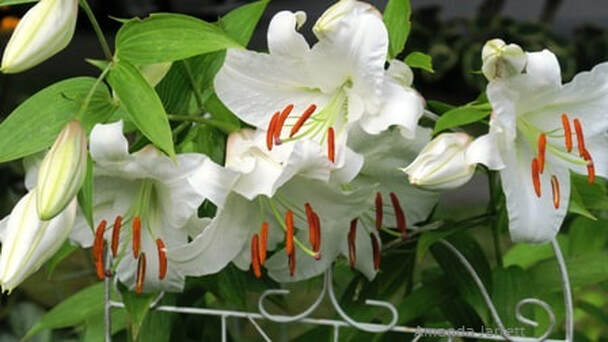 White oriental lilies are supported by a small wire trellis.
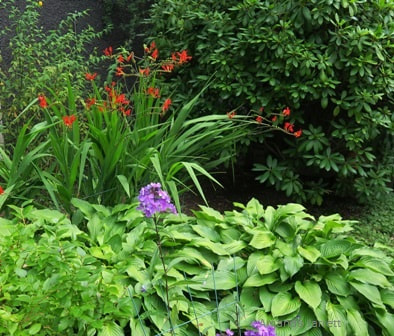
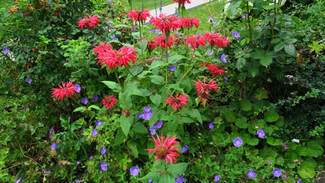
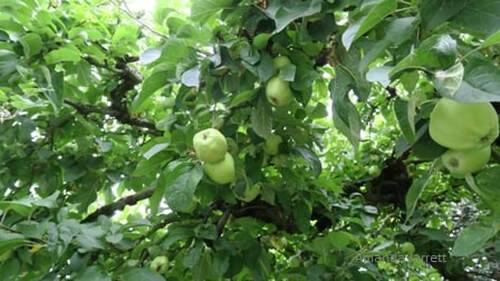
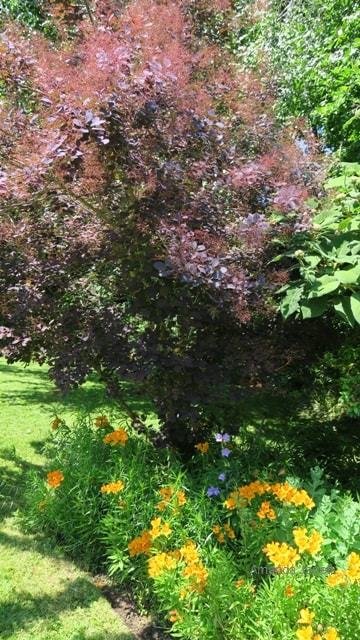
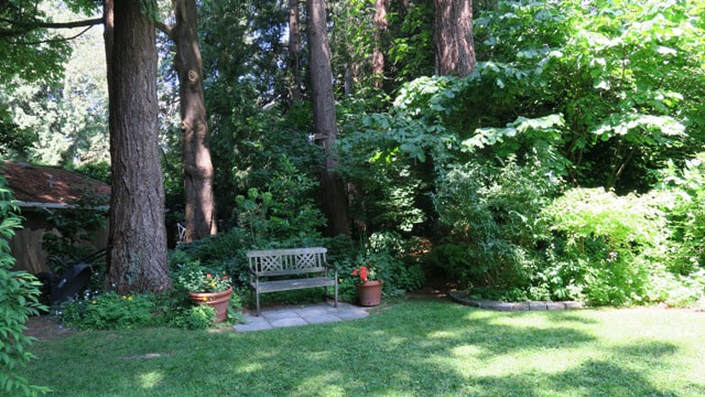
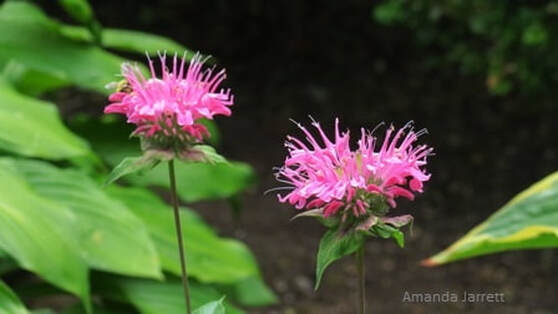 'Balmy Rose' bee balm Garden#3 - Beautiful Bones Large trees and sweeping beds are reminiscent of old cottage gardens. Upon approaching this property, it's reminiscent of an estate from yesteryear – and it is! Over 50 years ago it was a cherry orchard and a chicken farm. It’s vast and expansive front and side lawns are festooned with beautiful lush borders filled with roses, perennials, shrubs and trees. The house sits far back on the property and the owners have taken full advantage of their huge lawn by creating meandering beds full of bee friendly flowers. This garden has good ‘bones’ so matter what time of the year, this garden has something to offer. Majestic mature trees surround the property and gracing the garden. A couple of craggy old apple trees that look like they’ve been there from the dawn of time adds to the garden’s charm. This is not just a pretty garden, it is a functional one. The fruit trees are loaded and the veggie garden is full of goodies. Mature shrubs and trees dot the landscape and flowers are buzzing with bees. An inviting covered seating area is nestled among a purple smoke bush and goldenrod, is perfectly placed to view this expansive and generous garden.  A blue lace-cap hydrangea and an orange crocosmia are an unlikely but attractive pair.
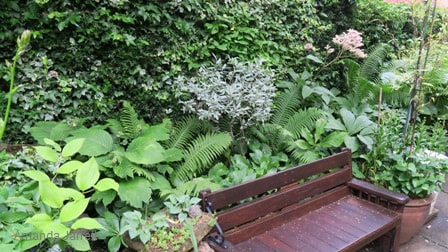
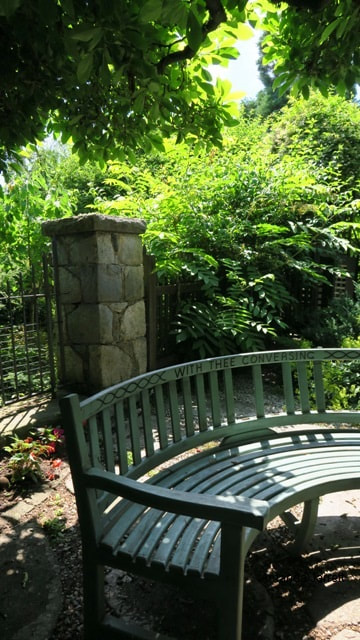
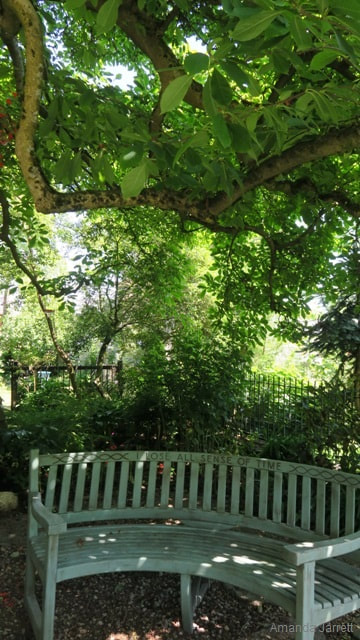
 A sheltered bench offers a prime view of the garden.
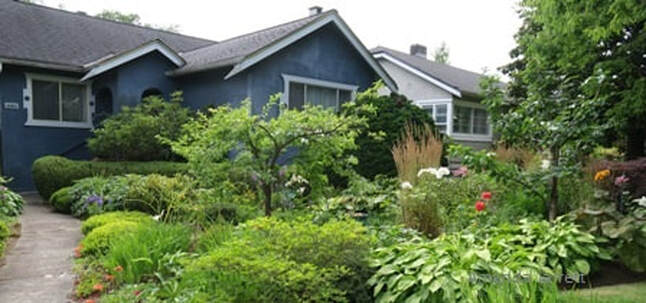
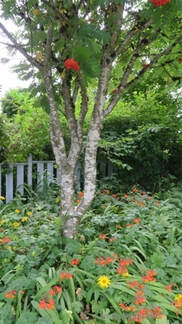
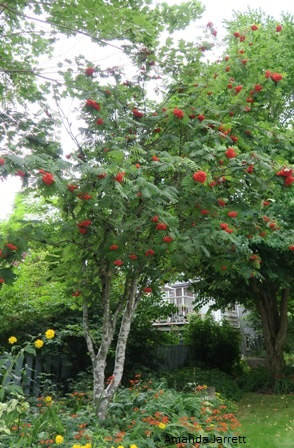
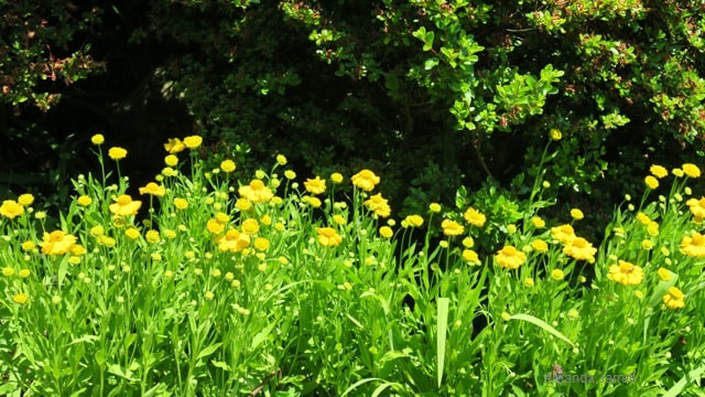
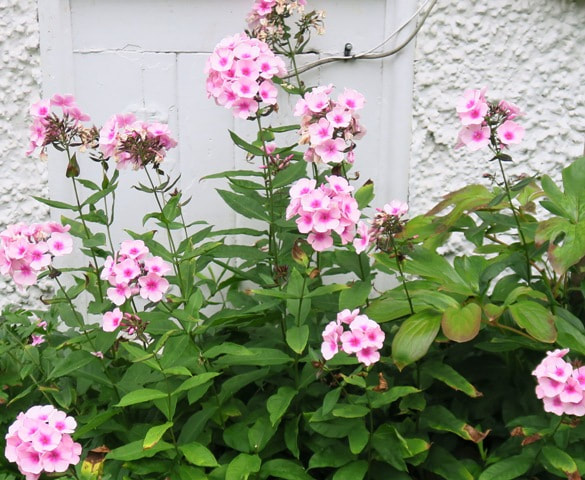 'Bright Eyes' garden phlox looks so pretty in front on the white stucco. 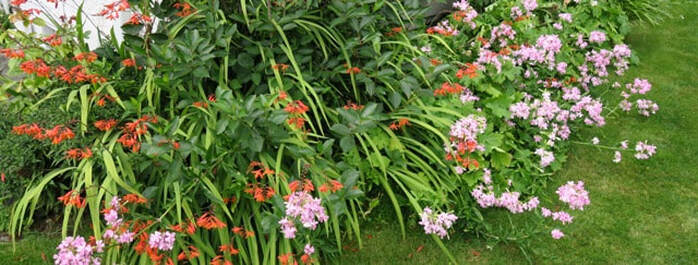 Orange crocosmia and pink soapwort flowers are quite happy together. Garden #4 - A Boulevard Bed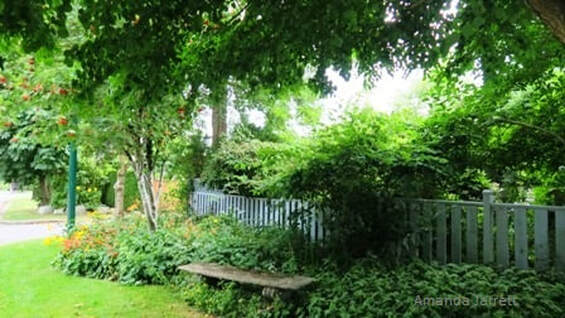 A garden outside a garden is appreciated by all that pass by. Although this garden wasn’t open for the tour, their boulevard was recommended for a visit. It certainly is worthy of a mention. The owners had made good use of their property along the fence on the boulevard. Yellow and orange flowers filled the beds in this tranquil scene. An inviting bench is nestled in among the orange-red crocosmia and yellow daisies. This simple mass planting is an effective and colourful ground cover. A mountain ash, dripping with clusters of hanging orange berries, ties everything together and provides needed structure to this perennial bed that echoes the colours below. Just goes to show that you don’t need lots of different plants to make lovely little haven. 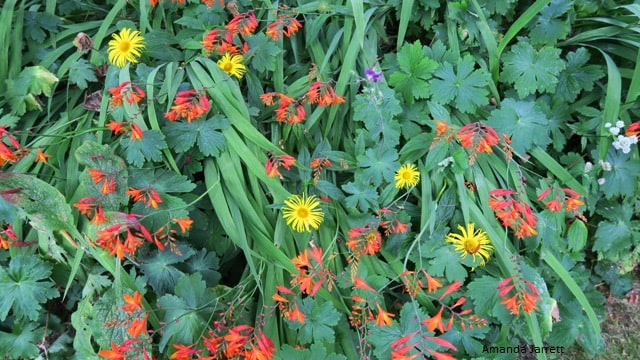 Yellow flowers of the Inula and orange crocosmia are a colourful and simple ground cover.
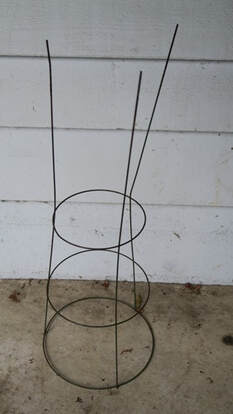
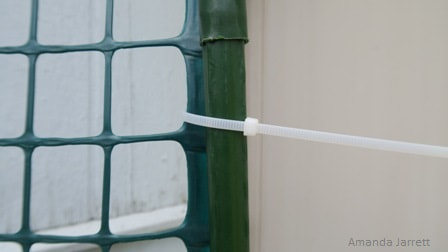
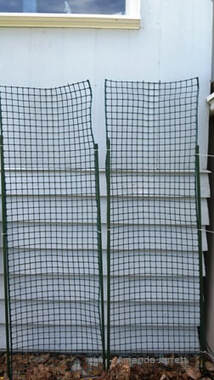
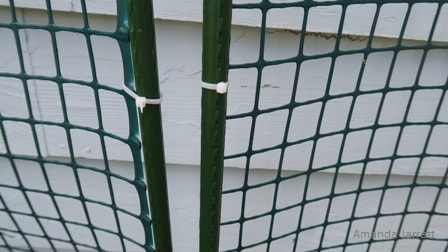
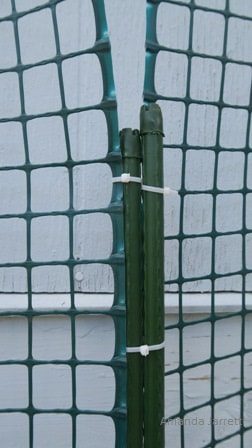
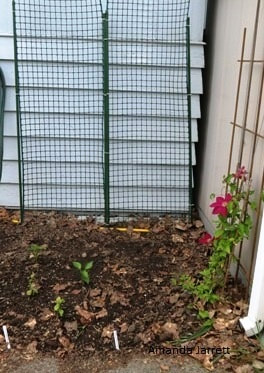
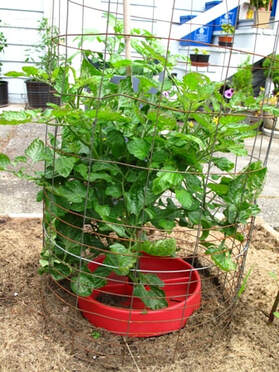
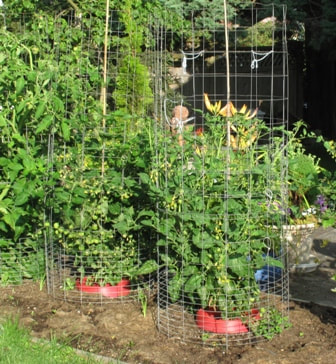
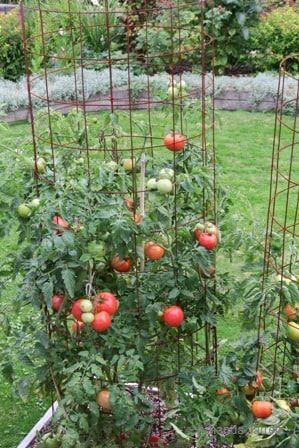
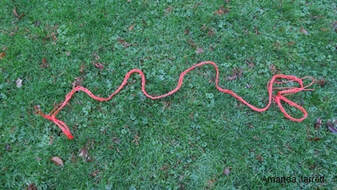
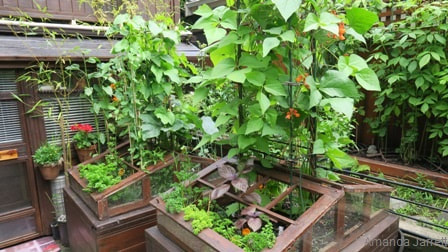
 The orange berries of the mountain ash. 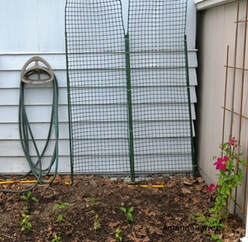 The finished product isn't fancy, but it is functional, easy to put together and inexpensive. I needed an inexpensive but effective way to support my cucumbers, peas and other climbing veggies. It had to be sturdy but portable, easy to dismantle and to store. I’ve tried many systems and rigged up all kinds of things over the years, but this one method fits the bill, and I bought everything at a dollar store! Instead of chicken wire or flimsy netting, I used a roll of thick plastic mesh I found at the dollar store, but it's also sold in home hardware stores and garden centres. It's easy to cut with just a pair of scissors to any length you need. First secure the stakes in the ground but space them just an inch wider than the width of the mesh. Wrap the zap strap around stakes to connect them to the mesh. Tighten firmly then cut the excess tail off the strap. At the end of the season, just remove the vines, cut the zap straps off then wind up the mesh and store. 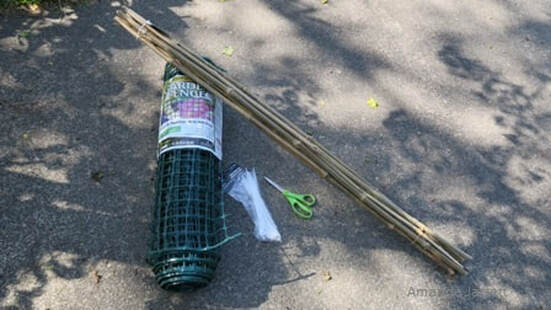 These are all the supplies you need: a roll of thick plastic mesh, stakes, zap straps and scissors.
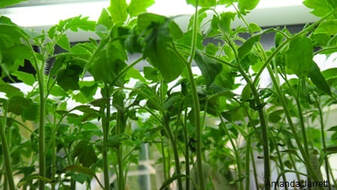
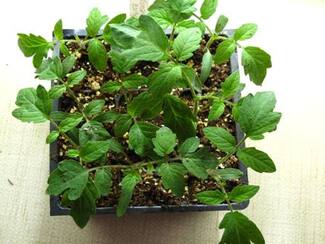
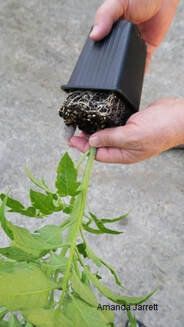
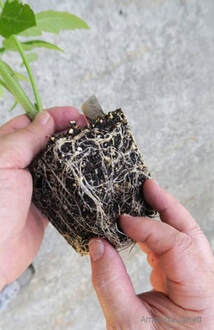
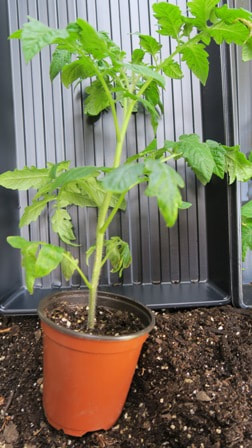
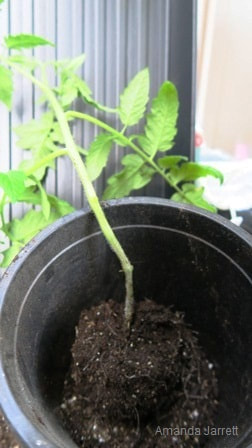
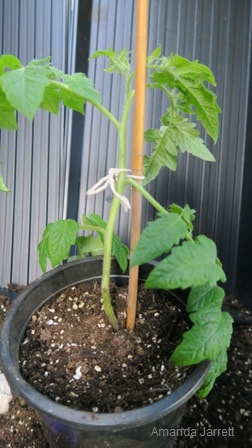
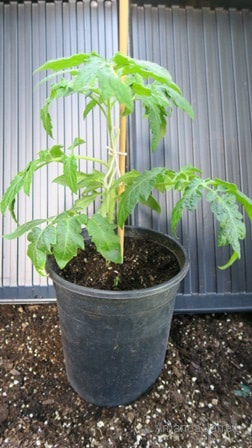
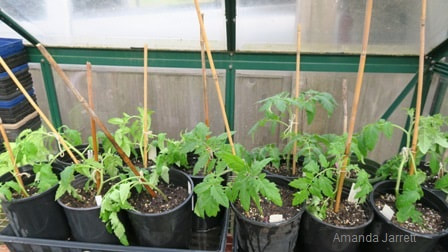
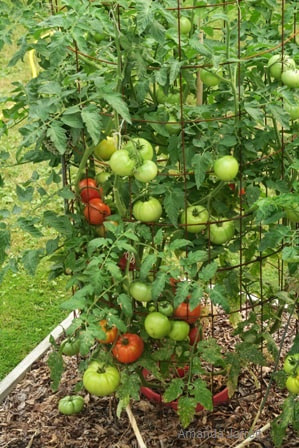
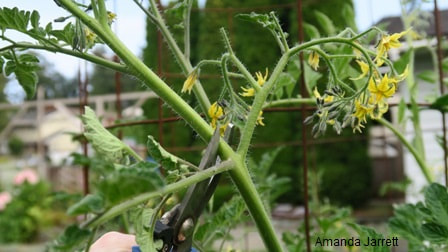
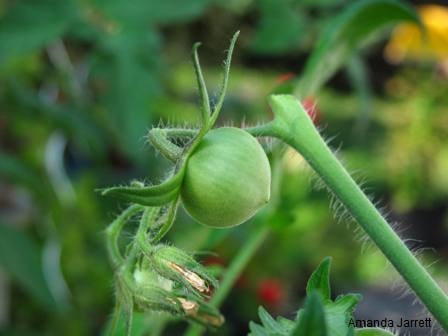
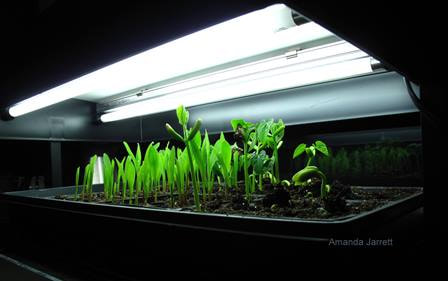
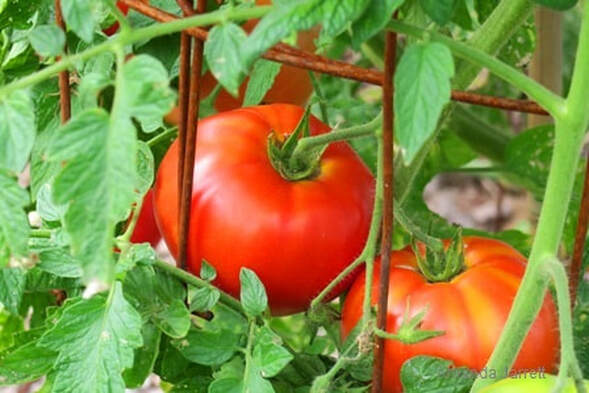 You can't beat delicious home-grown tomatoes. Here's a quickie on how to grow tomatoes via pictures. It starts with growing tomatoes from seed all the way to harvest. I use cell packs as it allows for numerous types of seeds in one cell pack, but you can use what you like. Keep plants well fed and well watered, especially during the summer and happy harvesting. Cheers, Amanda
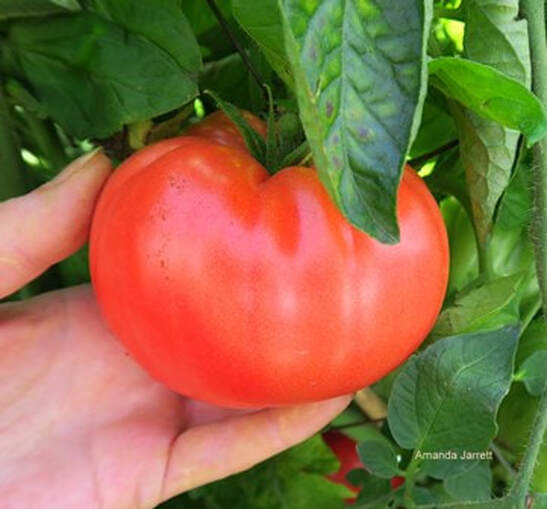 A Big Beef tomato. 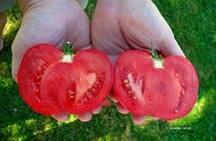 The tasty meat of a Big Beef tomato. 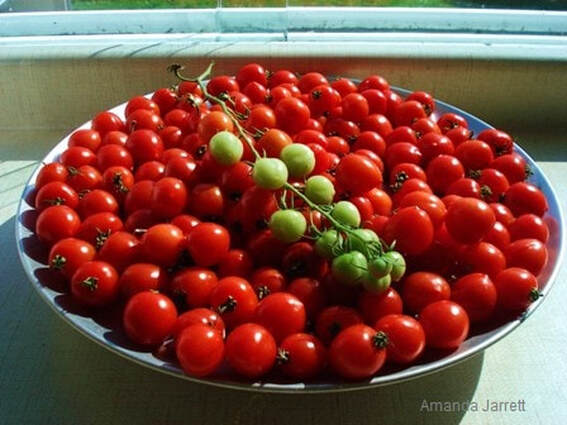 Isis Candy tomatoes are delish! 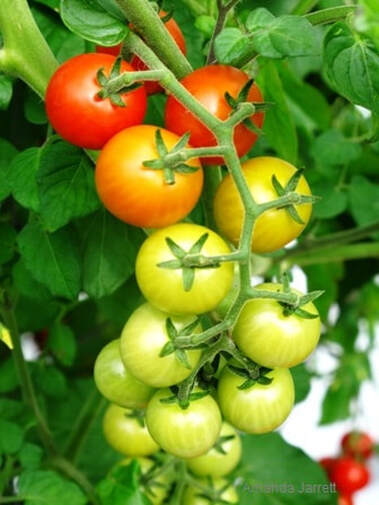 Cherry tomatoes ripening. 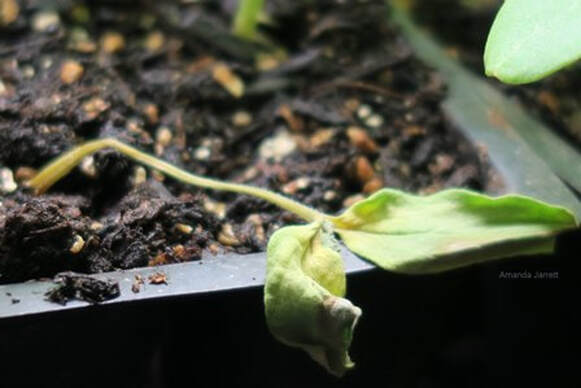 A cucumber seedling has withered and died overnight due to damping off disease.
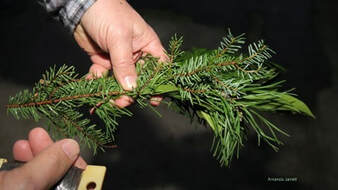
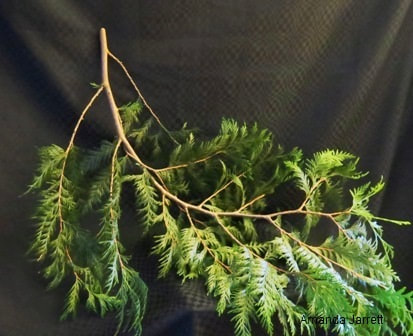
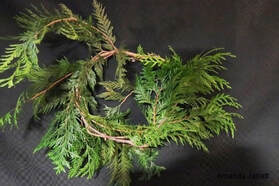
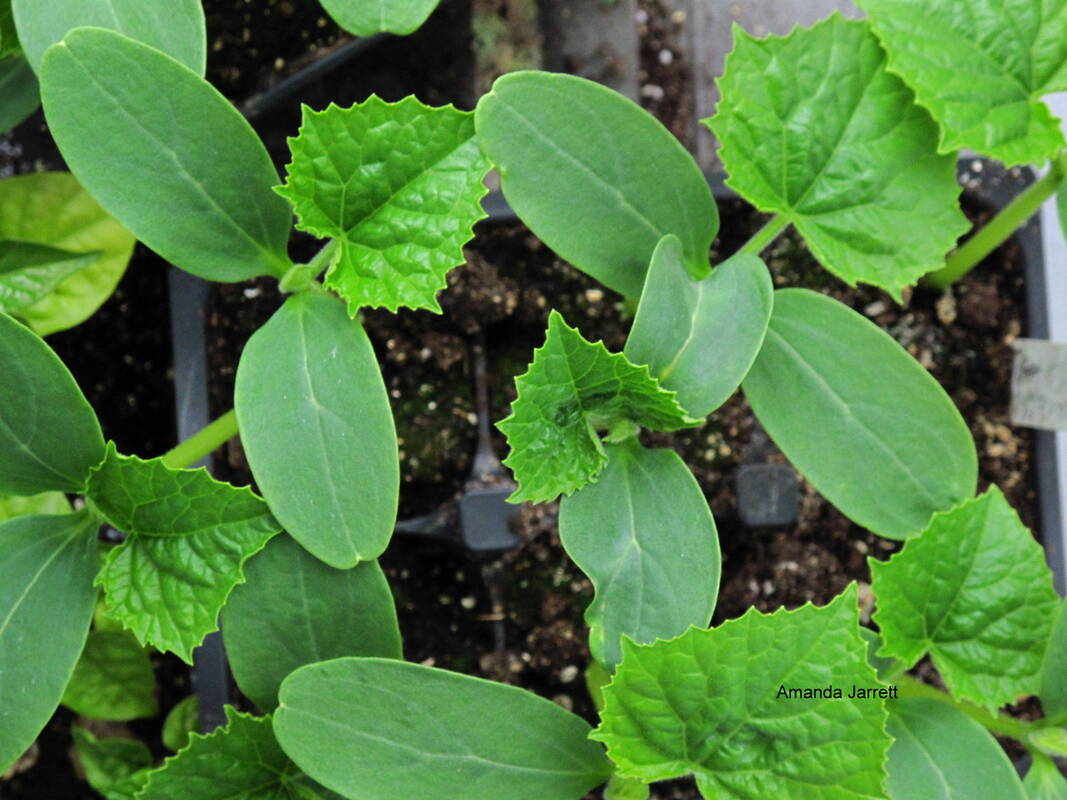 Lovely healthy cucumber seedlings!  A garland is a wonderful way to showcase a window, a door, a mantelpiece, wall art or anything else that strikes your fancy. They are pretty easy to make whether they are made from scratch or if you doll-up a simple fake evergreen bough from the dollar store. Add sprigs of cedar, pine and other fresh flora to make it more realistic, lush and fragrant.
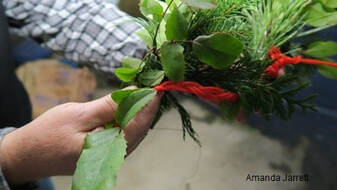
 Take cuttings from numerous evergreens. Select branches from numerous evergreens, including ones such as evergreen magnolias. Cut all the branches into 6 to 10 inch pieces. Gather numerous ones together into small posies, making sure you have a nice mix. Wire their stems together and continue to make these little leafy posies until you have an adequate amount to cover the length of the garland. The next step is to attach these small bouquets with wire to the garland. 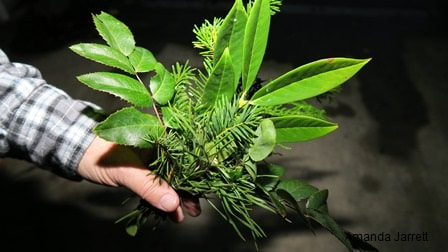 Gather numerous cuttings to make a bouquet.
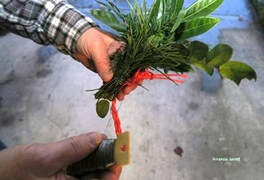
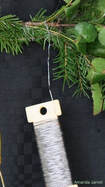
Start at one end and add one of the bouquets to the garland. Use a thin gauged wire on a paddle to wrap around the stems and to attach the posies to the boughs. It's easy to find were crafts are sold. Overlap the bouquets so the bases are covered.
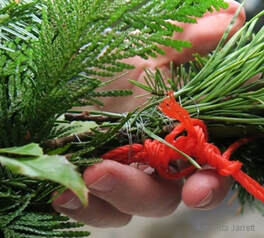
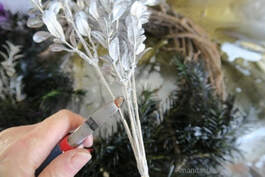
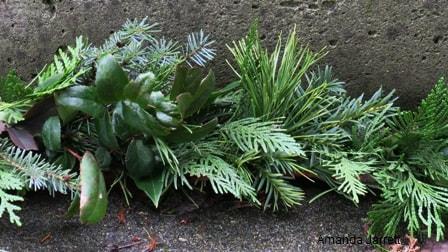 Completely cover the length of the garland with the bouquets. Once the wee bouquets have been attached to the garland, it's time to add some pine cones and other ornaments. Wire pine cones then attach them to the bough or hot glue them on. Real flowers and berries don't last long and are messy, especially the berries, so I like to use authentic looking faux ones. An added benefit is they are wired so they are easy to insert and secure to the garland.  Attach pine cones with a hot glue gun, or use paddle wire to attach them.
I like to keep my colour palette simple as it is more elegant and easier on the eyes than a cacophony of colours, but that is my preference. Have fun with your creation and I hope this blog has inspired you to make your own garlands.
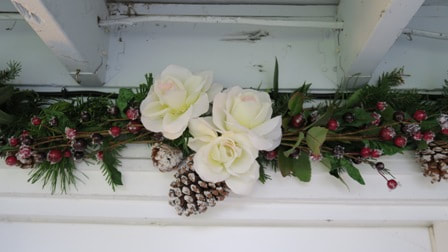
 It's a simple design. Just pine cones, white faux roses, some red faux berry stems and lots of greenery from the garden. Oh, and one last word, garlands aren't just for Christmas. You can make them for special occasions such as weddings, birthdays and garden parties. All the same rules apply, just change up the Christmas theme decor to whatever is appropriate and have a garland for every season and occasion!  Supplies:
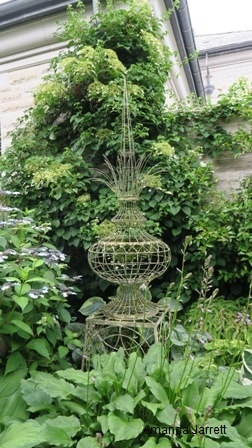
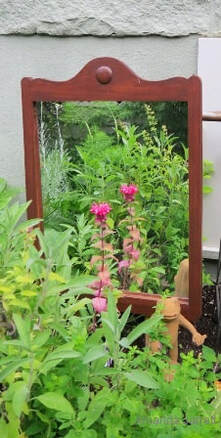
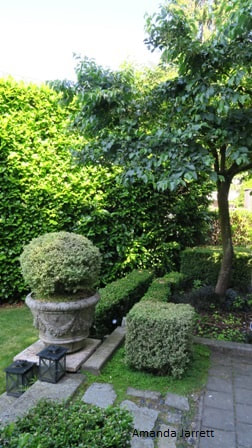
 Garden #10 French formality. The most memorable gardens in Vancouver were on display during the Heritage Vancouver Annual Garden Tour. This fundraiser provides the public with an insider view of private grounds in celebrated areas of Vancouver such as Point Grey and Shaughnessy. Proceeds go towards this worthwhile society that celebrates and treasures Vancouver’s cultural heritage and diversity. To check out their website click here. I attended this self-guided, two day garden tour last year as well and wrote a blog about it here. Many of the gardens belong to restored heritage homes that span the decades. Such wonderful gardens should be shared so I wrote a blog about it here. This year's gardens did not disappoint. Each one had something to offer with creative and functional designs that ranged from carefully arranged formal to casual cottage. June is the perfect time of the year for such things as garden tours are bursting with blossoms - especially roses! I love to visit other people's gardens as they never fail to inspire me to be more creative. There's always so many imaginative ideas, funky garden decor, brilliant colour combos and innovative substitutes for lawns that it is certainly worthwhile the price of admission. It's only $35.00 per person and the money is going to a worthwhile cause. As with last year's blog, I have included a small description of each garden along with pictures that I hope do the gardens justice. Some of the homeowners requested that no pictures were allowed, therefore, I have not included their gardens in this pictorial essay. Garden # 1: A Topiary Garden 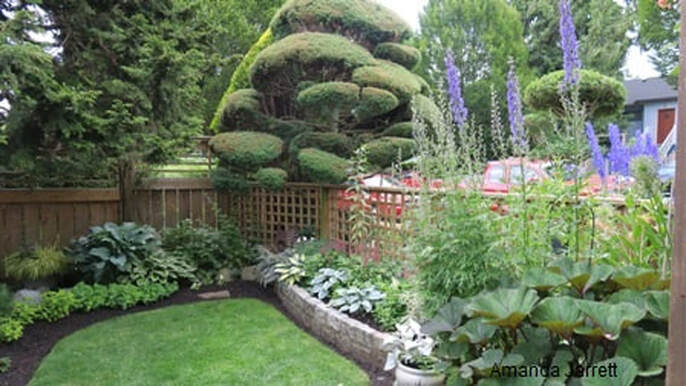 A large topiary greets all that visit this neat well-attended garden. 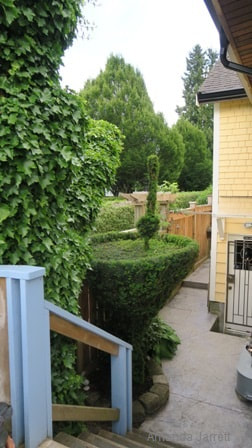 A martini glass topiary even includes an olive on a stir stick! A martini glass topiary even includes an olive on a stir stick! Built in 1946, this quaint house and garden has evolved with the help of reclaimed and recycled plants, hardscaping and garden accents. The entrance to this delightful but somewhat unusual garden, begins with a rose covered arbour atop a skillfully made wooden path. But that’s not what caught my eye; it was the dramatic grouping of blue delphiniums framed by a huge green cloud-like evergreen topiary. There were numerous larger than life tightly clipped evergreens throughout this small manicured garden. The giant topiary of a martini glass, stir-stick and olive included, was a whimsical and humorous touch. A bit of whimsy continued into the back yard with an upcycled, pretty blue ‘she-shed’. It was the perfect accent to the circular paved patio that provided an idyllic spot to enjoy this well-thought out garden. 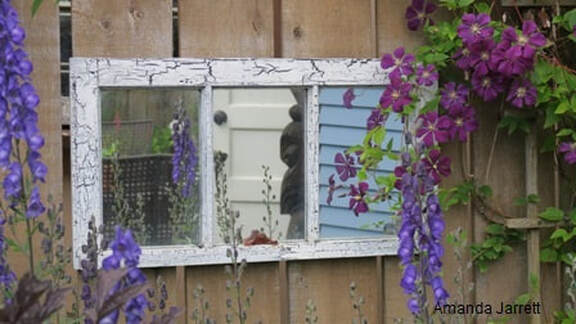 Clematis and delphiniums frame a wonderful old mirror.
 The back yard's raised bed.
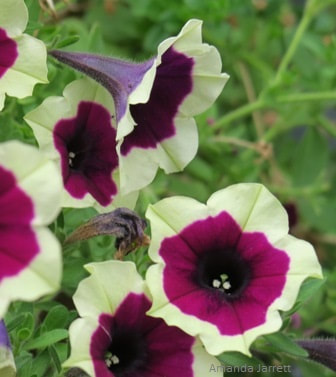
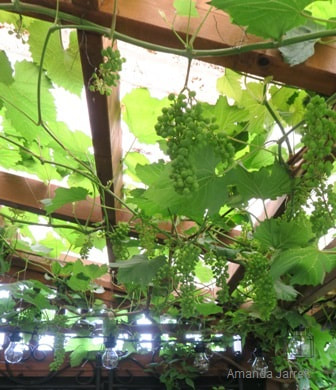
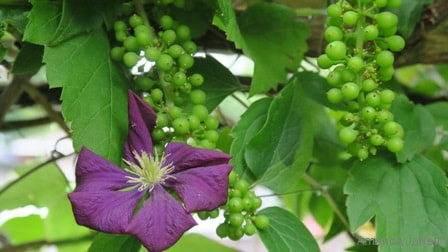
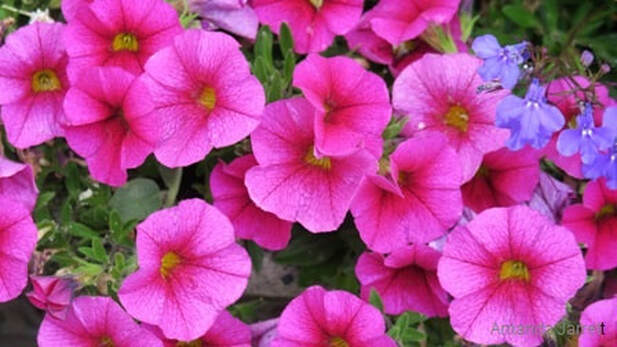 Pink petunias. Garden #2 Botanical Treasures and Old World Charm 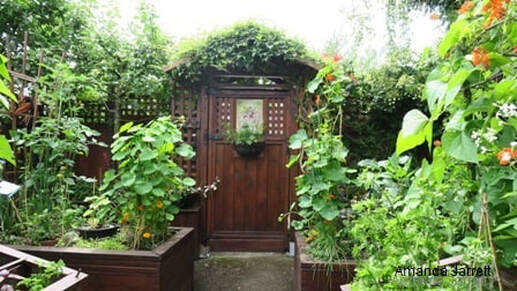 The edible food garden includes a gorgeous vintage wooden door that exits onto a back lane. Walking into this 1910 property’s garden felt like going back in time. The mossy old flagstone path is lined with a plethora of plush plants that thrive in the shady, moist conditions. It meanders to the back fence and exits into an enchanting sunken garden reminiscent of an old fashioned museum display. Instead of antiquities, the boxes are filled with edible botanical treasures. They poke their way through the wooden display boxes that are topped with matching lids. Flowers awaits those that climb the stairs to the spacious upper deck. A grapevine laces its way overhead with dangling grape clusters. It extends beyond the covered area and wraps around the walls enclosing a bevy of beautiful dahlias, miniature hostas, begonias and a glorious clematis. This truly is a garden full of delightful botanical treasures - oh and no lawn included! 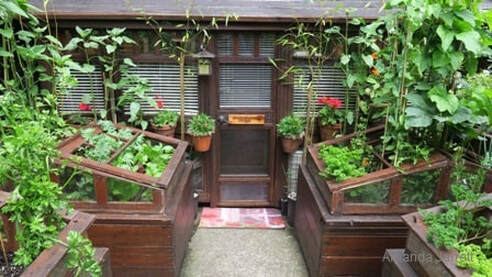 Some of the veggies and herbs are housed in numerous wooden display cases.
 Garden #3 Riley Park Community Gardens 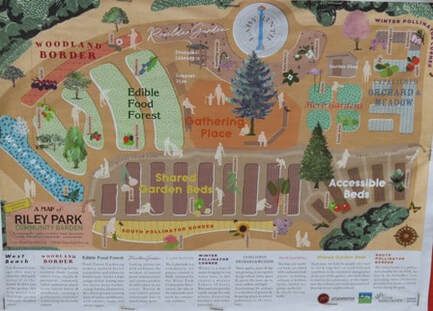 A map of Riley Park Community Gardens is posted at the park. It was such a nice surprise to find a community garden participating in the tour, especially one with so much to offer. Riley Park Community Garden is not just a vegetable garden, it produces organically grown veggies, fruit and flowers whilst educating the public. The many demonstration gardens show off drought tolerant plants, ground covers as lawn replacement alternatives, a pollinator garden, herbs, espaliered fruit trees, native berries and much more. Functioning compost bins, rainwater harvesting, upcycling of used items are a few of the innovative and exciting ideas that make this volunteer run garden a gem among those on the tour.
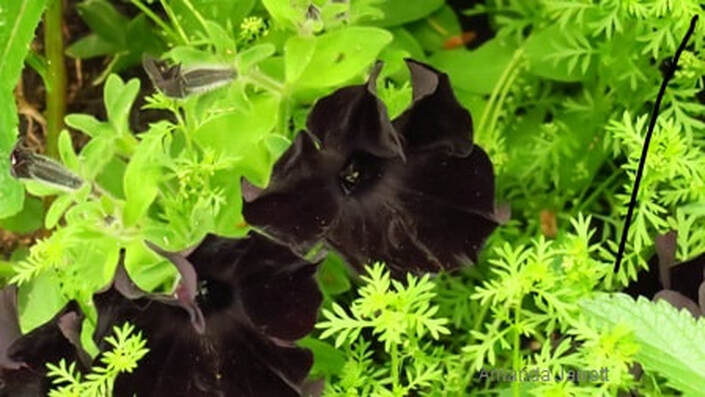 This petunias has black velvet petals.
 A dwarf pink speedwell, Veronica spicata is a tasty treat for the many pollinators that frequent this park.
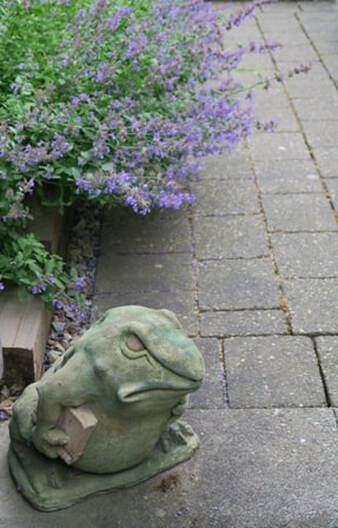
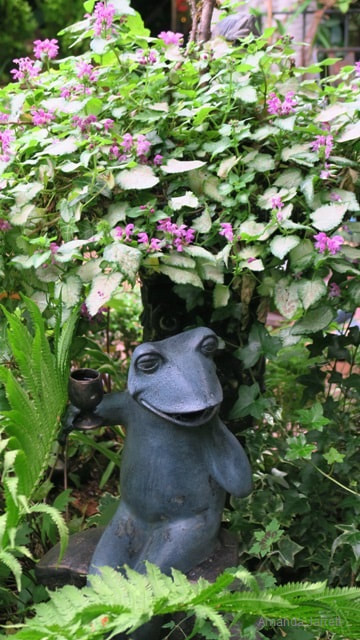
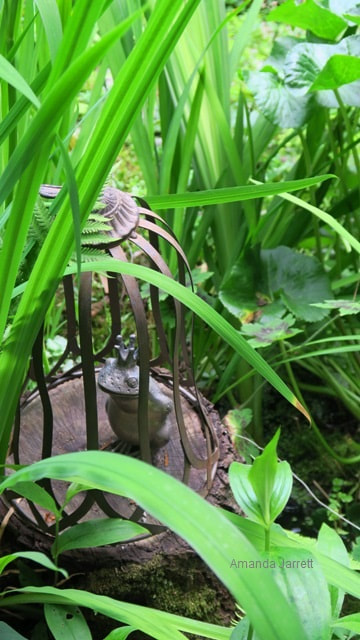
Garden #4 Small But Functional 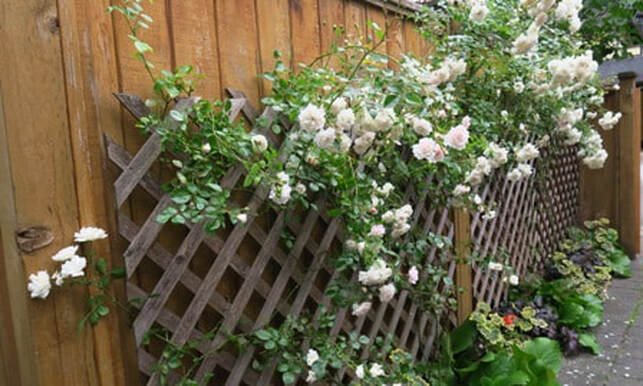 A white rose grows on the trellis that leads to the back garden. A tiny garden sits at the back of a townhouse that was once part of a 1930 Craftsman house. Its entrance begins with a bold black planter full of coleus, fuchsias and other shade loving lovelies. An amusing frog statue begrudgingly guards the way to the back yard. Every inch of space has been utilized to its full potential, including the small strips of earth at the bottom of the fences. They are planted with hostas, astilbes and other suitable shade loving perennials that aren’t going to become too unruly. To maximize space and to accommodate the needs of the owners, the backyard consists of two small but well-appointed areas - a sunny garden and a sunken patio with comfortable seating to enjoy year round. Just goes to show that limited spaces can functional and beautiful.
 Elijah Blue fescue grass (Festuca glauca 'Elijah Blue') and a blue speedwell (Veronica).  A black planter full of shade loving plants.
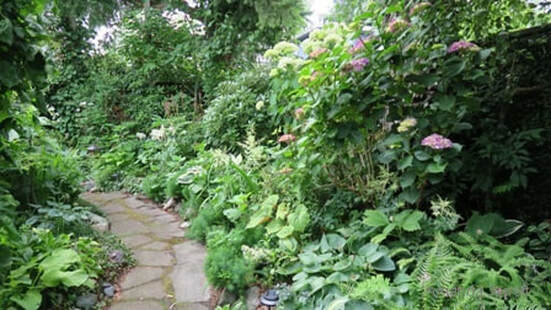
 A small garden softens the seating area below. Garden #6 No Lawn Needed  There’s no need for a lawn when perennials provide colour, texture and form. A simple bistro table and chairs are nestled into the scene by surrounding plants. They provide a diverse palette of greens, purples, whites and bright chartreuse. Leaf textures and shapes are combined to either complement one another or make others become the star like the soft pink filipendula that rises above its lower companions. An elegant urn sits at the corner of this refurbished house that was originally built in 1907 – imagine that! The urn points the way to a back yard full of sunny perennials including a stunning salmon pink cape fuchsia and blue veronica spires. It’s obvious, there’s really no need for a lawn.  Blue spikes of a speedwell stand out in this sunny area.
Garden #7 An Artist’s Palette 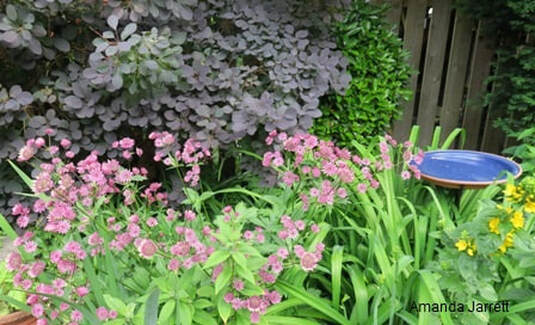 The deep purple leaves of a purple smokebush (Cotinus coggygria 'Royal Purple') frame the pink great masterwort (Astrantia) flowers. This simple garden doesn’t boast a plethora of floral beauties and rarities, but it’s beautiful nonetheless. The owner, Rae Mate is an artist and her studio in the backyard sits under a magnificent twisted trunk of an old plum tree. Below the tree a table is decorated with deep blue bachelor buttons atop a matching blue and white tablecloth. A red climbing rose accents the door to the charming studio. Yellow and white daisies and yellow loosestrife work perfectly with the many blue accents; the birdbath, starry sky petunias, clustered bellflower and blue-black petunias. It’s an effective use of colour and with added ornamental features artfully placed and arranged, it’s easy to tell an artist lives here.  Siberian bugloss and a blue hydrangea. Both love moist soil and more shade than sun.
The twisted trunk of an old plum tree provides accent to the patio.  Yellow and white argyranthemum daisies.
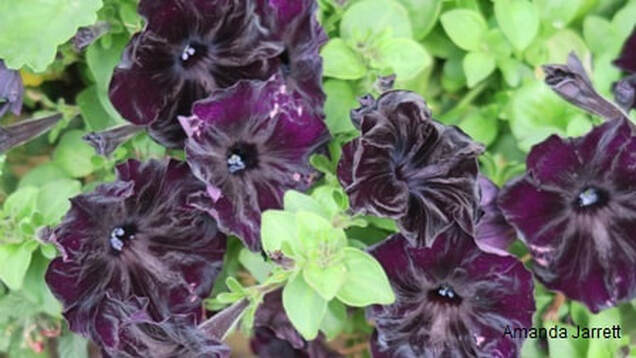 Black petunias. 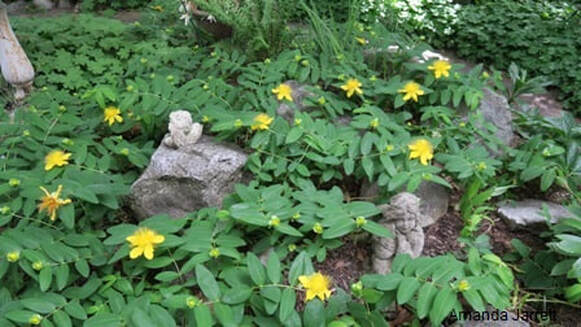 The yellow sunshine flowers of St. John's wort among the flower fairies. Garden #8 No Lawn, No Problem 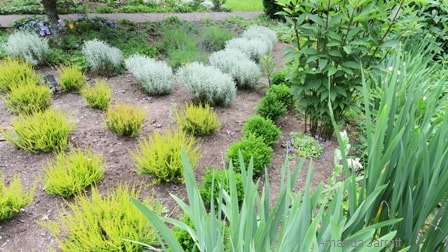 A geometric design using heathers and curry plants (Helichrysum italicum) take the place of the lawn. Instead of a lawn, pale blue stars of the aptly named blue star creeper, hug the boulevard and flow between the stepping stones. After many years of losing the fight against chafer beetles, the owners decided to scrap the lawn. To take its place, the front garden consists of geometrically arranged heathers and boxwoods. They form strong lines among the perennials and shrubs. There’s no lawn in the backyard either, but there’s a striking rectangular pond. Japanese Forest grass, a sweet Japanese maple and happy hostas work to accent strategically placed large rocks, which are fringed with round pebbles. The garden is designed by Radina Jevdevic.
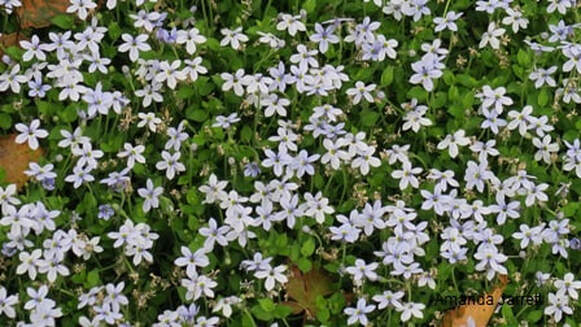 Blue star creeper flowers, Isotoma fluviatilis. 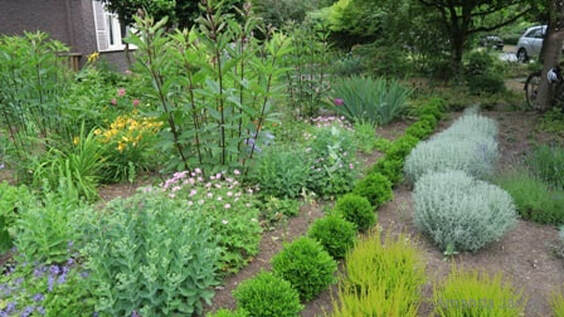 Artfully arranged plants have taken the place of the lawn.
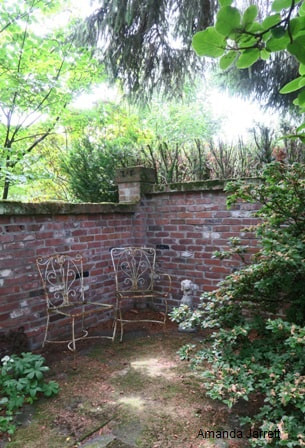
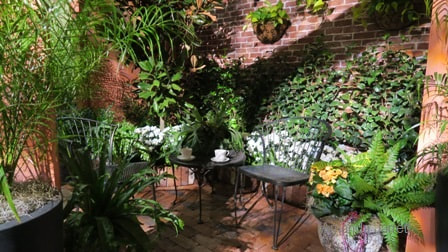
 In the back garden is a rectangular pond. Garden #9 Gothic Romantic 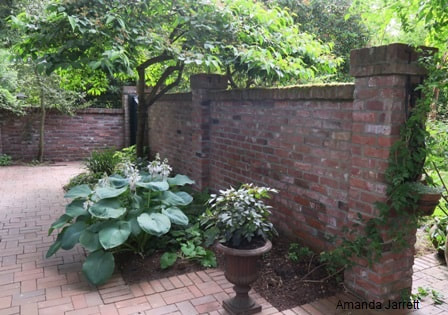 Recycled old bricks surround the garden. They set the tone for this old world garden. Old, discoloured recycled red bricks from days gone by surround this romantic style garden. The bricks, salvaged from around the city, were selected for their patina resulting in old English gothic charm. The enchanting brick wall not only encloses the garden, it provides for intimate seating that’s shyly placed for solitary contemplation or a romantic rendezvous. With such a setting, plants act as features that invite attention. The theme continues into the backyard with old moss covered pavers and generous stone stairs. They lead the way to the raised brick vegetable beds and patio, which features a simple fountain that pores water from grey blocks into a hollow below. It a harmonious garden that blends the softness of the plants with the aged brick and stone. It’s a delightful visit into another time and another place. 
 A view into the garden.
 The path to the back garden is surrounded by flowing beds.  A shrub rose called Golden Wings. Simply beautiful.
 A sunken area private retreat.
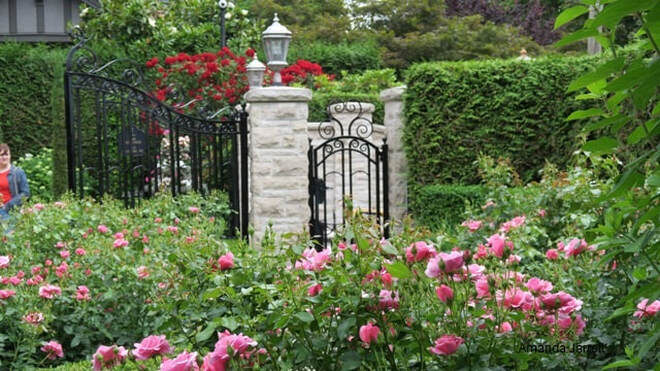
 Garden #10 French Formal Sophistication  A formal French style garden surrounds this elegant house.  The formal garden in the front garden is dressed in pink and blue. The formal garden in the front garden is dressed in pink and blue. This garden is one of French formal elegance that showcases perfect pink roses, sky blue hydrangeas and deep green tightly clipped boxwoods. It’s a sophisticated design with a colour scheme that pairs well with the blue framed windows. Spiral topiaries in elegant urns, life-size statues, rose covered arbours and mass plantings of roses surrounded by boxwood hedges are the epitome of elegance. Formality is left behind when proceeding to the back garden. Hostas, ferns and other shade loving perennials casually line the path that opens up to a spectacular back garden. We are greeted by an ornate French-style white pavilion that dominates the rear of the garden. A spacious circular seating area, fire pit included, sits in the foreground. Garden beds attached to the house repeat the pink and blue from the front garden, but instead of a formal design, it's charmingly casual. Loose and feathery hot pink astilbes, sky blue delphiniums and creeping bellflowers work together to create a French masterpiece. The pavilion and fire pit was designed by Tammy Anne Garden Design.
 Belle Danielle rose has a light scent and is positively perfect.  The Belle Danielle floribunda rose bears clusters of pristine pink blossoms.
 A magnificent deep blue gazing ball is the perfect foil to the spiky speedwell.  Bright apricot orange Livin' Easy roses are easy care floribundas.  Livin' Easy roses under a pink rose dogwood.
Garden #11 A Garden of Many 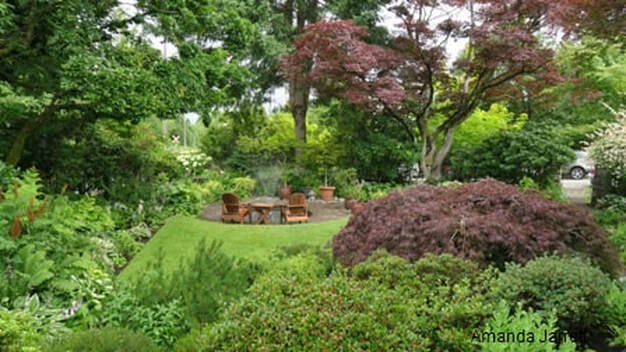 A casual English style garden greets visitors. the The original Mock Tudor house was built in 1922, but both house and garden were totally redone in 1999. An expansive English styled garden greets visitors upon arrival. It's replete with a large circular pond and fountain. There are many themes within this garden including a rockery, a Mexican patio or ‘terraza’, a vegetable garden, herbs, fruit trees and berry bushes. It has it all. The owners are avid gardeners with collections of rhododendrons as well as hellebores and other perennials. It doesn’t stop there; as with many enthusiastic and able gardeners on the tour, they’ve also taken over the back and side lane! 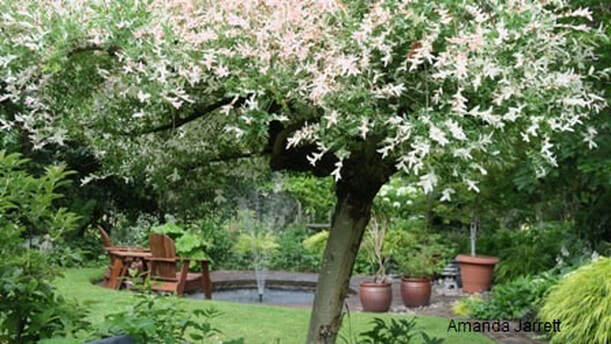 The soft pink and white foliage of the Dappled Willow (Salix integra 'Hakuro Nishiki' adds some extra colour.

 A cinnamon fern, Osmunda cinnamomea shows off its new cinnamon coloured brown fronds.
 A large bold green hosta leaf, purple-green bugbane leaves and the silvery fronds of a Japanese painted fern. Garden #12 Art and Roses 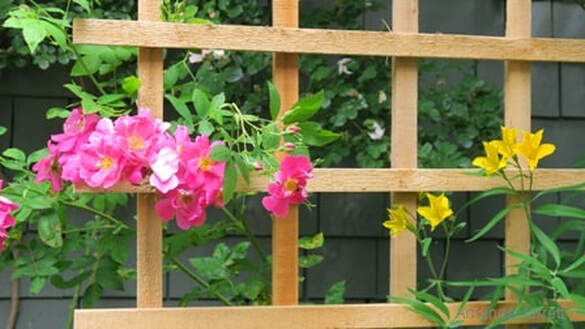 A climbing rose, William Baffin and a yellow Peruvian lily, (Alstroemeria). It’s the little things that make this garden unique, as unique as the sculptures that grow among the greenery. They were made by the owner herself, Judy Osburn, who is not just an accomplished artist, she’s also a passionate gardener. Roses fill the beds, scramble up the 1910 Craftsman house and tumble over arbors. Nestled among the vegetation and artfully arranged sculptures is a pond swimming with golden koi. The garden doesn’t stop within the fence, but extends to the neighbouring lane for everyone to enjoy.
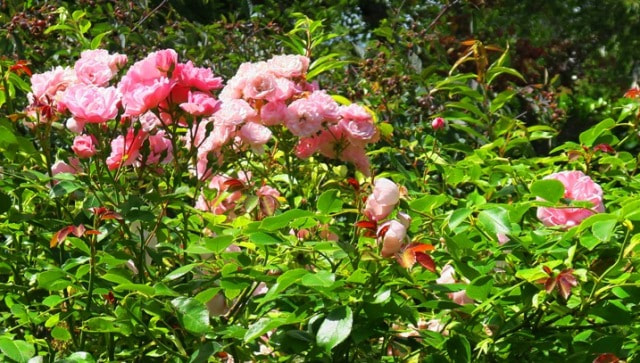
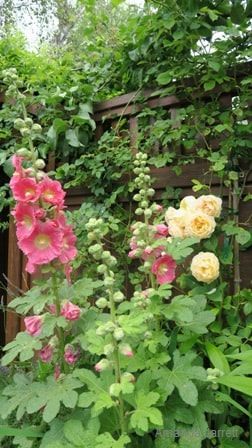
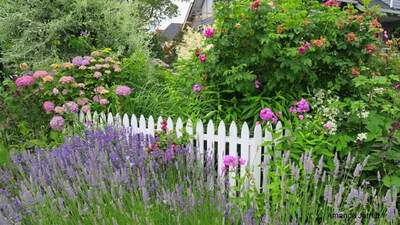
 Roses are everywhere! They envelope the house and languidly drape over the fence. Garden #13 – A Cottage Garden 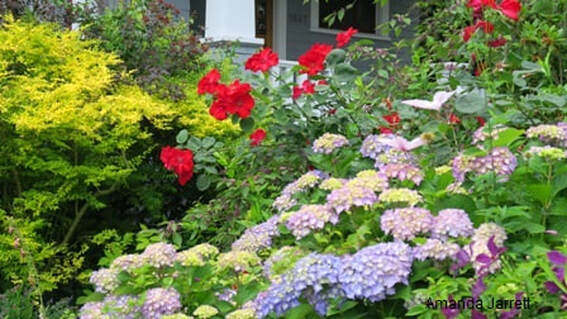 This cottage style garden is replete with a white picket fence, roses and hollyhocks. It is the perfect match to this 1912 house for the nostalgic design and use of plants. There’s so many flowers including a plethora of shrubs and a vast array of perennials. Plants are featured in blocks and en masse to make a big impact. The robust shrubs and perennials are no shrinking violets. There’s an impressive goatsbeard plant, a standout variegated red twig dogwood, a darling pink and a white hydrangea. This well-thought out sumptuous cottage garden is simply stunning.
 Dortmund climbing rose.
 Betty Corning clematis.
 A lacecap hydrangea called Strawberries & Cream. 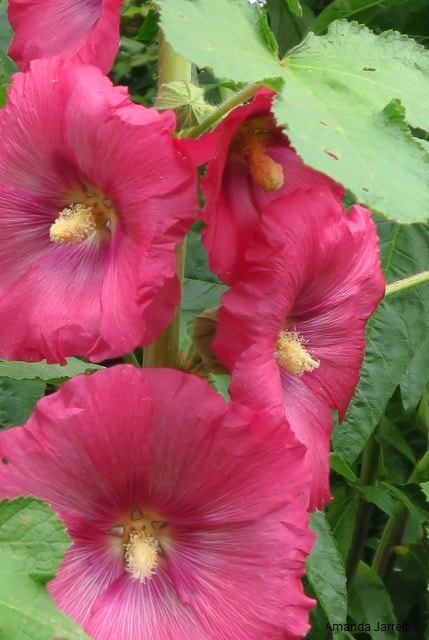 Hollyhock perfection.
 Golden Wings, a fragrant shrub rose.
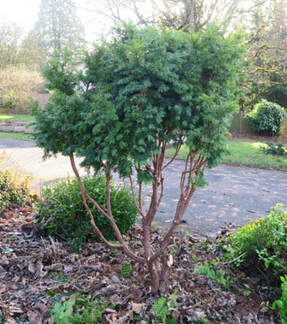
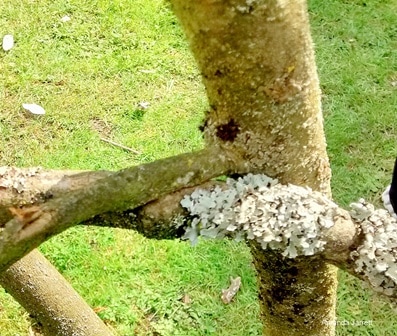
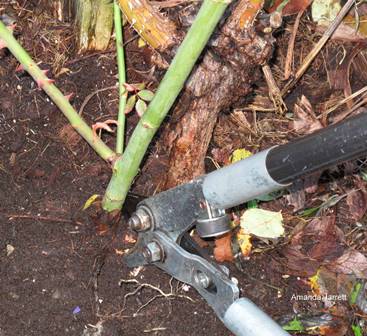
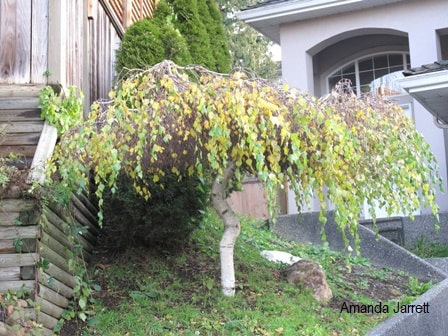
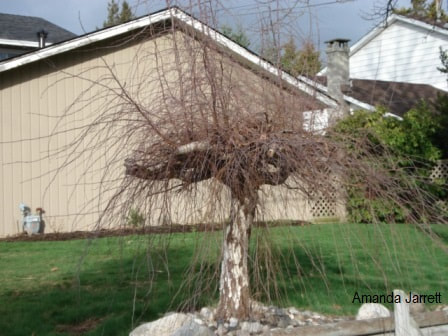
My neighbour’s Hicks yew must be on steroids. This previously inconspicuous, sane little yew grew a couple of feet last year - seriously. I gather it liked the weather, but for whatever reason it decided to morph into a big green blob. What to do? It was tempting to take the hedge trimmer and give it a haircut, but it would still look ugly, especially at that location, and let’s not forget the maintenance of trying to keep it small. It would be a shame to chuck it out, but converting into a wee tree is certainly doable. After a brief discussion with my lovely neighbour, it was agreed – and the metamorphosis began.
To convert a large shrub into a tree is not difficult. Keep the biggest branches but remove all others, including all the lower branches. Don’t go mad chopping away. Assess each limb and take your time and remember to step back. As you can see from the picture, the previously blobby yew is now a little tree with reddish-brown stems. Rhododendrons, which also can become rather large, are also good candidates for this pruning method. They also have reddish smooth bark and an attractive vase-like form. So instead of topping and shearing plants that have become too big for their britches, consider removing their lower limbs to reveal their charming bones. If you want to learn how to prune plants in your garden, I will show you how to prune or I can do it for you. Click here to book an appointment. 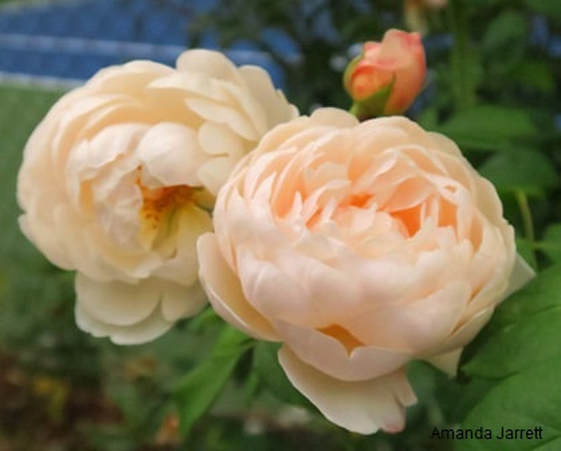 I have been to many rose gardens in my time throughout Canada, England, Italy and Florida, but I have yet to see anything like The Rose Test Garden in Portland, Oregon. It surpassed all my expectations and I look forward to visiting it again as there is so much to see.
To read more click here.
Being creative and making a seasonal planter is a great way to thwart winter's bleak, grey skies. If you already have some planters outside that look sad, just add some evergreen boughs, maybe some ornaments and battery operated fairy lights, and voila, it’s done. If you don’t have an existing planter to doll-up, use any container large enough to accommodate some branches. Fill with evergreen boughs, twiggy branches and berry stems. Add some pine cones, a weatherproof bow and anything else that suits your fancy. Don’t know how to make a pretty bow? Check out the dollar stores – they have all kinds. Festive Planter Steps
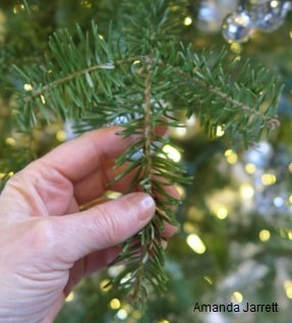
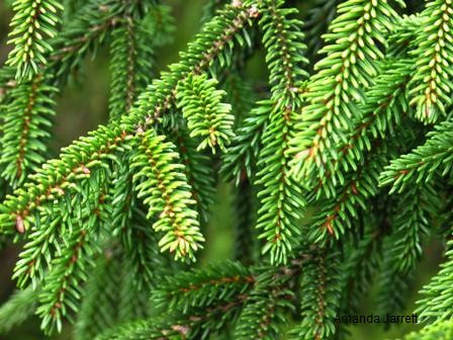
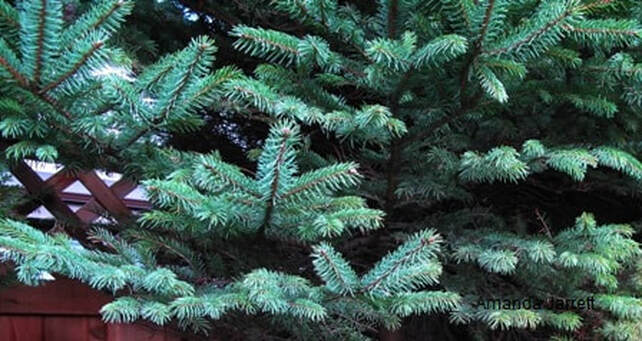
Step 3: Add floral oasis, or mulch or potting soil into the container so it is 3/4 full. Moisten the mulch or soil. Add water to the cans in temperate climates where it doesn't freeze, or omit the water altogether. It's best to use mulch or soil for areas that freeze. Step 4: Place shorter evergreen boughs in first to cover the base of the arrangement. Be generous as it not only looks better when its full of lush foliage, they help keep everything upright.  Step 4: Lush evergreen stems cover the base and stabilize any additional branches and ornaments. Step 5: Add more branches from other evergreens including evergreen magnolias, yews, boxwood, pines, junipers etc.  Step 5: Select evergreens with different textures for a more appealing look. Step 6: Follow with interesting and colourful stems: red twig dogwood, Emerald & Gold wintercreeper, curly willow, Harry Lauder’s Walking Stick, Stewartia and white birch. 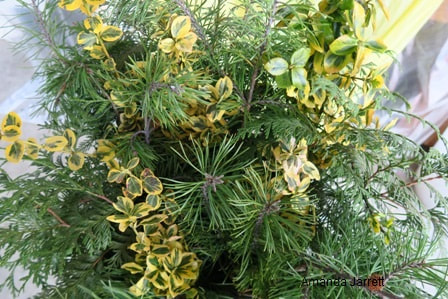 Step 6: Emerald & Gold wintercreeper adds colour and another texture. Step 7: Spray paint does a great job converting boring bare stems into colourful vertical accents. Same goes for evergreen branches; they take spray paint quite well. Turn green evergreen branches, gold, silver - any colour you like. 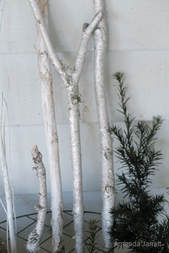 Step 7: Save money and spray paint branches. Step 8: Use dried hydrangeas, leaves, ornamental grasses, interesting seed heads and pine cones. Go for the natural look or spray paint them gold, silver or any colour you fancy. 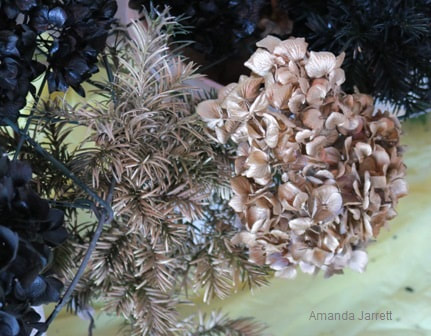 Dried hydrangea and fresh yew, painted gold. Step 9: Add stems of red holly berries or purple beauty berries or purchase faux ones from a dollar store. 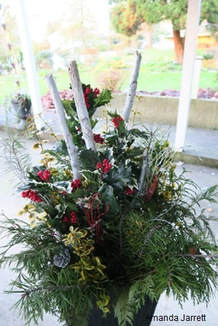 Use real or silk berry stems to add a splash of colour. Step 10: Add ornaments, or just finish it off with a simple bow. For nighttime sparkle I like to use battery operated Christmas lights   A flocked tree at Harrison Hot Springs Resort. Christmas trees are pricey so it makes sense to do your homework before you shell out your hard earned cash. Here’s some information on cut, flocked and living Christmas trees (they have not been cut and are grown in containers) and their care. Cut Christmas Trees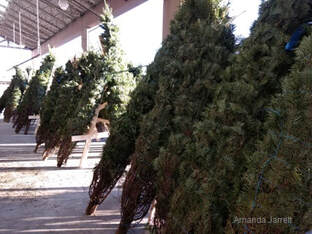 Cut Christmas trees ready to be sold. Tree farms grow a variety of coniferous evergreen trees for Christmas. They often clipped in summer to create denser branches and better form. Picking out the right tree is a tricky thing. Mostly everyone wants an ideal shaped tree with full sturdy branches that don’t droop with heavy ornaments. Good needle retention is essential, while fragrance is a bonus.  Don't forget to compensate for the tree topper and tree stand while measuring for the right size of tree. Measure: Measure the area where you will be placing the tree. Don’t forget to include space for the tree topper and its tree stand. Include the available width of the area, as some trees can engulf a room. It’s a good idea to bring the measuring tape when you go tree hunting. It’s uncanny how a perfectly sized tree miraculously grows to twice its size by the time you get it home. Needle Test: They should feel supple, not dry or crispy and they shouldn’t snap easily when bent. Give the tree a shake to check for excessive needle drop. 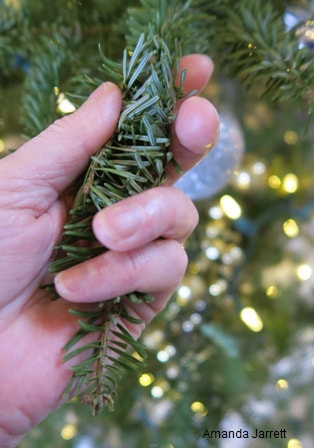 Needles should be supple, flexible and stay on the tree when held. Noble Fir
Grand Fir
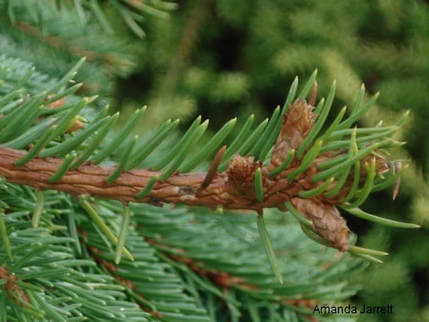
Douglas Fir
 Douglas fir is fragrant, not as expensive as other trees, and is suitable for light ornaments. Fraser Fir
 Fraser fir has excellent needle retention, is fragrant and has many branches for ornaments. Concolor Fir, White Fir
 Spruce needles are sharp and are a good deterrent for pets. Blue Spruce
 White spruce have sturdy branches suitable for heavy ornaments. White Pine
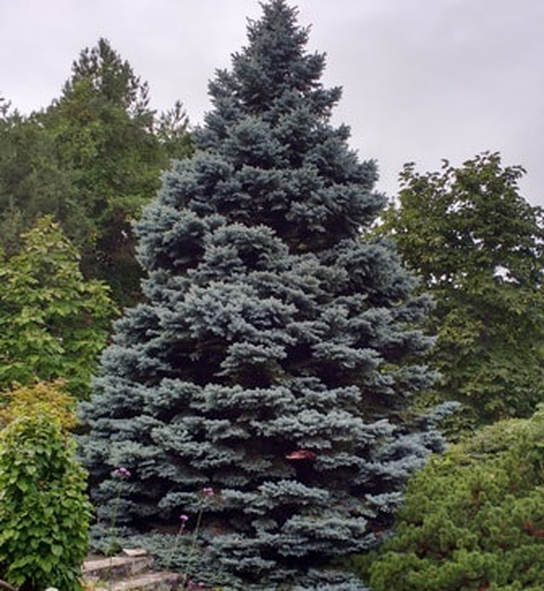 Colorado Blue Spruce bear distinctive silver blue foliage. 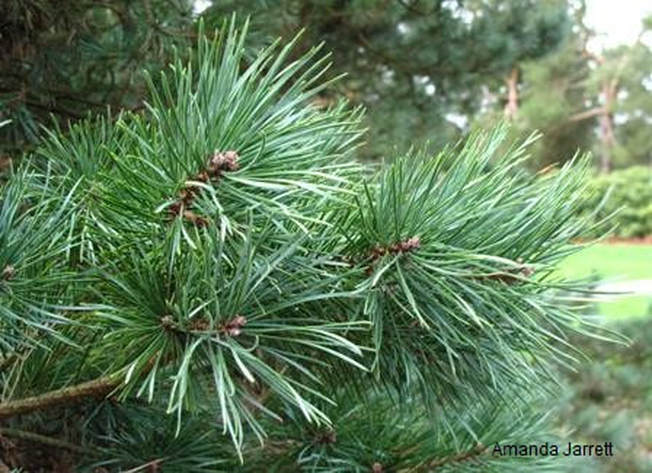 Pines, like this white pine, has soft needles in clusters of 5, which are difficult to decorate. 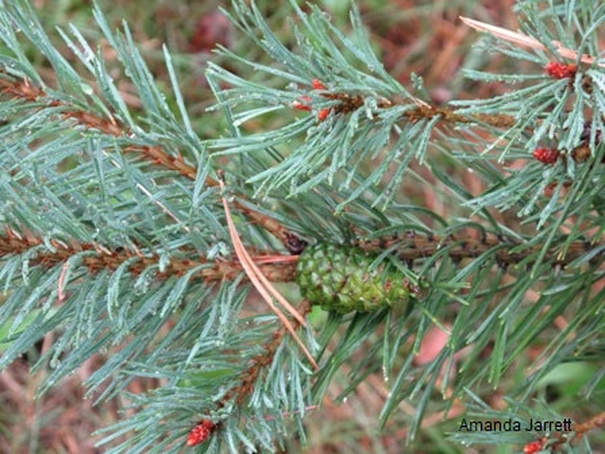 Scots Pine have good needle retention and stiff, dense branches. Flocked Christmas Trees Flocked trees last longer as the flocking seals in moisture and includes a fire retardant. Snow covered (flocked) Christmas trees are coated with an anti-flammable, non-toxic mixture made from fiber, corn starch and boron. The boron is a flame retardant. Flocking locks in moisture extending the tree's freshness. Christmas Tree Care
 Cut off a couple of inches from the cut end of the tree trunk before putting it in water. Disposing Of Cut Trees
Living Christmas Trees Keep living Christmas trees, like this dwarf Alberta spruce, inside for a maximum of 10 days. Any longer and it will break dormancy resulting in a very sick plant and even death. A living Christmas tree has not been cut and is grown in a container. Once the holidays are over either plant it in the garden or keep it in the container for next year. Container grown Christmas trees need to be either root pruned or repotted into a larger pot as they will outgrow their pot.
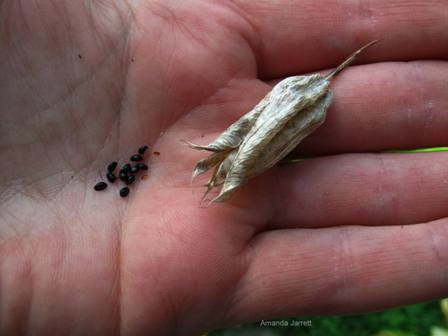
  I love expanding my burgeoning plant collection by gathering seeds from my favorite plants. It’s cost effective, extremely rewarding and very mysterious yes – mysterious… Seeds often don’t resemble their parents, just like people are not exact duplicates of theirs. I’ve grown some pretty cool hellebores from my Lenten roses that don’t resemble their mother plant. That’s how new exciting varieties come about from plant breeders. These plants are referred to as hybrids. How do you know if the seeds you have will grow into exact replicas of their parent or a different version? Seeds from hybrid plants will not be identical to the parents, however, seeds from plants that are non-hybrids should look like their parents. If you don’t know what you have, experiment and enjoy the mystery.
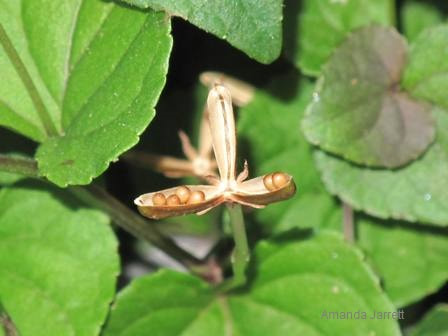
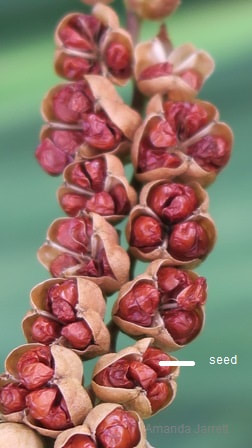
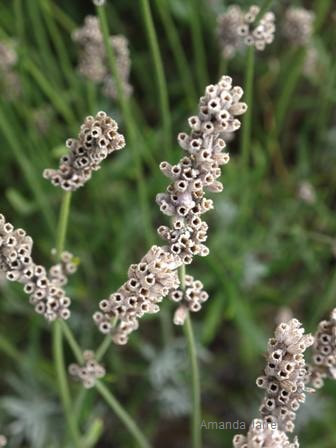
How to save Seeds
Tomatoes & Cucumbers
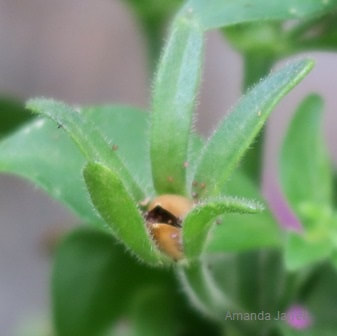
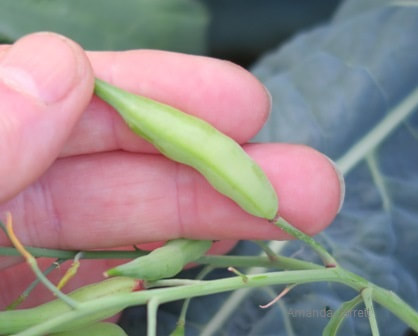
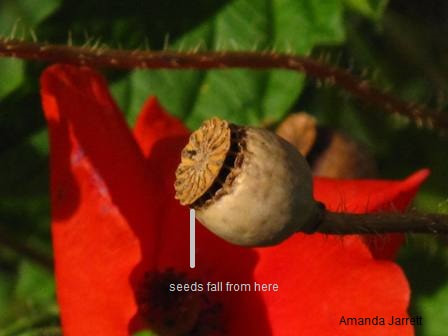
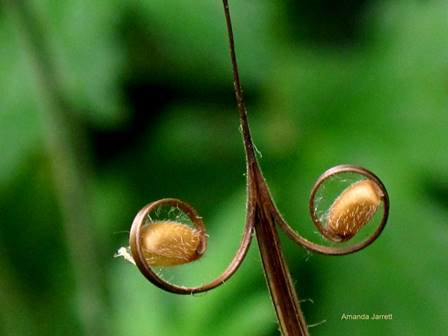
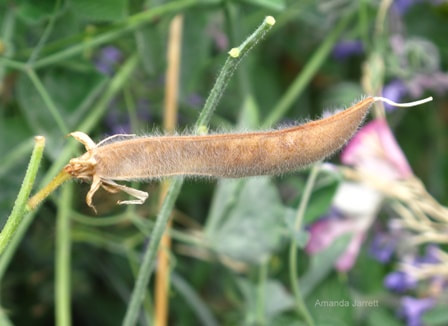 A sweet pea pod is ready to harvest. 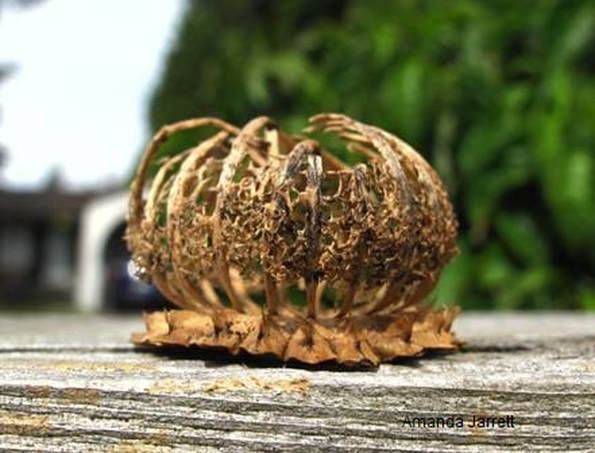 The remains of a poppy seed head looks like a regal crown. 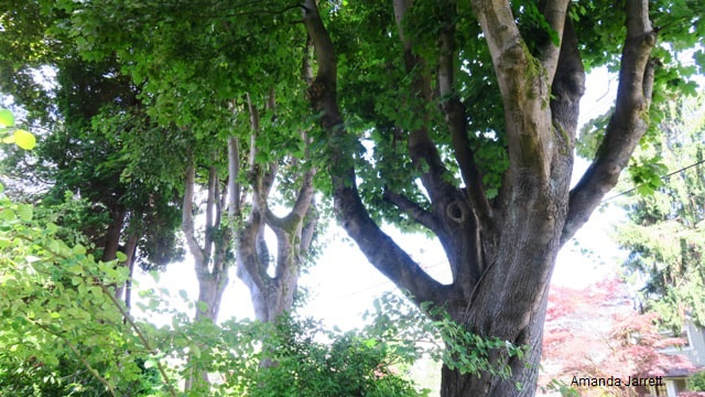 A row of very old giant maples line a 1908 garden. The Heritage Vancouver Society offered up a fundraiser I couldn’t resist; a self-guided tour of 15 exclusive gardens in the prestigious Vancouver's West Side. A special thank you goes to all the homeowners and designers that allowed me to feature their gardens in this blog. For more information on Heritage Vancouver Society click here. Garden #1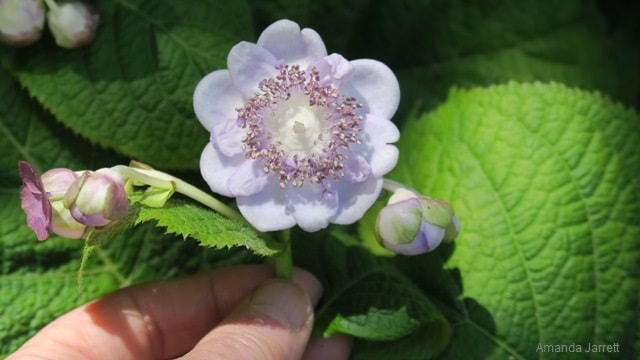 An unusual find, a Deinanthe caerulea, also called 'false hydrangea'. The tour started with an unassuming shady front garden, which did not hint of what lay beyond. The back garden is long and languid. This huge lot, 66 ft x 342 ft, has a huge main grassy area in the back garden bordered by undulating beds filled with trees, shrubs and perennials. In the centre, a golden Julia Child rose invites visitors to come closer and enjoy its fragrance and beauty. In contrast, a shady narrow path runs along the fence providing another perspective. Harmonious colour schemes, complimentary plant shapes and varying leaf textures give this garden an easy and relaxing feel. 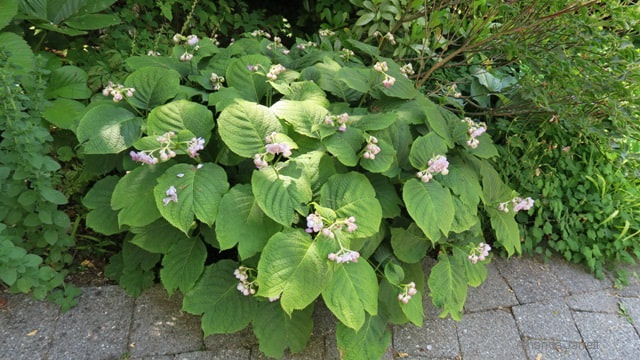 False hydrangea plant grows to 18 inches x 30 inches, prefers part shade and is hardy from zones 5 to 7.  Julia Child, a scented floribunda, disease resistant rose.
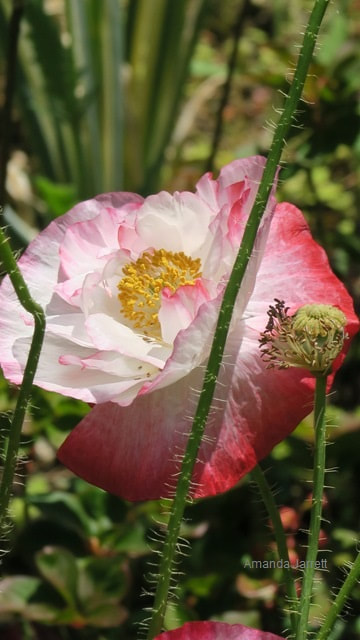
 A Shirley poppy.
 A rounded bed is full of shade loving plants.  A double flowering mock orange. 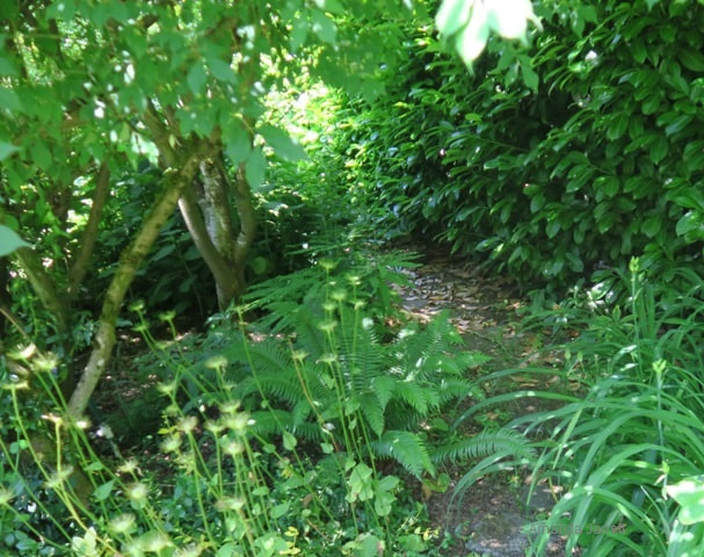
 A bench is tucked away at the shady end of this long garden.
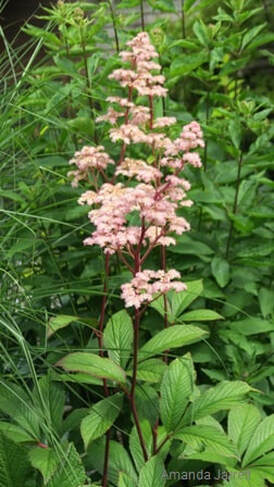
 Pure yellow Sneezeweed (Helenium) is an easy perennial that adores full sun.  The feathery flowers of the Rodgersia, combine with a white rimmed hosta.  Tiny flowers make up the flower spike of the shade loving Rodgersia. Garden #2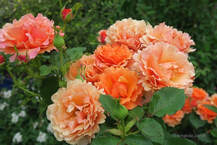 Easy Does Rose is an easy to grow reblooming, fragrant floribunda growing to 4 feet. A self-confessed plant addict, the owner has adorned her garden with some lovely specimens, especially roses. It was a spectacular rose, the Pink Martini, which grabbed everyone's attention. It was smothered with fragrant, brilliant, deep pink blossoms. Right beside it was the Carefree Delight rose donning scented, large single soft pink flowers. The long narrow back garden was accented by a rustic arbor accented by a deep red rose called Take It Easy. Hostas, astilbes and other shade loving plants filled the beds – and more roses wherever the light allowed, took center stage. 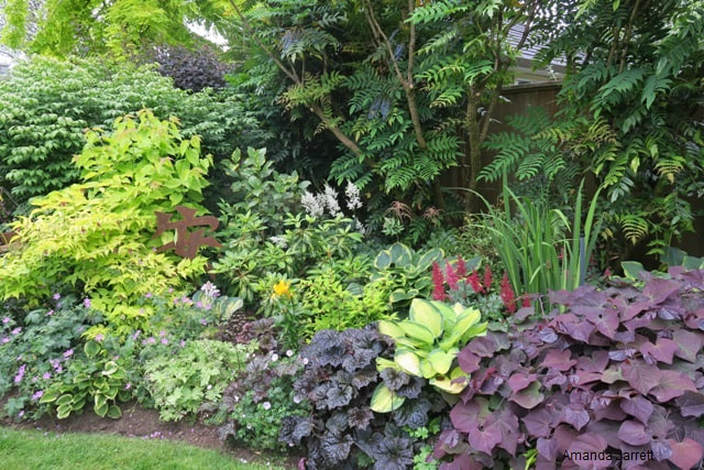 A garden bed with artfully arranged shade loving plants. 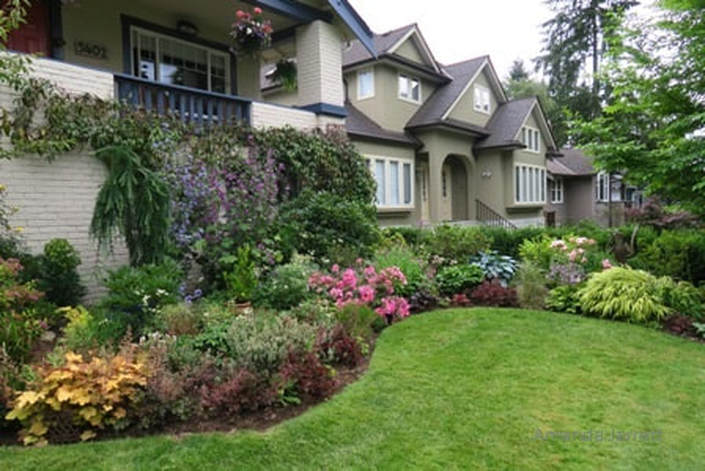 The generously curved front garden contains roses and perennials.
 Westerland climbing rose is hardy from zones 4 to 9, fragrant, disease resistant, continuous blooming. 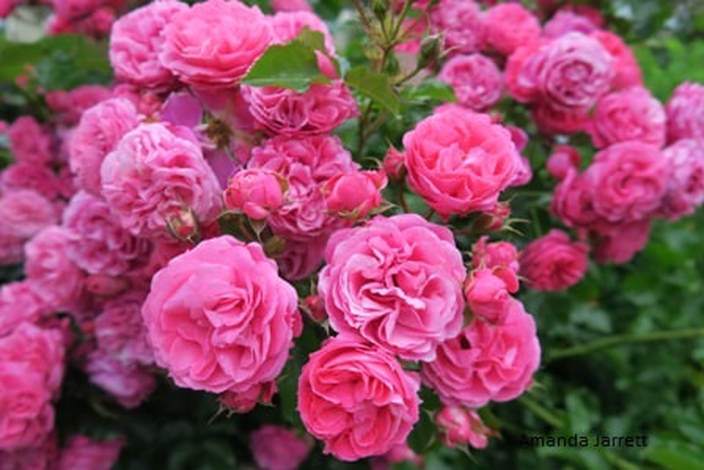 Pink Martini blossoms stay perfect as they do not fade with age. 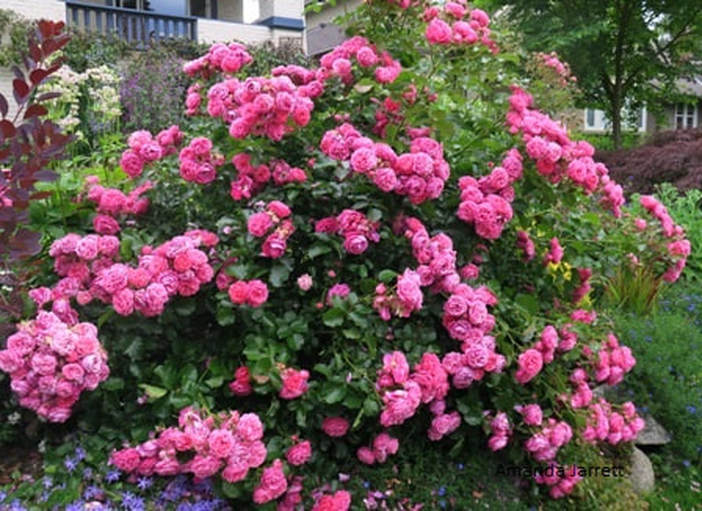 Pink Martini is a continuous bloomer with fragrant flowers on 3ft plants. Disease resistant. Zones 5 to 9. 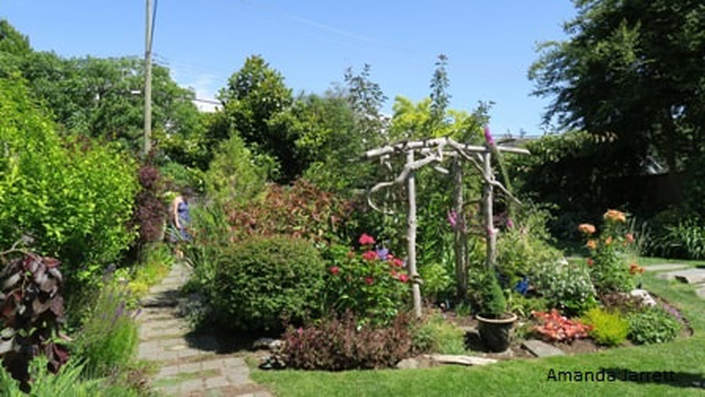 A rustic arbor provides a focal point in the back garden.  A big leaf hosta and a chartreuse Japanese maple pair well.  Take It Easy, a disease free, continuous flowering shrub rose. Grows to 5 feet, zones 5 to 9. 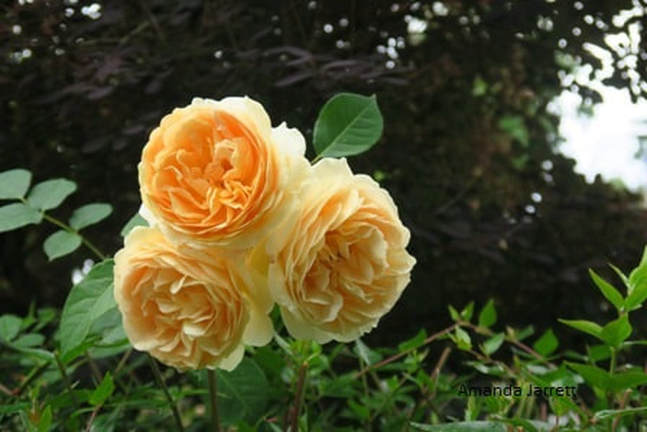 Graham Thomas, a David Austin rose, have a light tea scent with repeat flowering. Disease resistant, vigorous grower to 5 feet. Zones 5 to 9.  An easy care, free-flowering , Meijocos Pink Drift. Zones 4 to 11, 18 inches tall, 3 ft spread.
 The easy care and fragrant, Take It Easy rose and a blue peachleaf bellflower.  The feathery flowers of a white astilbe. 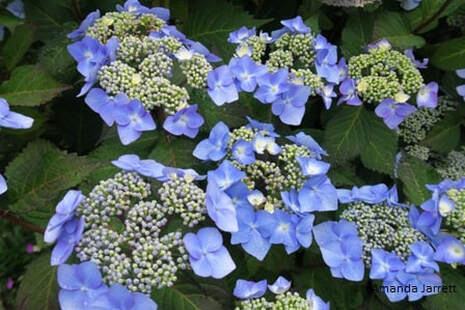 Twist & Shout hydrangea is an Endless Summer reblooming hydrangea, hardy from Zone 4 to 9. 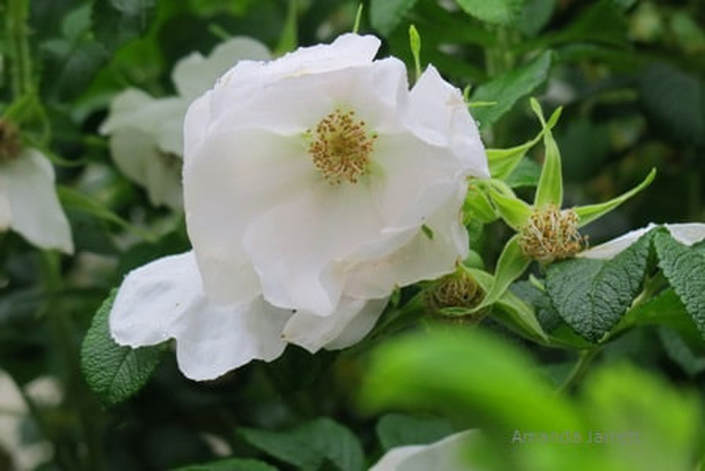 Blanc Double de Coubert is a tough, hardy and fragrant rugose rose.
 Carefree Delight is fragrant, easy care shrub rose growing to 4 feet and flowers continuously.  Carefree Delight Garden #3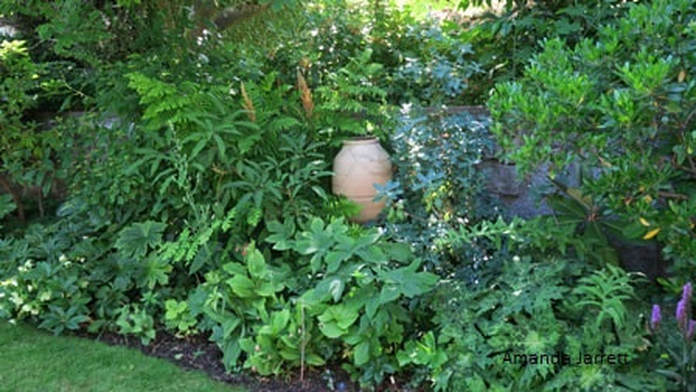 An attractive urn provides a focal point for this woodland garden. There are two basic gardens surrounding this 1940 CBK Van Norman tudor styled home. A large ceramic urn in the front garden provides a focal point to the lush woodland shade plants. Stairs flanked by a smooth barked eucalyptus invites people down the stone steps to the garden below where the woodland theme continues. The sumptuous garden is punctuated by unusual plants such as the Spotty Dotty Podophyllym with its huge flat crinkled leaves and the funky Jack-in-the-Pulpit plant. The woodland settings gradually evolves to a more formal scene. Trimmed boxwoods define a large seating area under the white hanging lanterns. A dining area with an Asian feel hides under the balcony. It’s intimate and restful with a rustic stone head as its focal point. Trimmed boxwoods edge the deep garden beds to provide a loose formality. Feathery astilbes peak out among the greenery, a bold gunnera pairs well with white trimmed hosta and tall ferns compete with rhododendrons. It’s an appealing loose formality. 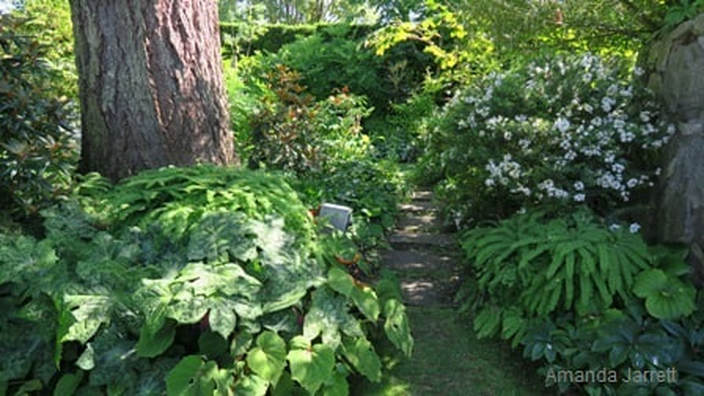 A casual path meanders through the lower verdant garden.
 A silvery globe thistle.
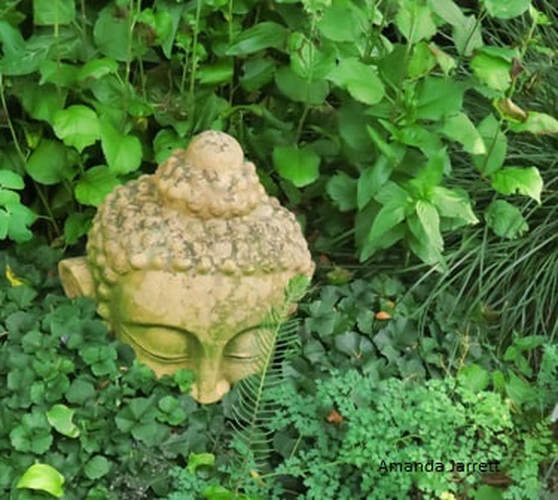
 The dining area sits underneath white lanterns for nighttime dining al fresco.  This Buddha looks like an ancient relic. 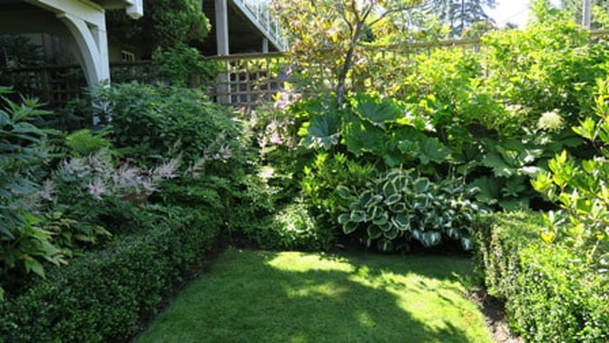 The lower back garden turns semi-formal with clipped boxwood hedges that seem to retain the burgeoning plants within their boundaries. 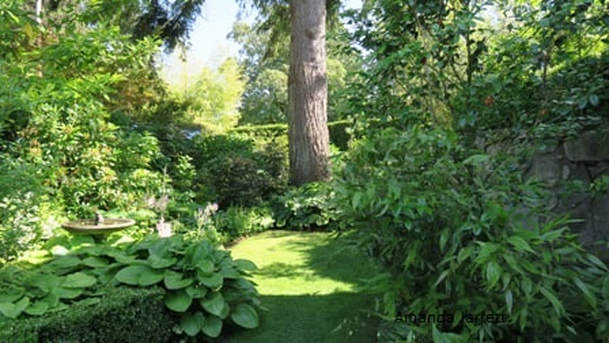 The lower woodland garden receives dappled shade from the huge Douglas fir in its center.
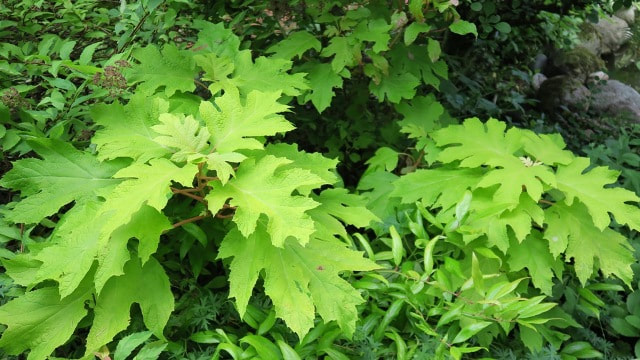
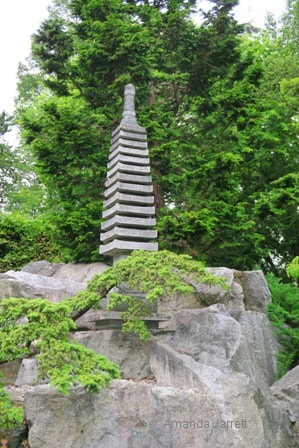
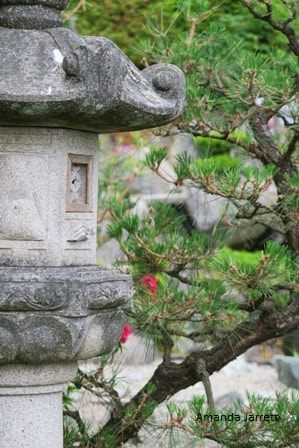
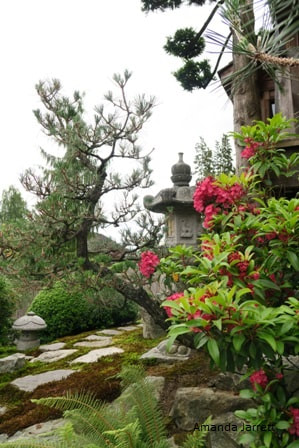
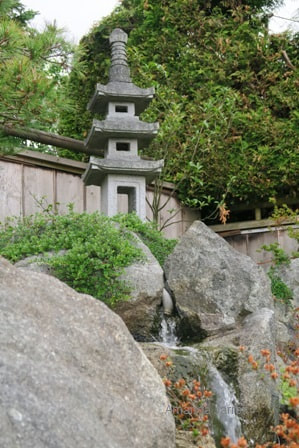
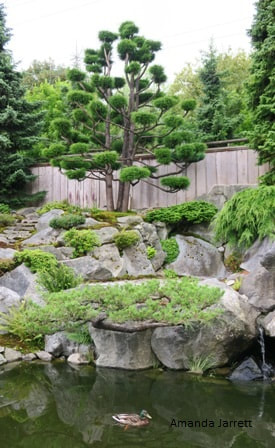
 Spotty Dotty may apple prefers shade in rich, moist soil. Zones 6 to 9. 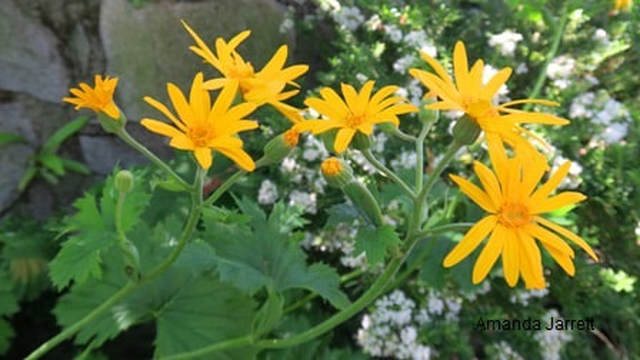 Ligularia flowers shine brightly in the shaded woodland garden. Garden #4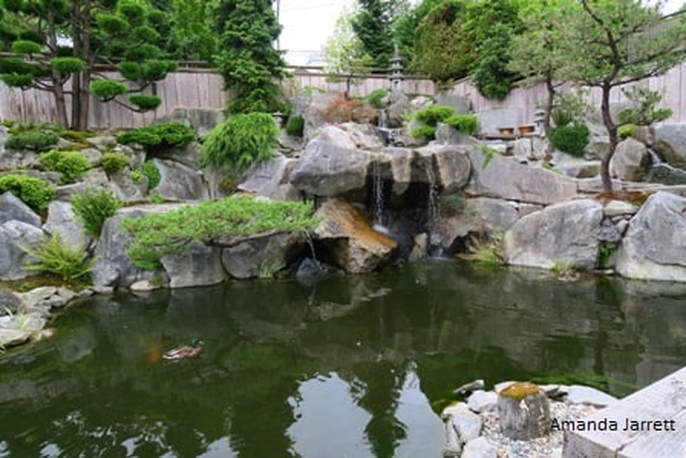 This sculptural Japanese themed garden is dramatic in its use of rocks, water and plants. It was designed as a miniature Japanese landscape with rocks mimicking mountain ranges. The water features simulate waterfalls, streams and lakes. Stark pines replicate wind ravaged evergreens atop craggy mountaintops. It’s so well done that this garden has been featured in movies, television and magazines. 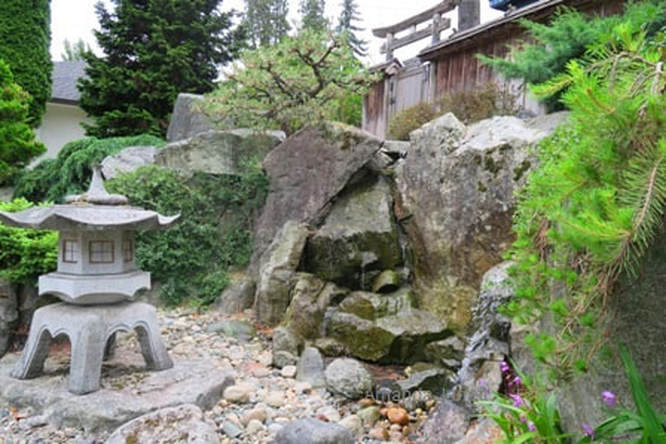 A pagoda sits in front of a trickling waterfall.
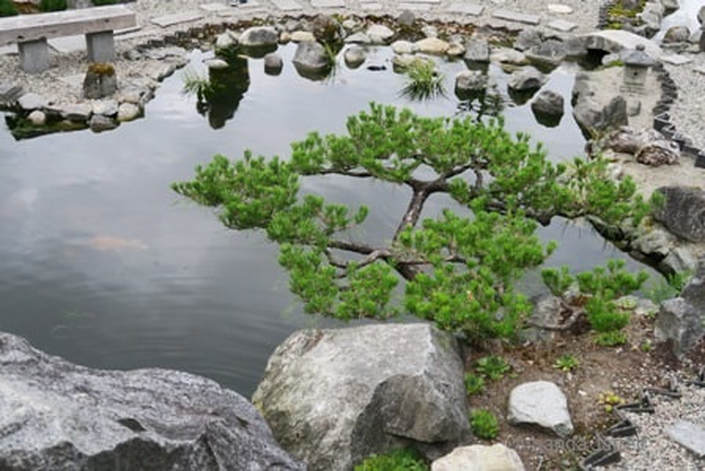 The still water of the pond acts like a mirror to a spruce bonsai .  An unusual shaped pagoda imitates a home in the mountains. 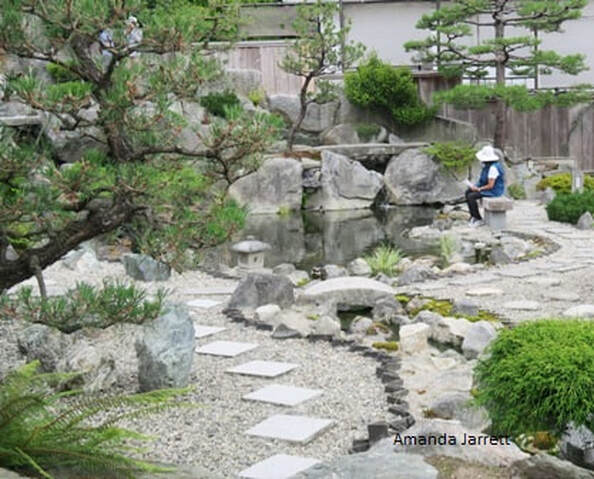 A large pool is the main attraction of the back garden.
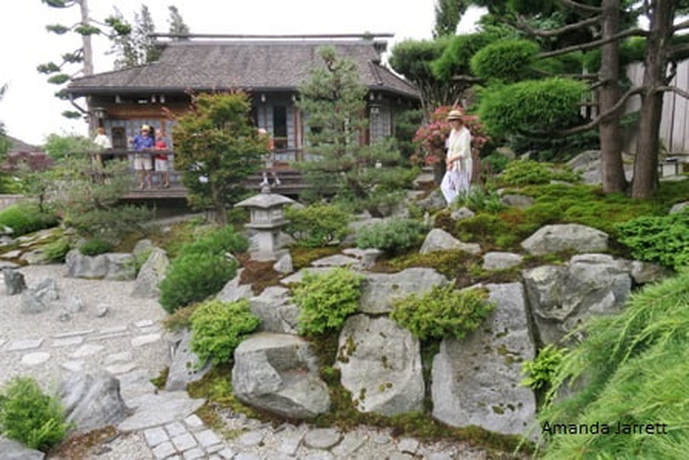
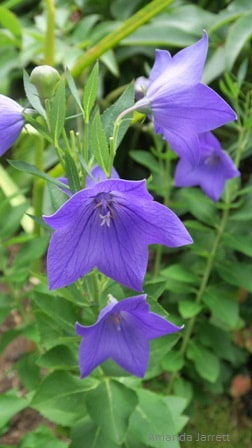
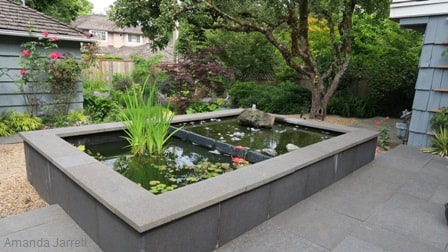
 A pathway leads to the tea house and a Japanese style gate.  A stone path simulates a mountain trail located behind the large pond.  The use of stone as a landing to the stairs is ingenious. Garden #5 Mexican Feather grass, a yellow flowered stonecrop and lavender. There’s no lawn in front of this delightful Craftsman house, but it does have a meadow. It consists of numerous low growing sun loving perennials, but it was the Mexican Feather Grass that stole the show. Its flaxen, silky, hay-coloured stalks partnered well with lavender, blue cranesbill geranium and yellow stonecrop sedums. A turquois ceramic urn topped with red geraniums provided a dramatic focal point. A productive vegetable garden plus raspberries and blueberries takes up the back yard. This lovely garden was designed by Linda Shulman. 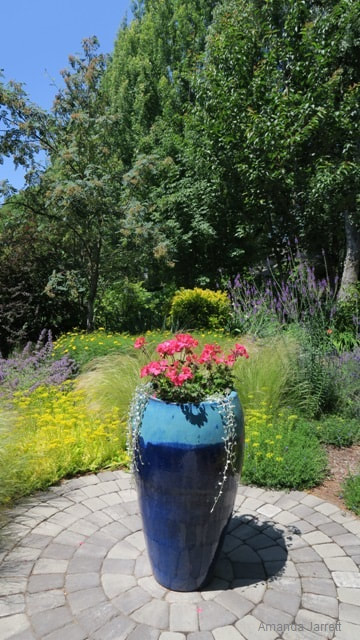 An elegant container with red geraniums is a simple but effective focal point. 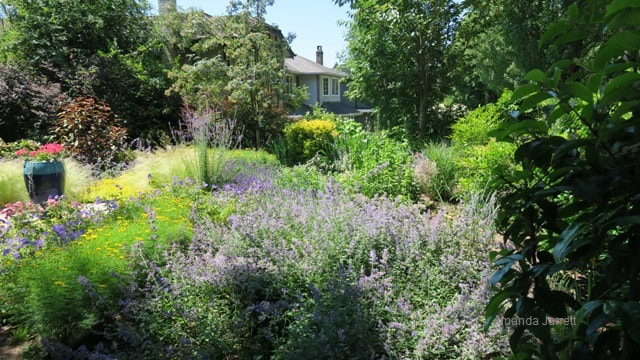 There's no lawn, but there is a meadow. 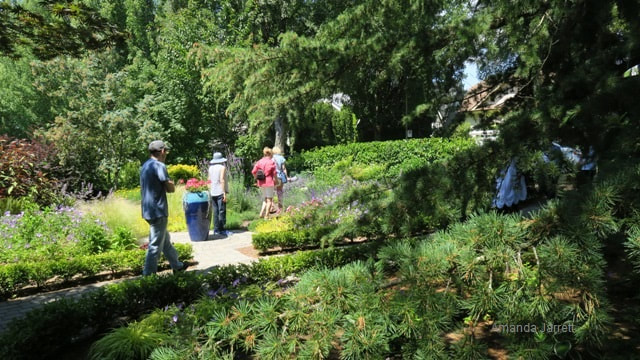 Visitors on the tour explore the garden. 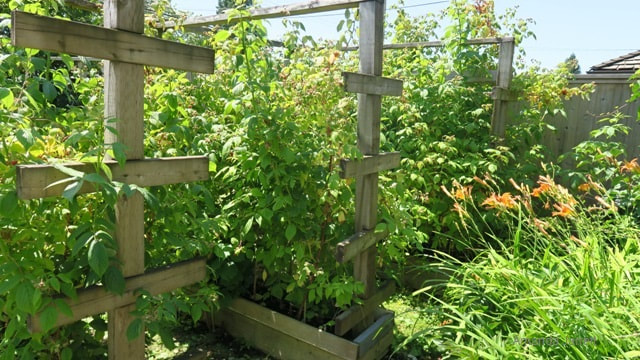 The back garden is dedicated to growing food including a serious raspberry patch. 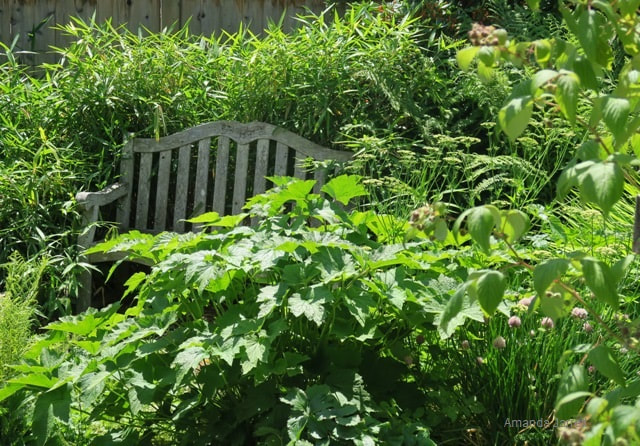 A quaint and handy bench in the veggie garden.  The meadow includes Moonbeam coreopsis, lavender, stonecrop sedum, Mexican Feather Grass and blue cranesbill geranium. Garden #7 Blue accents tie everything together. Blue accents bring harmony to this creative and colourful garden. It starts with a deep blue bench atop thyme rimmed flagstone taking the place of a lawn in the front garden. It is repeated out back with cobalt blue planters, blue and yellow striped cushions, the flowing azure starry flowers of the Waterfall Serbian bellflower and the deep navy spires of the Royal Candles speedwell. There’s a charming pond in the back yard, replete with a water sprouting frog. Artistic and colourful combinations of plants and ornaments are used throughout. 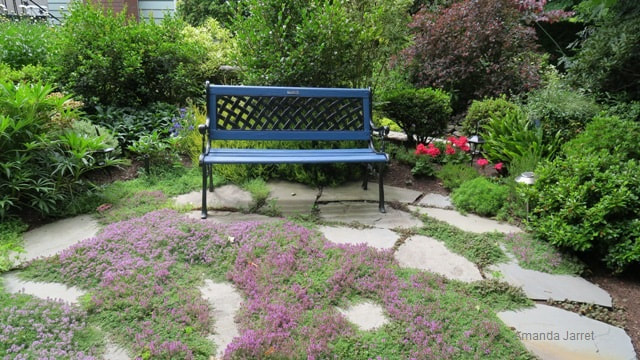 The front lawn was eventually replaced by flagstone strewn with thyme and a dramatic blue bench. 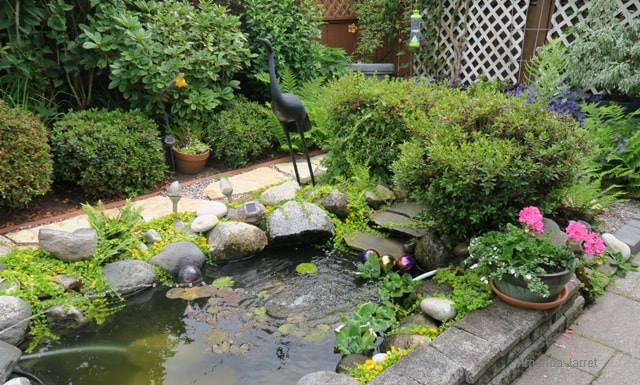 A charming pond is the focal point of the back garden.
 A perfect pairing of an ostrich fern and Waterfall blue Serbian bellflower.  An unobtrusive frog fountain hits the mark.  Framed succulents featuring numerous types of sedums.  A perfect combo of small stonecrop sedums.  A blue wall adds to the blue theme and provides a great backdrop for a pink rose and the geranium baskets above. 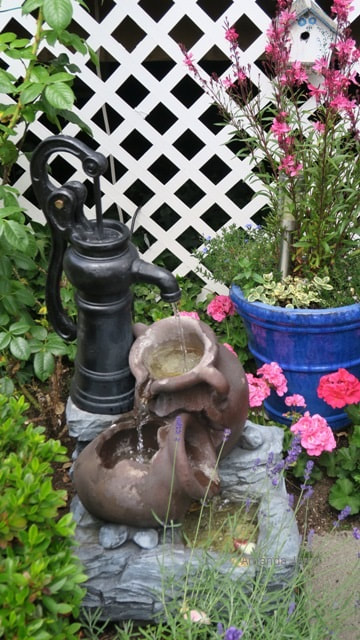 A country themed water feature is one of the many vignettes.
 A pink, salmon and white floribunda rose.  This restful spot is perfect to enjoy the birds enticed to the garden with the many bird houses and feeders. 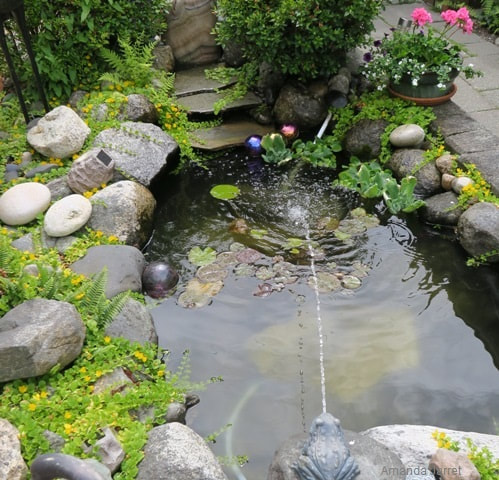 The frog fountain in action. Cute!  Blue Candles speedwell pairs well with a green and cream coloured hosta. Garden #8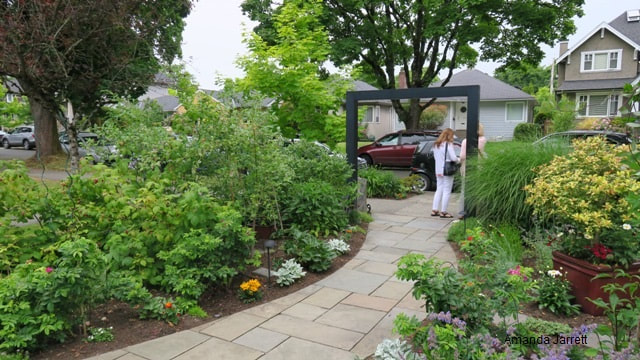 The front garden, framed by a black arbor, is full of food, flowers, ornamental grasses, shrubs and no lawn. There’s no need for a lawn when food and flowers take priority. Raspberries, blueberries and veggies take up one side of the front garden while a birdbath surrounded with bluestone pavers provides a focal point on the opposite side. Ornamental grasses, flowers and shrubs comprise the rest of the gardens including more veggies in the backyard. Designed by Linda Shulman.  Blue ceramic pots hold Japanese forest grass on the left and a purple leaf ligularia on the right. 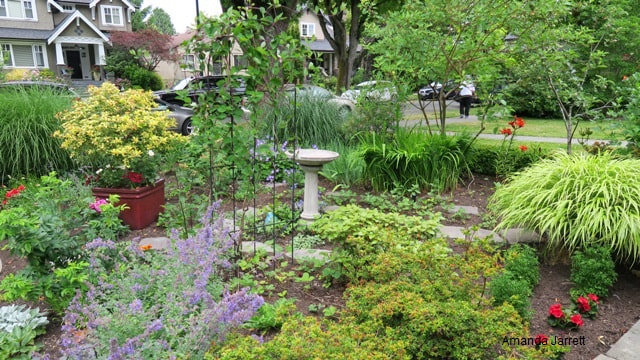 The front garden is accented by a birdbath and bluestone pavers. 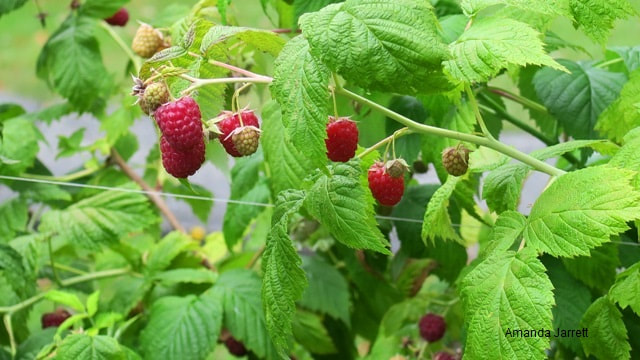 Ripening raspberries are one of the many plants in the food garden.  The leopard plant, Ligularia looks great in a pot with its bold round foliage. 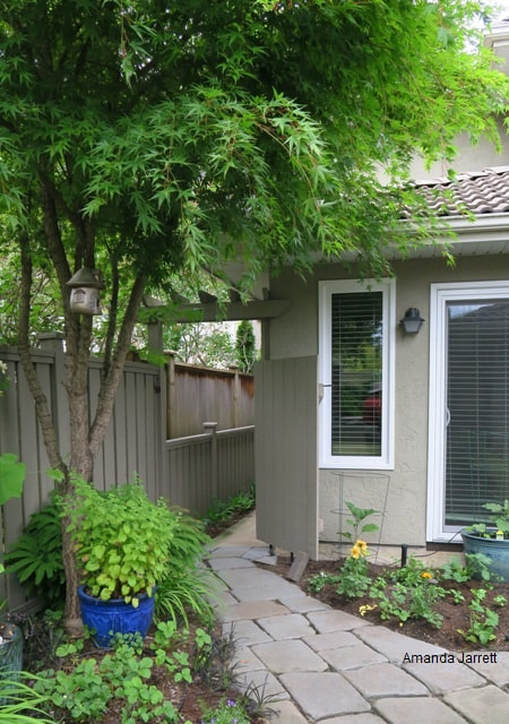 The path to the front garden is framed by a Japanese maple. Garden #9 As visitors enter the ivy covered arched pergola, they are transported into a magical world of gnomes, dragons, moss covered statues and other old world ornaments. The path made from recycled old red bricks winds its way throughout this gothic English style cottage garden. Lush green plants intertwine, cascade and intermingle with the art pieces and drip into the numerous water features. The piece de resistance is a black Victorian gazebo. A wisteria and rose drape across the top providing a green lacy ceiling. Inside there’s a small table draped in a white tablecloth and two chairs inviting visitors to sit and enjoy the enchanted surroundings.
 A wee pond is a place for flower fairies to take a dip.
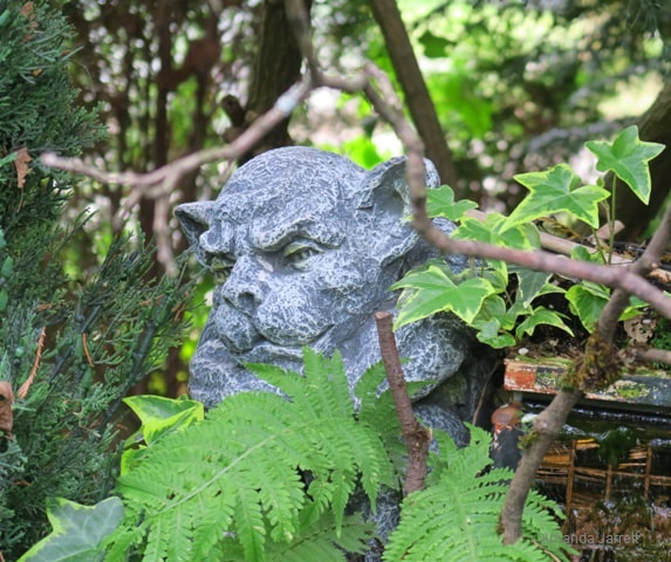 A dog-like gargoyle overlooks the pond below.
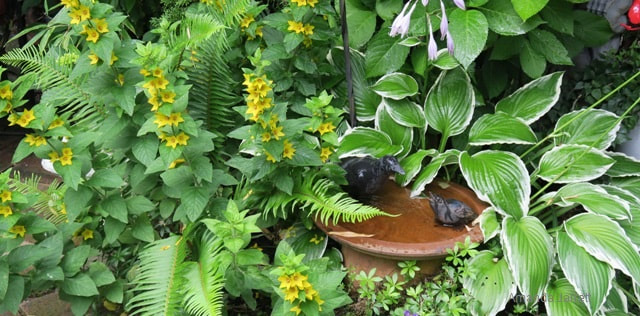 A small water feature is nestled among yellow loosestrife and a white edged hosta.
garden #10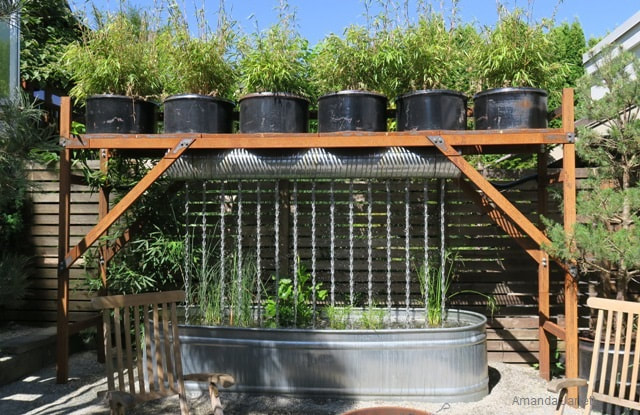 A water feature made from recycled and reclaimed materials, including an air duct. The owner and the designer, Anne-Talbot Kelly, worked together to create this eclectic garden. It has touches of industrial, Asian and West Coast beach, and practically everything is recycled. The most impressive feature is the waterfall made from an old air duct pipe with bins atop to collect rainwater. Water cascades down the chains into a large elongated metal bin below. It was made by Robert Delahanty, a bike mechanic and welder. Cooking oil cylinders and semi-truck wheel drums make unusual but effective planters. This garden has numerous areas to entertain, but the crushed shell beach area is a cool place to hang out. There’s even a fireplace for chilly nights made out of an old barrel with a gas insert. It’s an ingenious and very functional garden made for entertaining. 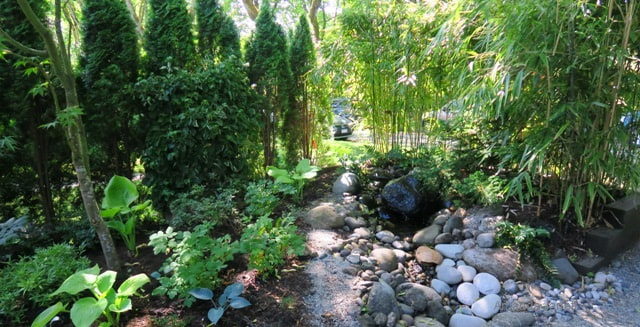 A shade garden and small path.
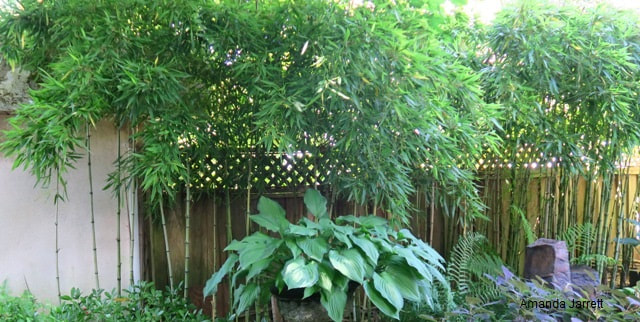
 Metal rims surround Evergold Japanese sedge. 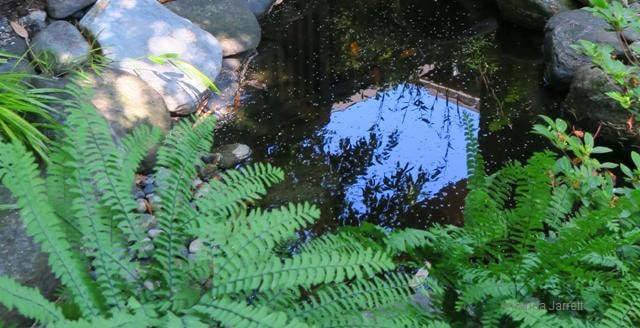 A tiny pond reflects the sky and foliage above.  An industrial style metal planter is filled with upright yews and pretty cherry pink zinnias. 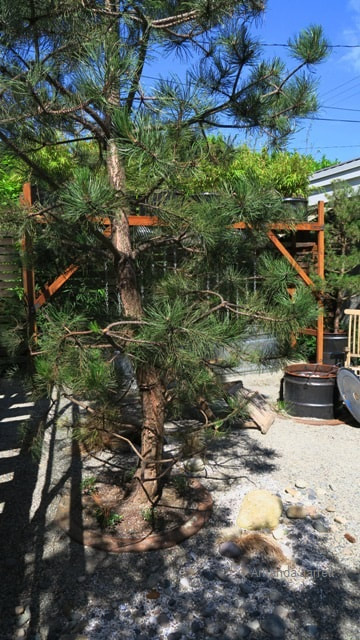 A single pine brings a country element to the scene.  The wooden deck chairs offer a casual beachy feel to this part of the garden.  The rush of water trickling down the chains is very soothing and rather hypnotic. Garden #11 The Arthur Erickson Foundation is the sole owner and caretaker of this iconic home and garden. The foundation offers tour from July to October. Click here for more info. "A clearing in the forest." is how Arthur Erickson, famed architect, described the garden he enjoyed for over fifty years. It's more of a contemplative retreat rather than a traditional garden as there are no floriferous, colourful garden beds, nor a veggie bed waiting to be harvested. Instead there is a stand of Douglas fir and dogwoods framing the pond. Glossy green water lily leaves coat the serene water. Rhododendrons become bold statements especially when combined with the tall graceful bamboo. Large ferns sprout from the bare undergrowth in the dappled shade. It's a serene setting, with simple rustic benches placed to view the artistic vistas made by the light playing upon the scene, changing slowly with the moods of the sun.  Trees planted on a berm facing the pond resembles a forest.  A crow lands on a waterlily. 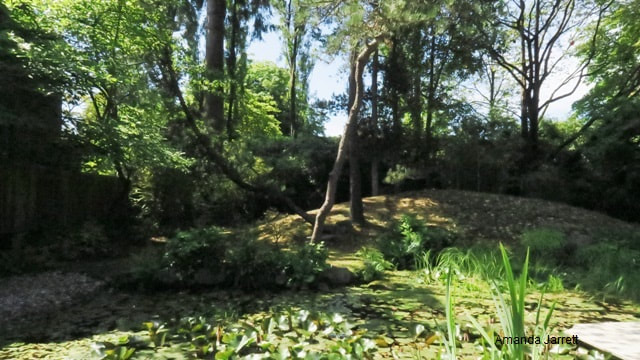 This idyllic scene belies the fact that it's located in the middle of the city.
 A bamboo and rhododendron lined path is forest-like.
 Nestled in the undergrowth a simple bench resides. 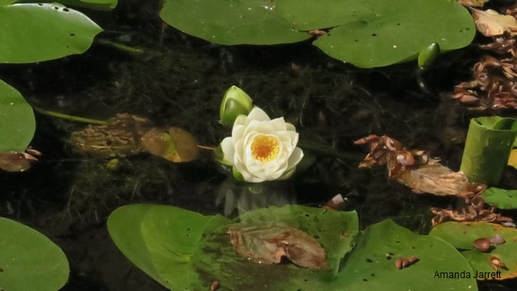 A white waterlily interrupts the shiny green leafy blanket. 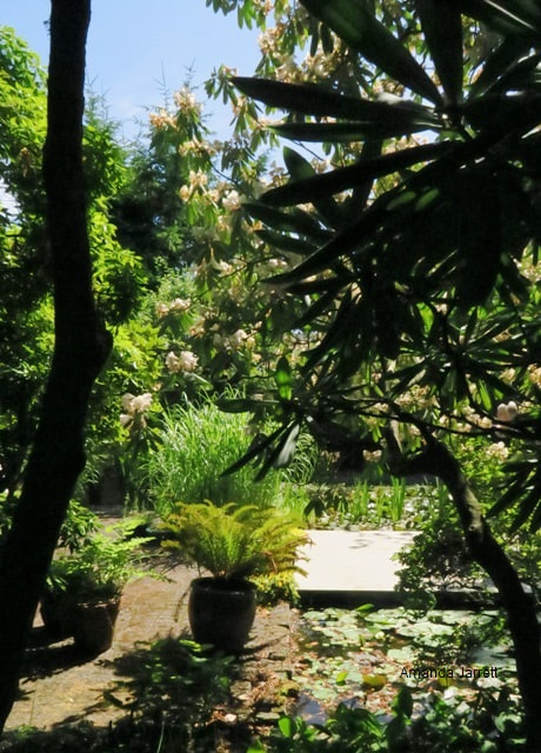 A view from the bamboo and rhododendron 'forest'. 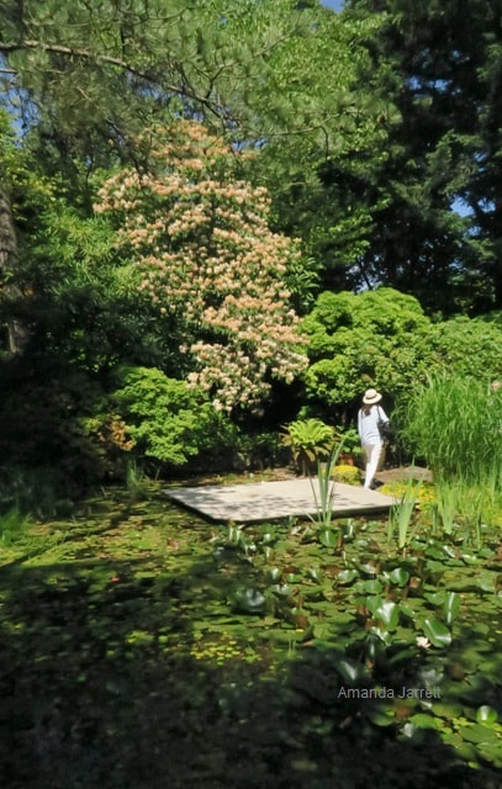 A concrete pad allows visitors to extend into the pond area. 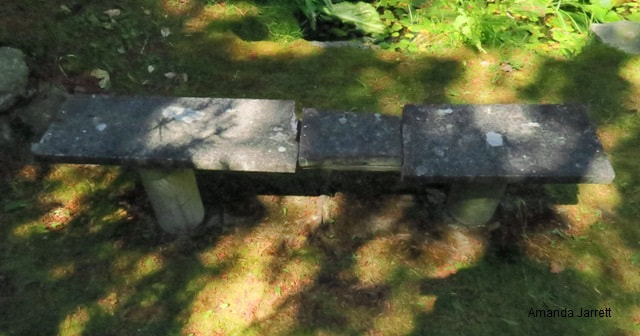 A simple stone bench allows a view of the pond while being part of the forest.  The trimmed trunks of English laurels become a graphic piece of art against the wooden fence. Garden #12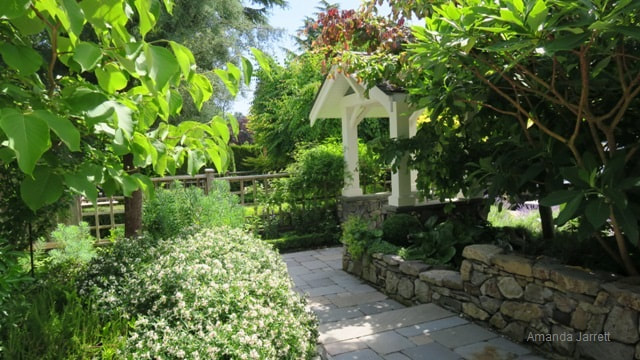 Sweetly scented daphne and jasmine greet visitors as they arrive. An arbor shadowing the style of the house provides an entrance to the front garden. Jasmine’s sweet fragrance fills the air. Their pure white star-like flowers drape over the wooden fence enhancing the attached bench accented with lime green cushions. Designed by Anne Talbot-Kelly, the numerous seating areas are cleverly placed to enjoy this multilevel garden. 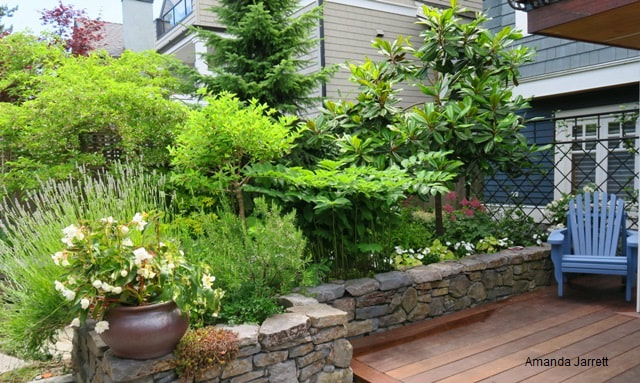 A blue deck chair provides a private place to sit next to the stone raised bed.
 The repeated use of cobalt blue ceramic pots provides unity throughout the garden.
 A blue wall serves double duty as a screen for the fence behind. The window becomes a frame a colourful moss planter full of annuals.
 A white tuberous begonia and a Johnson's Blue cranesbill geranium.  A tuberous begonia flower and Johnson's Blue geraniums.  The view from the deck above.  Japanese spurge surrounds a potted geranium on a stone retaining wall. 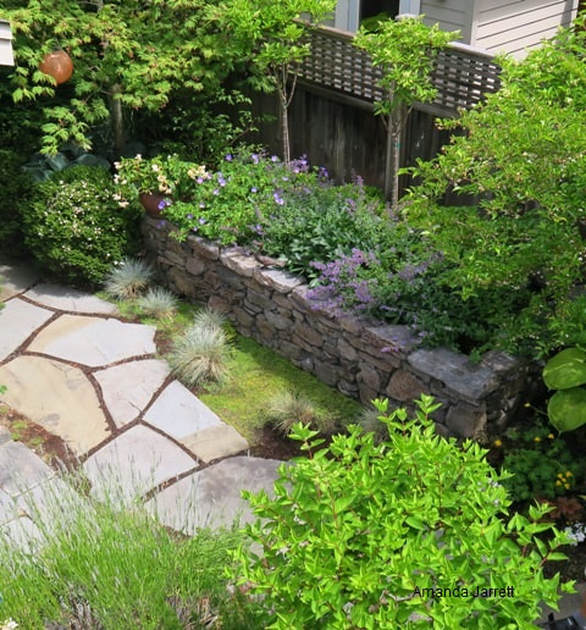 A view from the deck above provides a great vantage point to view the gardens below.  A fragrant jasmine scents the garden besides a built in stone bench. Garden #13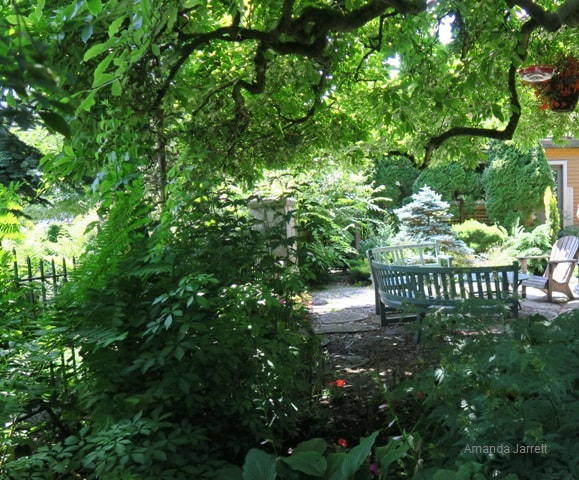 Under the shade of magnolia planted in 1908. This 1908 house still has the original wrought iron fence that wraps around an old fashioned garden, but it doesn’t stop there. The garden spills out with all sorts of shrubs and some small trees past the fence, much to the delight of people passing by. A memorial bench located at the corner of the lot is dedicated to the previous owner and avid gardener, Diana Snow. It is tucked in and wrapped by a lush green hedge for passing pedestrians to rest and view the ocean beyond. Within the fenced area the garden lends itself to comfort and conversation with two curved, green wooden benches arranged in a circle. A huge and original magnolia provides a rich green canopy overhead. Its dappled shade extends far and wide creating lacy speckles of light below.  This burgeoning garden with a flashy pink dogwood, is enjoyed by all those that pass by.  The gated old vegetable garden still exists. 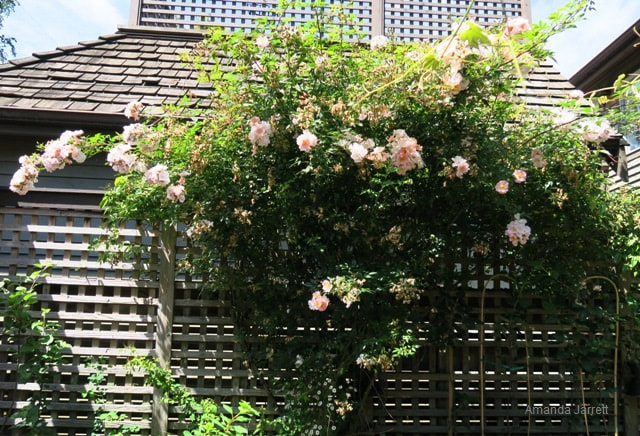 This climbing rose has been here a long time.  A big leaf maple shows its old bones.  Grapes cover an arbour.  The canopy of a majestic magnolia is the perfect spot for this red tuberous begonia. 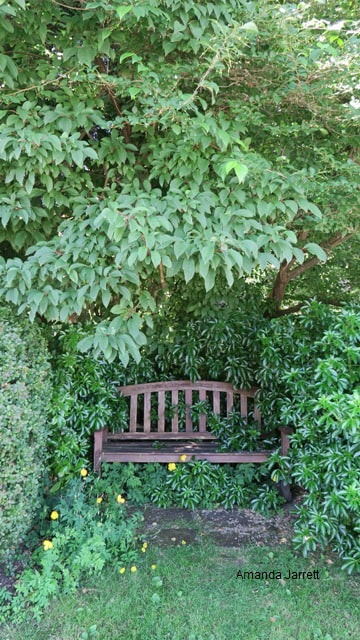 This bench sits on the corner of the lot for those that need to rest and to enjoy the view.  The purple daisy fleabane flowers are surrounded by lungwort's spotted leaves.  Potted pink verbena. 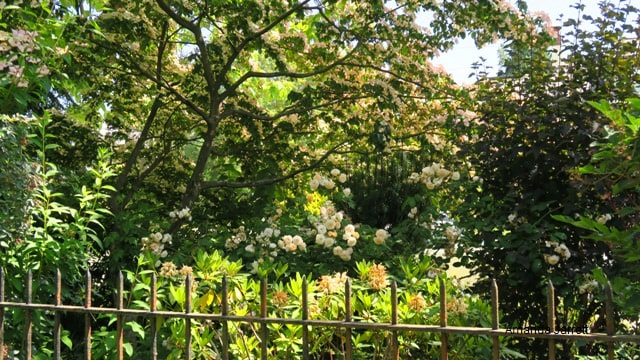 A view over the fence from the vegetable garden creates a floriferous vista.
 The conversation pit fits snugly under the magnolia.  Dappled shade makes patterns on the old antique window.  The view from the garden captures the Burrard Inlet. Garden #14Outdoor living is the focus on this design and installation by De Haas Landscape Design Ltd. A clipped formal yew hedge is accented by black granite pavers that leads to the back garden. An elegant white covered patio looks over this inviting garden designed for entertaining. There are numerous areas to sit and enjoy the flora including a separate seating tucked up against the wooden fence.  A trimmed yew hedge provides a deep green backdrop to the skimmia and helleborus in the foreground. 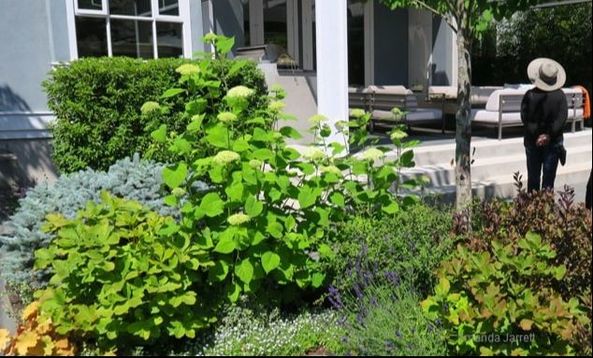 A central raised bed softens the surrounding hardscape.
 Orange coral bells provide a frilly skirt for the dwarf blue spruce. Garden #15 A goblet fill with succulents. A number of large trees shade this 1925 Craftsman home and the accompanying small paved courtyard. It features a rock fountain that gently cascades into a quaint pond. Tall bamboo becomes a striking form against the pale walls and wooden fence. The Italian inspired patio is is dotted with pottery and art from the owner’s travels. In addition to the delightful art and keepsakes, Keith Rice-Jones sculptures were discretely displayed among the ferns, the hostas and coral bells for this special event.  Containers line up along the steps.
 A single coleus fills its container with bronze foliage rimmed in chartreuse.
 An eager gargoyle begging for attention.
 Bamboo lines the fence creating an airy screen.  The light from above filters through the tree and into the garden below.
 A natural looking water feature. 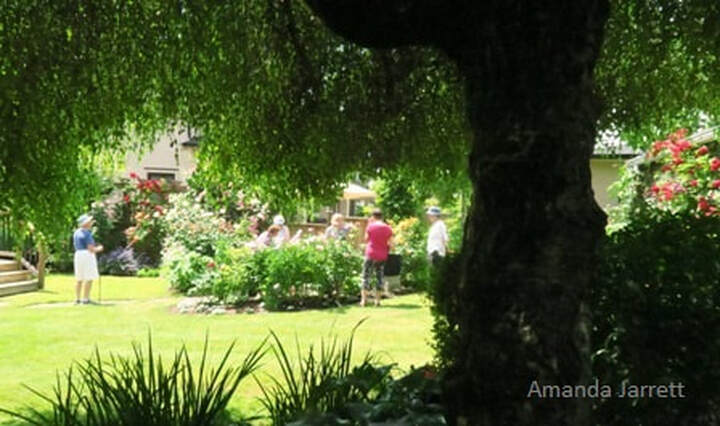 Dunbar Garden Club members admiring Nola Frost's garden. It was a hot and sunny Father’s Day in June when the Vancouver’s, Dunbar Garden Club had their annual member’s garden tour, which I gleefully attended. I was impressed as well as inspired by the five very different gardens. Although many plants were in flower, it seemed to me that it was the roses that stole the show. The many creative flower combinations brought out the very best of each individual. I couldn’t get enough of the many wonderful peonies, roses and clematis combinations. If you want to take the tour with me follow below. I’ve written a few things of note for each garden and theirs lots of pics as per. Hope the photos inspire you as much as the real gardens inspired me. Thank you to all the garden tour hosts for their generosity and kindness. Cheers, Amanda 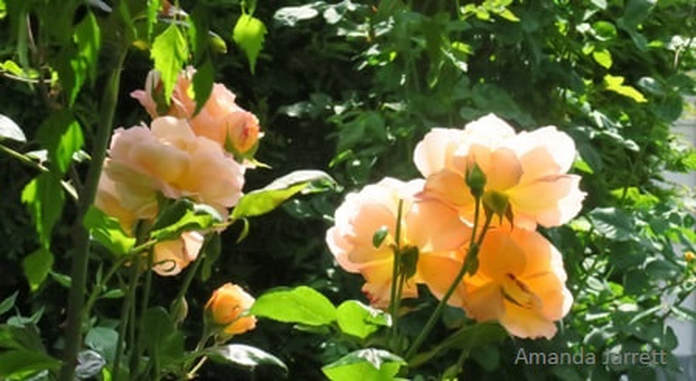 Rosemary Harkness is a Gold Medal & Fragrance Award Winner reliable, free blooming hybrid tea rose. It apricot coloured flowers bear a sweet citrus scent. It grows 3ft x 3 ft. Nola Frost - A Garden of roses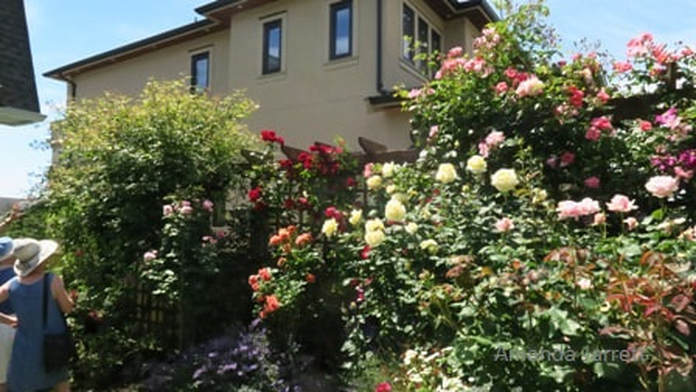 Climbing roses provide a backdrop for the many robust roses in the foreground. If you are not a lover of roses, this garden might just change your mind. Unlike most formal rose gardens with blocks of roses surrounded by boxwood hedges, Nola has incorporated bold, beautiful and floriferous roses throughout her garden. They are artfully interspersed between vibrant peonies, lilies, clematis and other garden beauties. Climbing roses are an obvious favorite of hers as they have been accommodated by the many trellised covered walls and arbours. Nola’s roses are virtually blemish free, but such healthy and beautiful roses must need lots of care, right? Well, that is just not the case. There is no spray program except for an occasional application of dormant oil/ lime sulfur mix in the winter. Fertilizer is applied yearly in early spring and a layer of a rich organic mulch on top of the soil is applied every other year. They really are easy care roses. As a member of the Vancouver Rose Society, Nola knows her roses and makes a point of growing those that are resistant to black spot and mildew. This is why she likes the new modern roses that are bred to be disease resistant as well as the reliable and tough Old Garden roses. When asked which rose were her favorite, Nola responded with three different ones ‘Dublin Bay’, ‘South Africa’, and ‘Summer Wine’. Sadly Summer Wine was not in flower during my visit so I don’t have any pictures. Although I already love roses and have a few in my garden, Nola inspired me to grow more. I have no idea where to put them in my bursting garden, but I just can’t resist. Oh no!  Compassion is a continuous blooming climber with fragrant pinkish-apricot 4 inch blossoms.  Golden Gate is a vigorous repeat climber with fragrant citrus and fruity scented 3 inch blossoms.
 Graham Thomas is a David Austin rose with fragrant 4 inch blooms on vigorous, slender upright 5 ft shrubby bushes. A repeat bloomer. An Award winner.  James Galway is a David Austin climbing rose with frilly pink petals with an old fashioned rose sent. Repeat flowering and grows 5ft x 4ft.
 Teasing Georgia flowers are packed with petals.  Easy Does It is a repeat flowering floribunda. Flower are fragrant on tall 6ft plants.
 South Africa, a grandiflora, grows 5 ft, fragrant 4 inch blossoms and a repeat bloomer. An award winner. 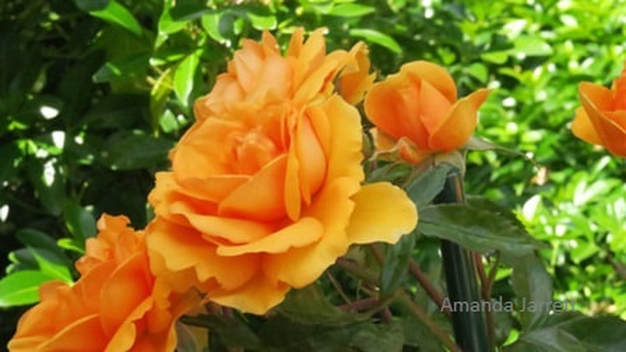 The grandiflora rose, South Africa.  Kardinal Kolorscape 'Forever & Ever' rose flowers continuously and needs no pruning. Grows to 2 ft, fragrant and low maintenance.  Bull's Eye, a 5ft shrub rose, with fragrant repeat blooms. 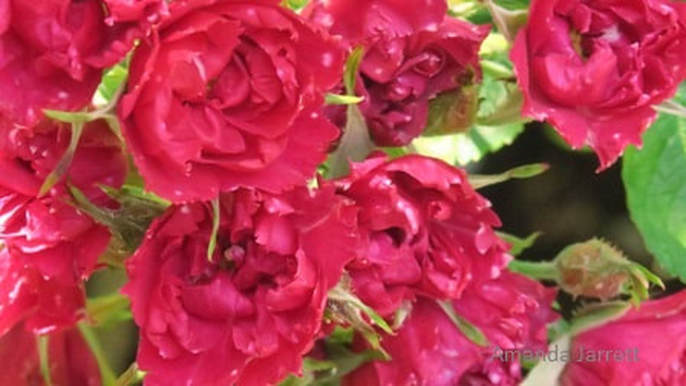 Grootendorst Supreme, a rugosa, grows to 4 ft blooms repeatedly but bears no fragrance. Very hardy and reliable. Helen Smith – A Tale of Two Gardens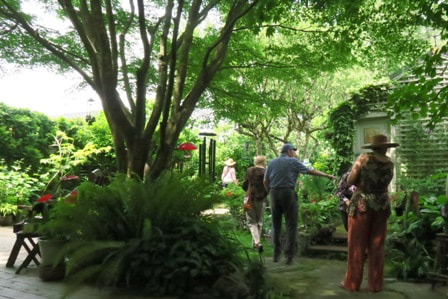 Helen's shady back garden boasts bird feeders, a koi pond and fun little touches. A tall retaining wall greets all that pass Helen’s garden. Rugosa roses cover one end of the rock wall and bright yellow creeping jenny and stonecrop sedum provide a brilliant groundcover at the entrance. It’s only when you walk up the stone path that you get a sneak peak of what’s to come. There’s a circular sunken patio with chairs and table inviting visitors to sit and enjoy the sunshine. It was a nice surprise. This patio becomes the main focal point when viewed from the house, but relaxation isn’t the only intent of the front garden. There’s a path that winds its way around the patio with vegetables and ornamental plants blending together in harmony. Asparagus, pole beans, squash, basil, garlic, chives and other edibles are mixed in with peonies, spirea, ninebark and other ornamental plants including a stunning deep purple clematis. When walking from the sunny southern facing front garden to the back yard, the bright sunshine gave way to coolness and shade. Green leaves of different hues, shapes and forms dominated the small but well-appointed garden. And it is full of life. A netted fish pond sits below an ivy covered wall and active bird feeders hang above in overhead tree branches. Helen has added many lovely little touches to amuse and delight. A stone frog, a bunny by the stairs, a wee frog in water-filled rock, a rustic birdhouse tucked in behind Japanese forest grass and at the front, there’s a clay pot on its side spilling out succulents. Helen has artfully created two distinct gardens that are both functional and innovative. 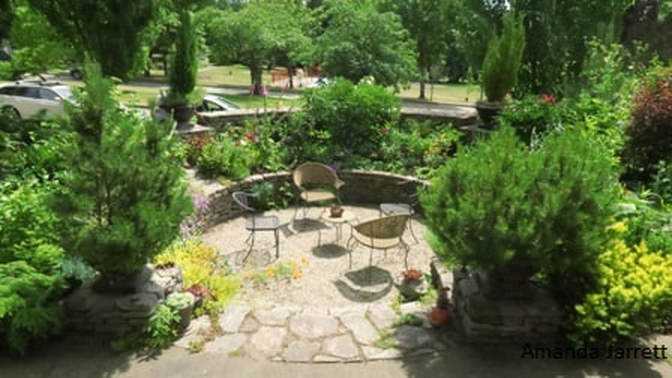 The front garden is hot and sunny with a patio surrounded by a garden full of edibles.
 A stone retaining wall hides behind robust rugosa roses 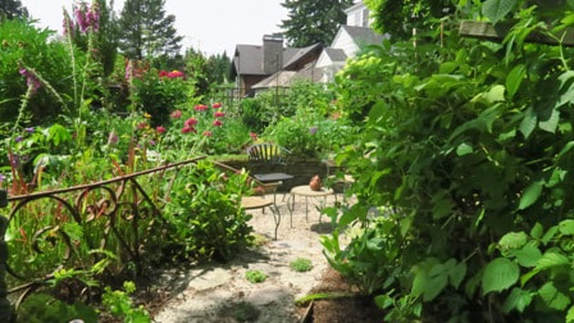 On the other side of the retaining wall lies this inviting sunken patio.  This is a great way to display a miniature hosta.  Mature Oregon grape hollies, laden with blue berries, provide an architectural backdrop to the chartreuse Mexican orange in the foreground.
 Water in a wee pond reflects the Japanese maple tree above. 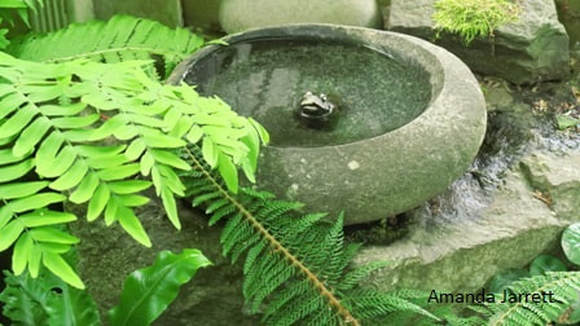 Within the tiny pond, a little stone frog rests.
 Ferns lay at the feet of a huge Western red cedar. 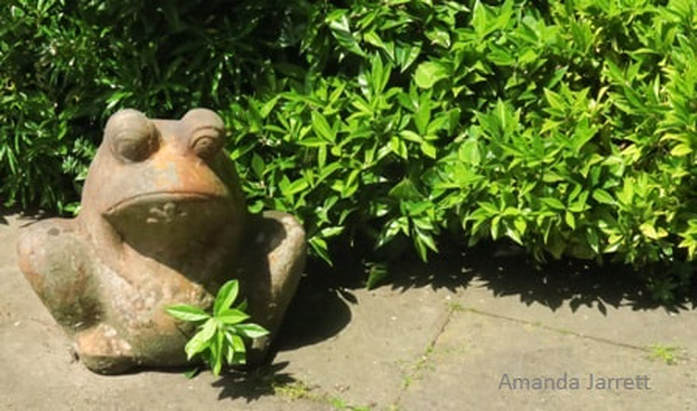 A frog seems bored and unimpressed by all the garden visitors.  The entrance to the front garden.
 The shed is surrounded by well chosen and arranged shade loving plants.
 A lush garden border is a safe haven for the visiting birds.
Larry and Margaret Moore – A Garden of Rooms  Huge flowers of the Nippon Beauty peony. This heritage home has been in the family since it was built in 1924. The large 84ft x 120ft lot is divided into numerous rooms to serve specific functions. The front garden display gardens wrap around the large lawn and the garden’s perimeter. A concrete garden urn provides an accent and a touch of formality while the wood wheelbarrow with a container of Bishop’s weed provides country flair and breaks up the large lawn. The backyard is a whole different ball game, literally as it opens up to a vast lawn with a basketball hoop on one end. With generations of the Moore family growing up in the house, the garden must be multifunctional. There is a kitchen garden full of edibles that doubles as a play area for small children that includes play house. As Larry explained, the kitchen garden opens up to the living room where people congregate and sit. Tucked away in the 'living room' is a serene pond laden with fish and waterlilies for everyone to enjoy. For privacy and to rest, another garden awaits on the other side of the property. It’s shady, intimate and features green and white plants that adds to the serenity. A striking stained fence provides a warm, fresh backdrop to the white goats beard, hosta and other shade plants. A bucket of blue campanula seems to flow aimlessly out of an old water pump. It provides a fine accent to the stylish bench beside it. This garden is one for all ages, which is evident with the garden rooms that perform specific functions for every member of the family, no matter what their age.  A birdbath becomes an Asian vignette with the addition of a pagoda and a Japanese maple. 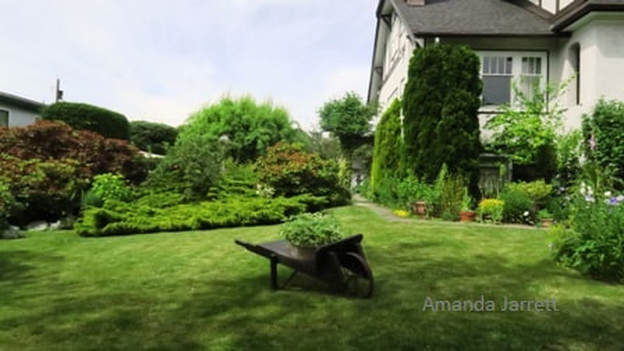 A quaint wooden wheelbarrow provides a nice accent in the vast lawn. 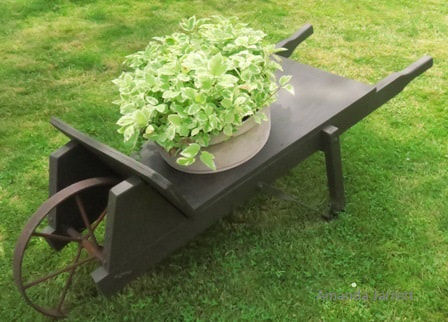 The wheelbarrow contains a planter full of the otherwise invasive goutweed.
 A cute way to display wooden clogs and sedum. 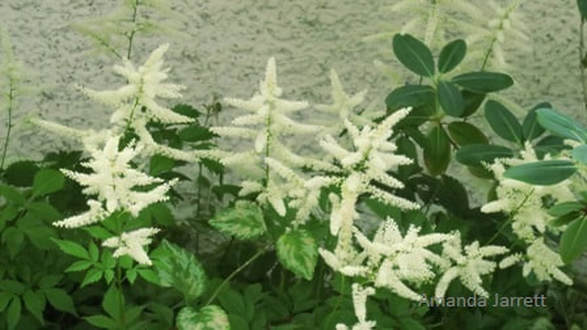 A white astilbe likes the shade and moist soil. 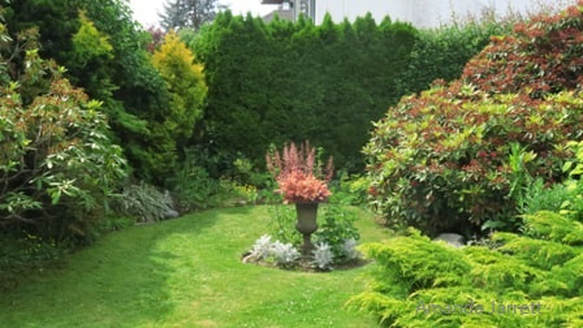 This urn planter is located on the front lawn surrounded by the large and lush garden beds. 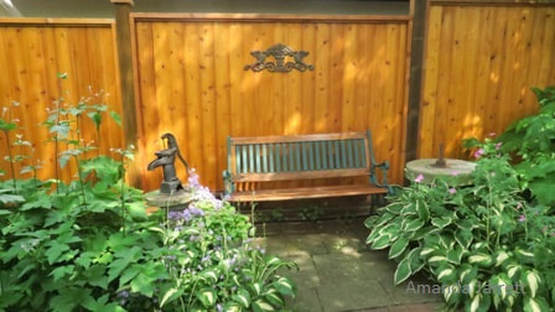 A secluded bench is a wonderful place to relax and enjoy the garden. 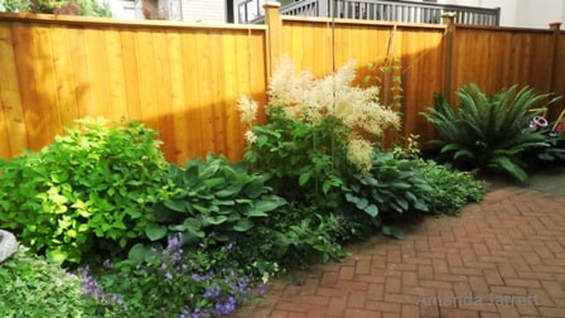 The white plumes of a goat's beard (Aruncus) is showing off in this shady garden.  The food garden and play area for the grandchildren, sits beside the ;living room' where the family congregates.
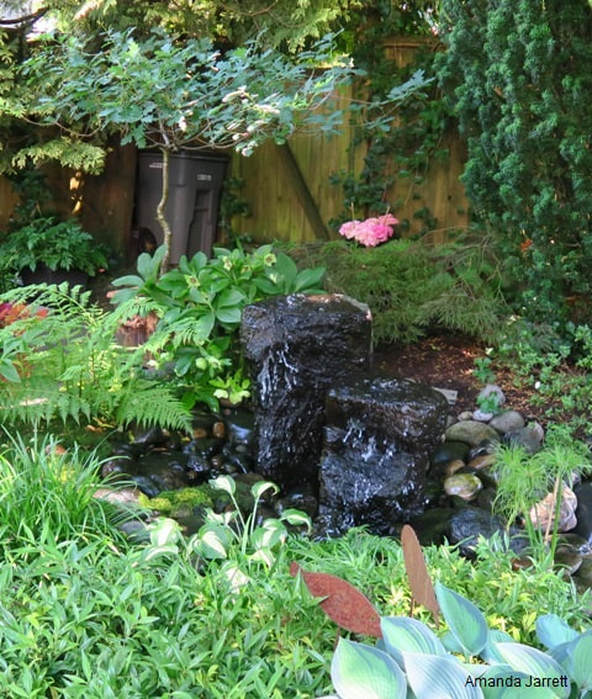
 A small water fall trickles water into this lily and koi pond.  A perfect water lily. Jennifer Buckland - Art in the Garden The front lawn is embraced by softly formed beds.
 The entrance to a small loosely formal secluded garden.
 The secluded garden offers a bench placed so you can see the gardens beyond.
 The back garden is full of hostas, a gunnera and a charming piece of art.
 Beside the pond, emerges this charming ornament.
 I will never again throw out my old shoes.  A beautiful hosta is adorned with painted a red allium seed head. 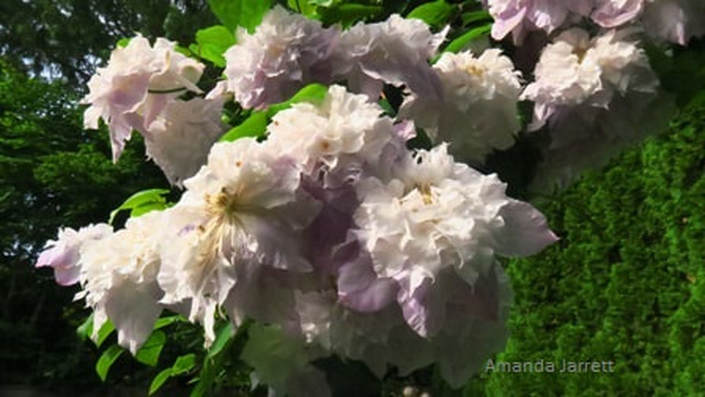 Veronica's Choice, a double flowering clematis, cascades over an arbour. 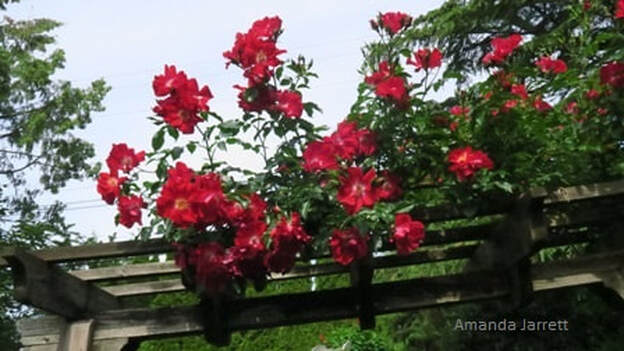 Dortmund is a dependable and beautiful climbing rose.  Dortmund climbing rose.  Mediterranean spurge, Euphorbia characias, becomes an easel to hold an original piece of art.
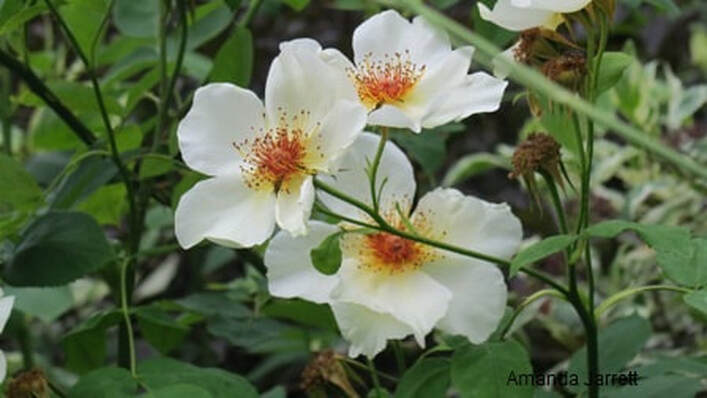
 A climbing species rose, Lady Banks. One of the earliest flowering roses. Blossoms only once but it is smothered with gorgeous yellow flowers that smell of violets. Lovely. If you love roses but are afraid of taking the plunge or just don’t want the extra maintenance, new shrub and landscape roses as well as old garden roses, may change your mind. They are all beautiful, easy to grow and most need little maintenance depending on your climate. The following roses do well in the Pacific Northwest, specifically Vancouver, BC. Winters are wet; sometimes it snows but mostly its green and wet. Summers are not very hot, but they are quite dry. Most of these roses do well here, despite the lack of sun and heat for much of the year. Black spot is a problem, so is mildew, never mind the aphids. We need disease tolerant roses that don't mind wet, grey days and cool temperatures. No matter where you live, select roses that grow best in your area. Most of the roses mentioned here do well in most of North America and the UK. If it is difficult to grow roses in your neck of the woods, go to your local nursery, ask your rose growing neighbours and check out rose clubs and societies in you area. For more information on types of roses, click on the following subjects:
Hybridizers and breeders have worked diligently to develop continuous flowering, pest free, hardy, dependable roses that are beautiful. Flower clusters replace the traditional romantic single rose. Tresses of flower laden canes throughout the summer translates well as a reliable garden shrub. Many are also fragrant. Canadian breeders have developed hardy roses for the north with their Canadian Explorer Series, named after explorers of note. Other easy roses that take the worry and stress out of rose growing include Parkland Roses, Meidiland Landscape Rose, Flower Carpet Rose, OSO Easy Roses by Proven Winners and Knock Out roses.  Pink Pet (Caldwell Pink) flowers all summer, is disease free, bug free and compact plant - what's not to like? 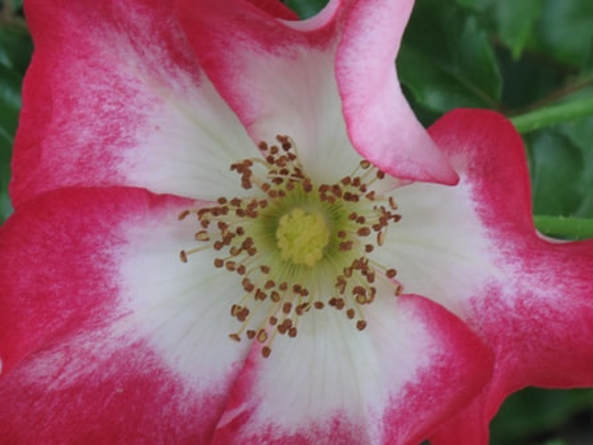 Pink Meidiland Rose blooms continuously until frost and is disease resistant. Other easy care roses are Old Garden roses: Alba, Centifolia, Damask, Gallica, Moss, China, Bourbon, Hybrid Perpetual, Noisette and Tea roses are made of tougher stuff. Some bloom only once, but when they do, they drip with beautiful and bountiful blossoms. Flowers are usually fragrant, come in a myriad of colours and either bear 5 petals to blossoms bursting with them. Some bear colourful hips come fall, which also feed hungry birds during the winter.
Species roses (wild roses) have been unaltered by plant breeders. They grow on their own roots and are not grafted like the hybrid teas, grandifloras and floribundas. This makes them hardy and pest resistant especially when grown in their native habitat. The Nootka rose hails from Nootka Sound in BC, others include Lady Banks’ rose, Alberta rose, Musk rose and the Multiflora rose.  The Oso Happy Smoothie landscape rose by Proven Winners, flowers profusely and doesn't suffer from insects or diseases. It's thornless too.  The light pink rose is Bonica, a modern shrub rose (R. bonica). John Cabot, from the Explorer series is the deep pink rose.  Salmon Carpet rose, flowers all summer into fall, is disease and insect free. 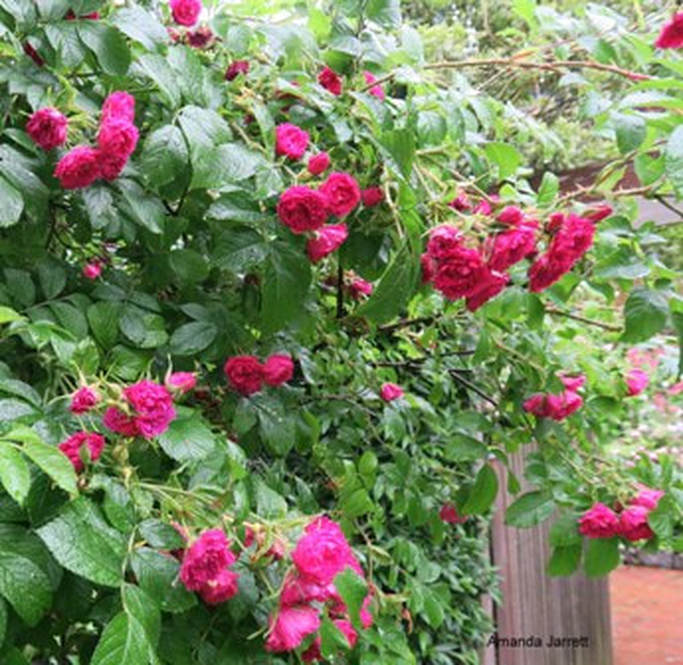 F. J. Grootendorst is a lightly scented rugosa rose. It flowers all summer and is trouble free. Worthy of a mention are shrub roses Hybrid musk and the Rugosa rose. They are also easy care and bloom more than once, are fragrant, bear nice rose hips and tolerate partial shade. They are tough, hardy and the bees and birds love them. 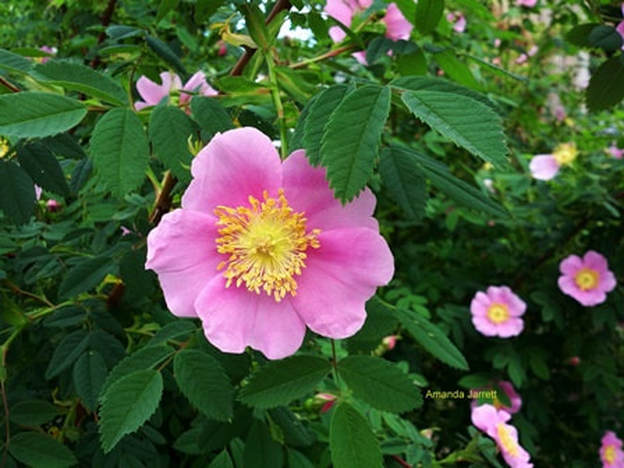 A species rose from Nootka Sound, the Nootka rose, Rosa nutkana. For more information on types of roses, click on the following subjects:
Types of Roses How to Grow Roses Climbing Roses Pruning Roses Roses Insects & Diseases  A mixed shrub and tree border featuring large flowering rhododendrons and a bright yellow maple tree. Billowing and blossoming shrubs, stately towering trees and drifts of flowers greet visitors at the Dart’s Hill Garden Park. From its conception, a mere 70 years ago, this garden park has matured into a beautiful oasis. This 7.5 acre garden has something for everyone. There are numerous plant collections including rare plants for us plant lovers, heritage trees, an old but well-kept apple orchard, a pond, stream and borders crammed with plants of all kinds. Huge rhododendrons thrive underneath the expansive tree canopies. The lush undergrowth features swaths of pink primroses, blue bluebells and yellow leopard’s bane daisies. Although Darts Hill feels and looks very natural, the gardens were created by Francisca Dart. With help from her husband Ed, Francisca laid out the gardens and filled them with rare and unusual trees and shrubs. It’s a plant lover’s utopia with old-boned trees providing living walls and ceilings made from their leaf laden branches. The resulting dappled shade are the perfect conditions for many plants, especially rhododendrons, camellias, primroses and azaleas.  Pink and red rhododendrons, yellow primroses and blue carpet bugle sit beside a handy bench. It was a sunny day in May when I visited Darts Hill with the Dunbar Garden Club. The timing was perfect as the rhododendrons were on full display. It was breathtaking. I especially loved the path lined with blue-flowering Rhododendron augustinii... and the pond. The pond is so serene. Its babbling brook spills over strategically placed rocks into the still pool below. It is beautifully landscaped with a perfectly situated bench to admire the view. My pictures do not do it justice. 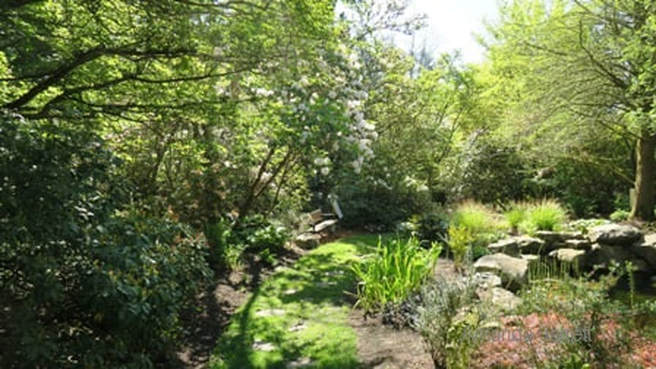 The tail end of the pond where a bench overlooks the view.
For those that need a retaining wall, check out the dry-stacked stone wall. Although it was just installed, it looks like it had been there for centuries. The accompanying garden was being planted as we passed, labels included. Since this is a gardener’s garden with many rare plants and plant collections, most of the plant are labelled. This takes the guesswork out of plant identification and notes specific varieties and cultivars. 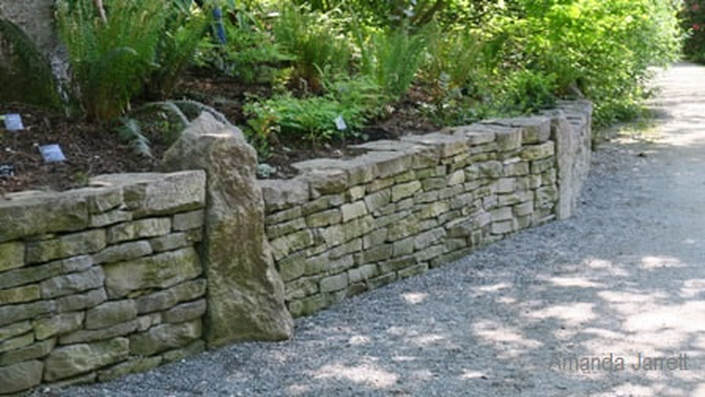 The newly installed dry stone stacked retaining wall has old world charm. The Darts house still stands and rises above a vast expanse that includes a heritage apple orchard. But it's the humongous heritage walnut tree (Juglans cinerea x J. siebolidiana v. 'Cordiformis'), that steels the show. Its branches are so long and heavy, they are supported with metal braces.  Francisca and Edwin Dart's house sits atop a hill overlooking the heritage apple orchard. Eventually Francesca had to give up the garden but instead of selling the property to developers, Francesca donated it to the City of Surrey in 1994. Along with the city, the non-profit Darts Hill Garden Conservancy Trust Society, work together to educate, protect, maintain and cultivate this little piece of paradise in South Surrey. The garden is open to the public from 11 a.m. to 3 p.m. on most Fridays, Saturdays and Sundays in April, May, June, July, and September. They also have special open Houses on May 26, September 22, and October 20. Tours are also available, which I recommend as there is so much to see. Become a member for extended openings and opportunities to volunteer. For more information go to Dart’s Hill.  Planted in 1997, Canadian-Japanese Walnut hybrid, Juglans cinerea x J. siebolidiana v. 'Cordiformis, is a heritage tree. 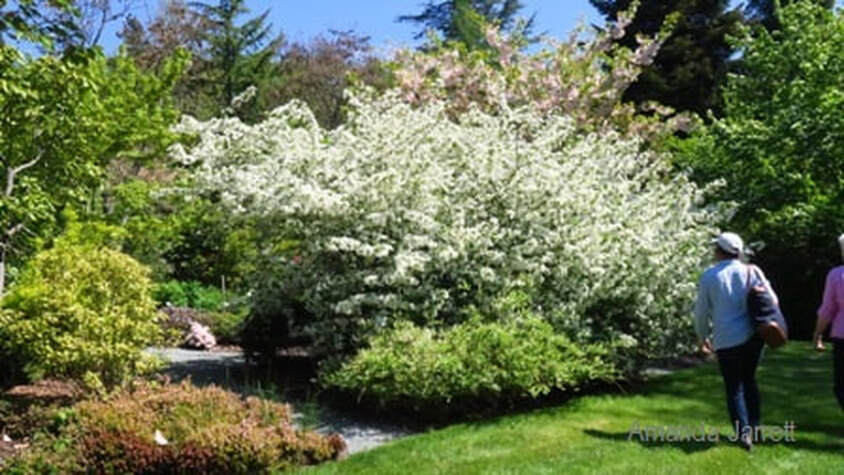 A Sargent crabapple in full bloom.  A close-up of the Sargent crab apple flowers.
 Purple aubretia and a low spurge (Euphorbia) intermingle creating a colourful ground cover.  Cushion spurge and aubretia make a good pairing.
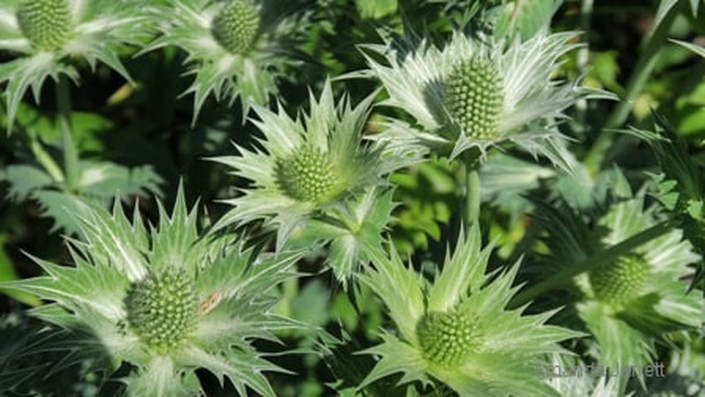
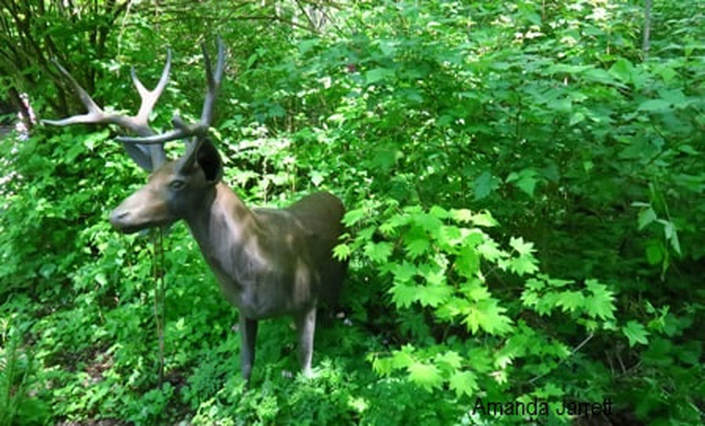 A deer statue adds a little touch of whimsy.  Eryngium agavifolium, agave-leaved sea holly.  Cushion spurge, Euphorbia polychroma.  Delavay tree peony.
 The lovely blue flowers of the Rhododendron augustinii. 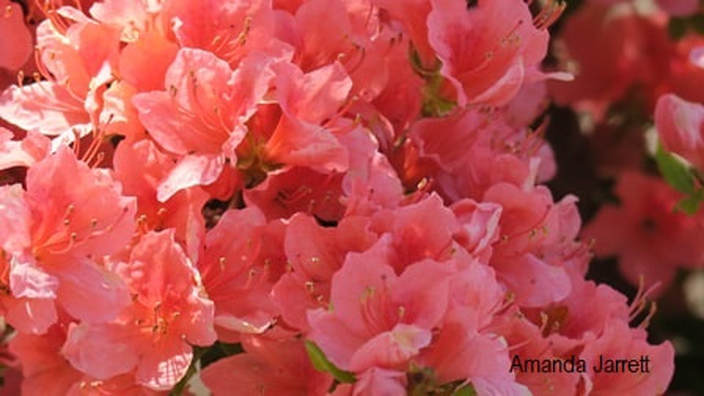 Kaempfer azalea, Rhododendron kaempferi. 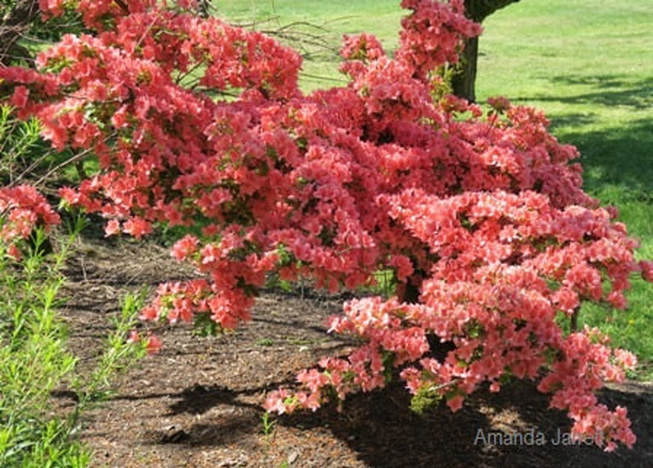 Kaempfer azalea. 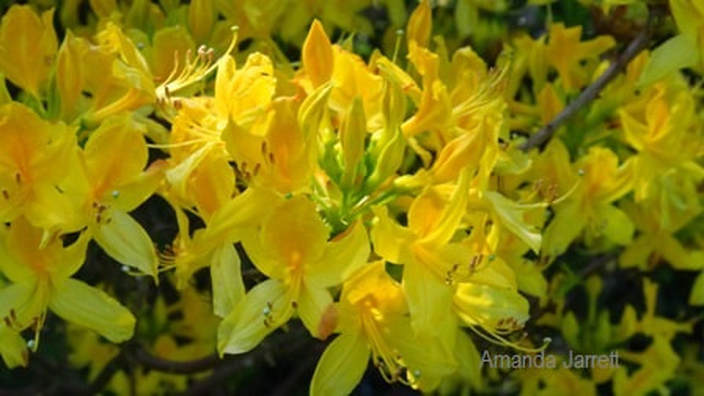 A yellow azalea, Rhododendron luteum. 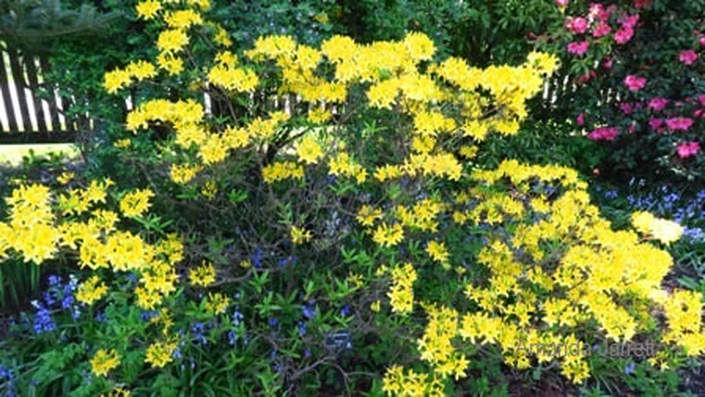 A yellow azalea, Rhododendron luteum. 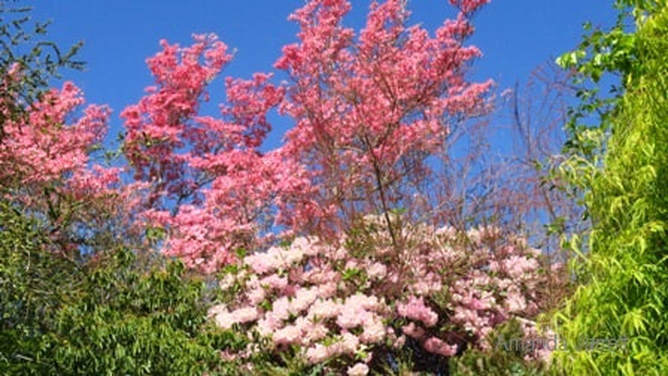 A deep pink flowering dogwood emerges from a soft pink rhododendron.  A yellow primrose provide contrast to the blue spiked flowers of the carpet bugle (Ajuga reptans).  Leopard's bane, Doronicum orientale.  Plants are often left to do their own thing and form drifts of colour like the Leopard's bane.
 Red Bells enkianthus, E. campanulatus 'Red Bells'. 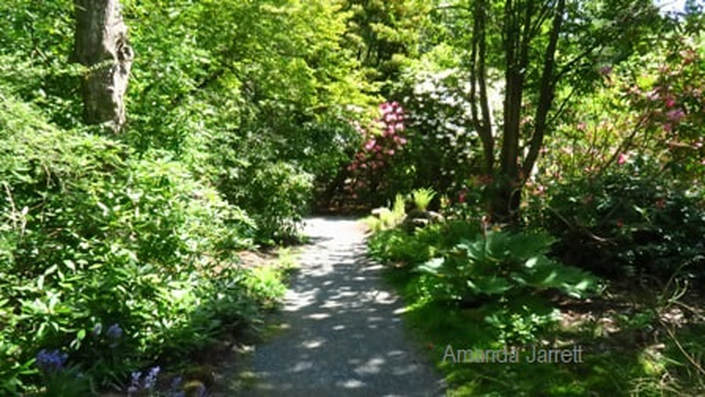 One of the many paths at Dart's Hill.
 A majestic fern-leaf beech, Fagus sylvatica 'Aspeniifolia' is quite impressive.  A charming hand-made bench.  This yellow rhododendron is a real beauty and sits behind the bench in the apple orchard. 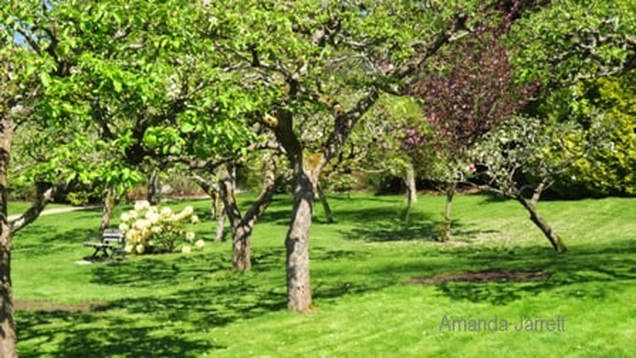 The heritage apple orchard has a strategically placed bench along with a beautiful yellow rhododendron.
 A close-up of a ground-hugging spurge (Euphorbia).  The flowers from the perennial, Darmera peltata, umbrella plant.  A white peony is backlit by the May sun.
 Leopard's bane and a red rhododendron look darn good together.  A Shirofugen Japanese flowering cherry flower cluster with the garden in the background.  A light variety of the Blue Rhododendron group, Rhododendron augustinii.  A nicely done rock garden featuring labelled plants to help you design your own rockery.  Yellow and orange deciduous azaleas combine with leopard's bane to brighten up a shady spot.  A variegated Chinese elm, Ulmus parvifolia 'Variegata'.  This variegated Chinese elm is a gorgeous specimen tree. 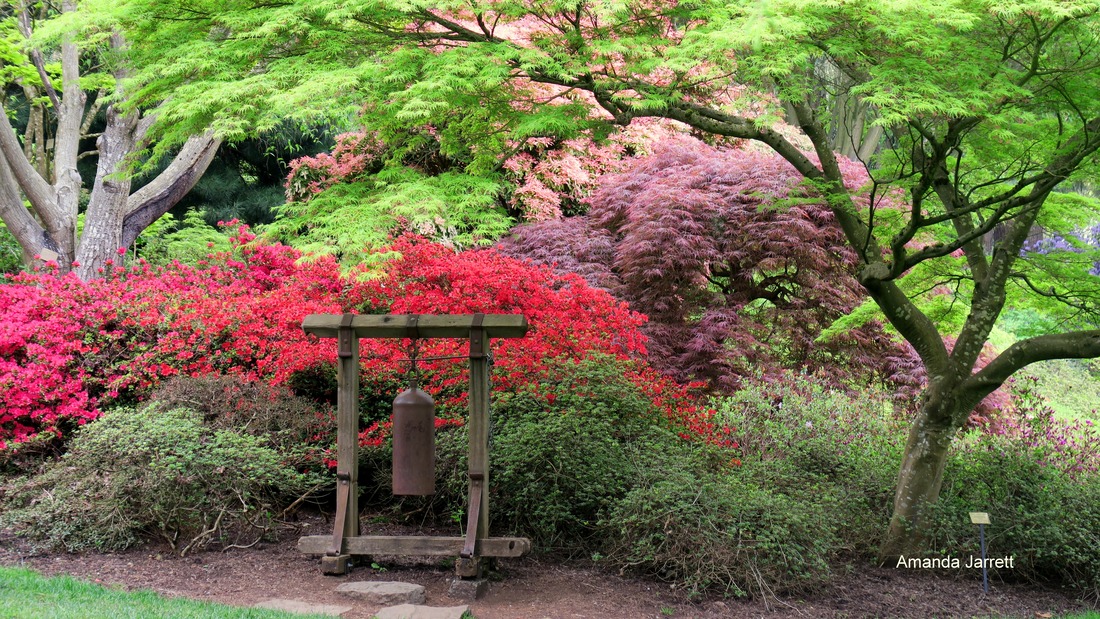 A giant gong is surrounded by camellias, rhododendrons and other spring flowering shrubs. It was the end of April when my daughter, Jessica and myself, visited one of my favorite places, the VanDusen Botanical Gardens. It was a pleasant sunny day; a perfect day to enjoy the many beautiful flowers that were strategically featured throughout the 55 acres. Going to any garden or park is always good for the soul and VanDusen doesn't disappoint with its natural plantings as well as its more formal designs. I took lots of pics, grabbing ideas as we sauntered through the displays. It doesn't matter if you miss April's floral treasures at VanDusen, because no matter what time of year it is, even in the depth of winter this garden doesn't disappoint.
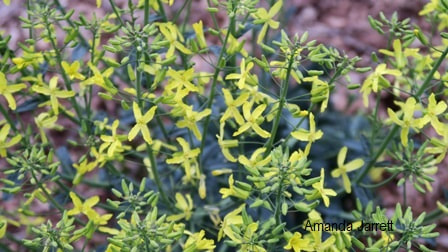
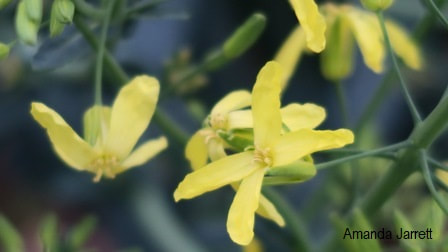
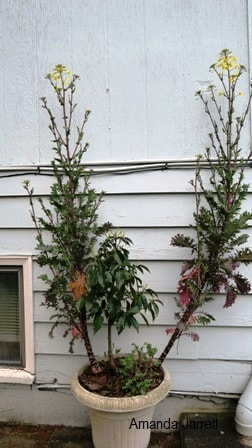
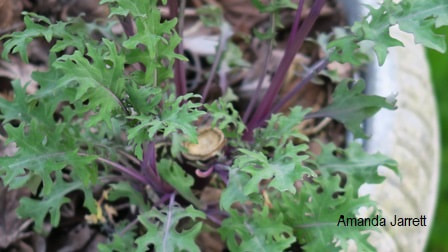
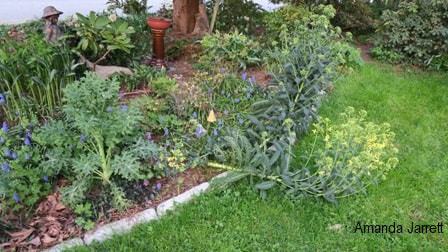
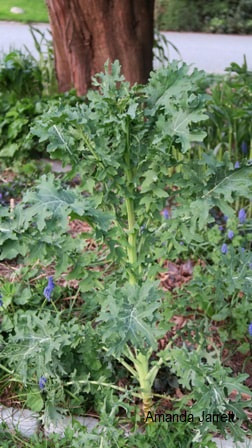
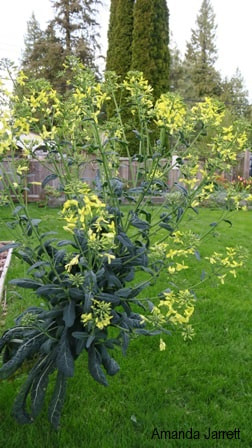
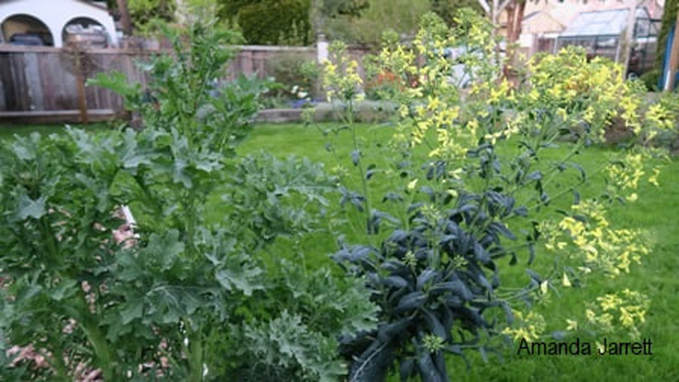 Curly kale and Tuscan kale are huge as they don their plentiful flowers. I like to grow kale because it is easy to start from seed, it does well in my garden and it is tasty. Spring kale's new leaves are delicate with a more subtle flavor than the mature foliage from fall. An added bonus is they flower their second year and they are delish. They are great in a stir fry and salads, so are the tender new leaves and stems. Kale is a biennial, and flowers only in its second year, then it dies. The first year it throws out robust foliage, but in the following spring the centre of the plant elongates producing a loose cluster of simple yellow flowers. Bees love them. If you don't want huge plants, but still want the flowers and baby leaves, harvest the main stem as it elongates. The remaining plant with pump out more delicious stems and flowers. So here are my kale plants. I have a few since I love them so, but no one else in the family is as keen. All the more for me!
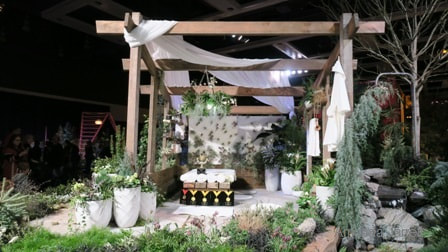
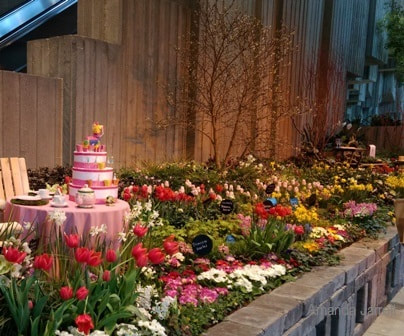
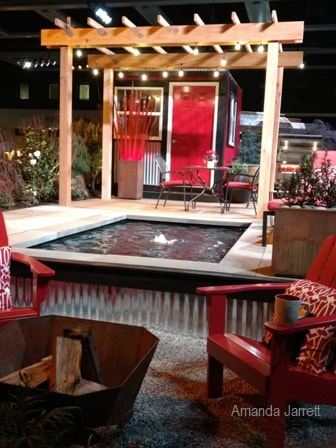
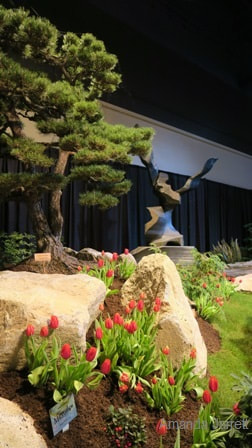
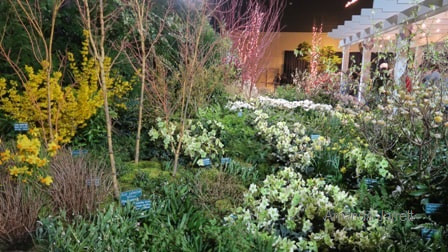
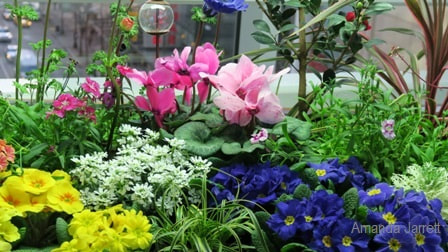
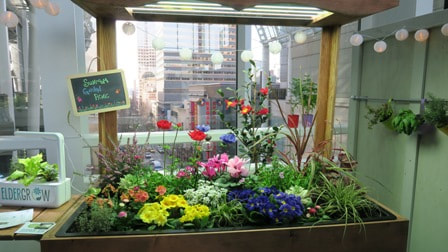
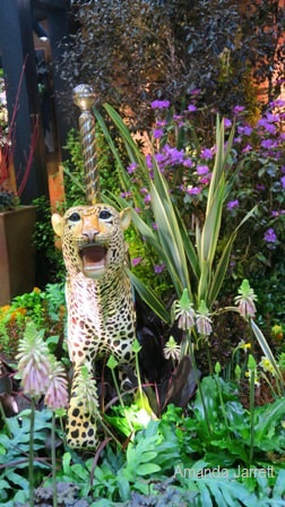
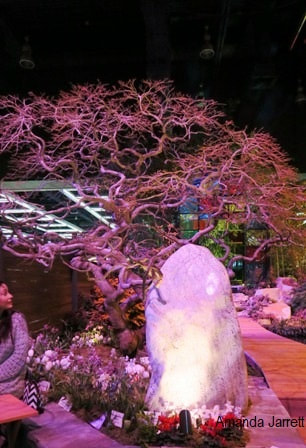
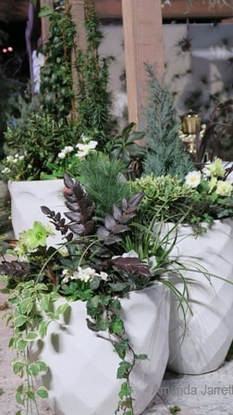
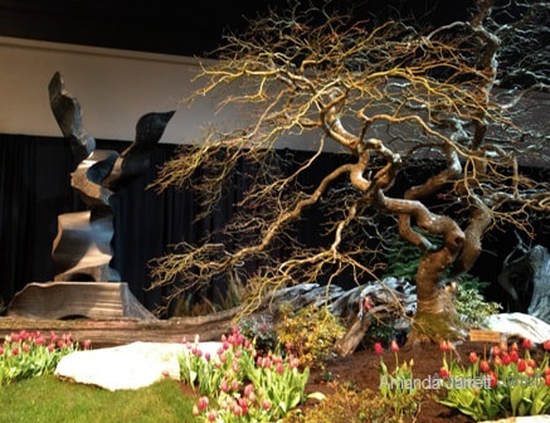
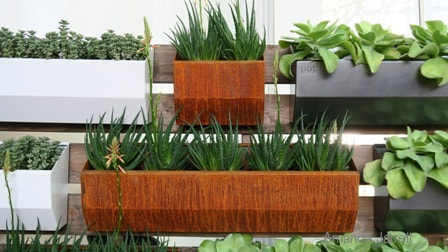
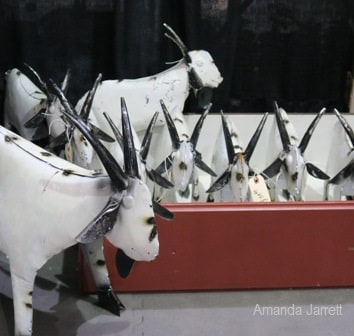
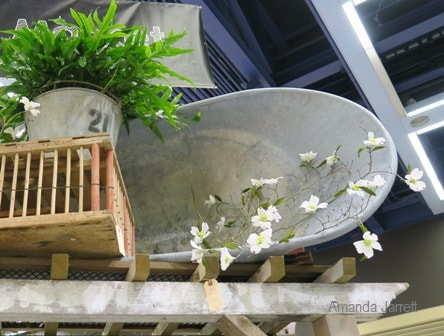
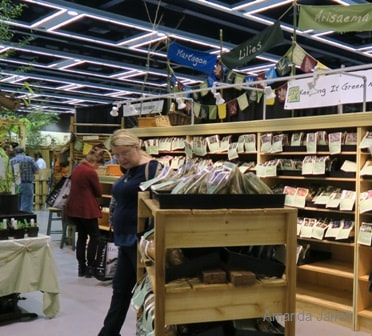
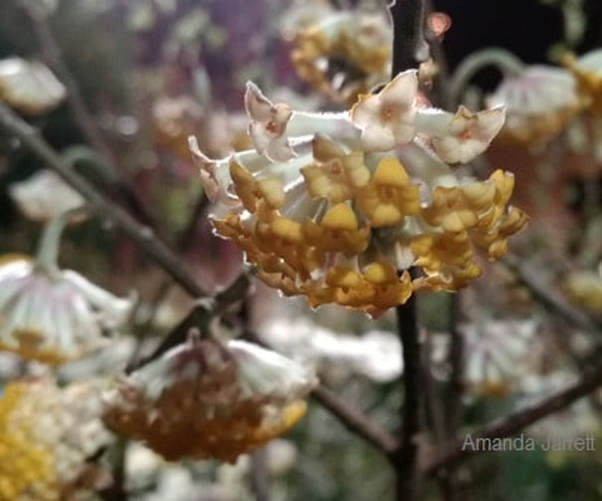 The plant that created the most buzz was the Paperbush, Edgeworthia chrysantha grandiflora. It grows to 6ft, Zone 7 to 10, partial shade. The Northwest Flower & Garden Festival, February 2018 The Northwest Flower & Garden is THE place to go for the latest in garden trends, landscape design and new plant introductions. Garden enthusiasts, horticultural gurus, landscape designers, plant collectors and crazy plant nuts, like me, flock to this exciting expo of what is new and exciting in the plant world. This is the 30th year Seattle has hosted this five day event, which is held every February. Gardening is not just celebrated, it is explored, re-imagined re-invented and celebrated. I have linked most of the pictures below to the vendor's and designer's website for your convenience. Just click on the pictures and it will take you to their websites.
This year’s theme; The Garden Party, went beyond pretty teacups nestled among floral finery. All kinds of wonderful plants at their peak of loveliness were used to create competing gardens by the pros. Designers, growers and nurseries brought gardens to life within the walls of the Washington State Convention Center. Twenty professionally designed gardens vied for gold, silver and bronze awards. There were gardens fit for bees, fantastic container garden combinations and ones echoing the Cascade Range. Ancient forests with waterfalls, indigenous plants in natural settings, elegant geometrically designs, winter bloomers, edible landscapes and Zen inspired gardens were part of the contest.
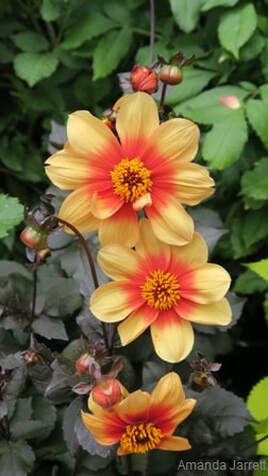
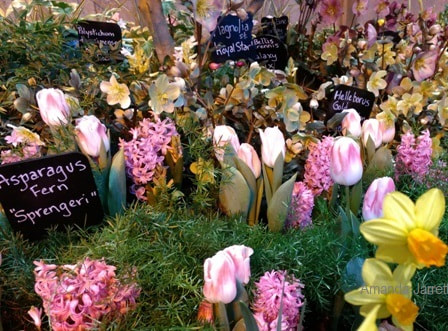
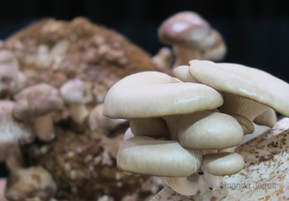
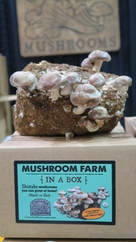
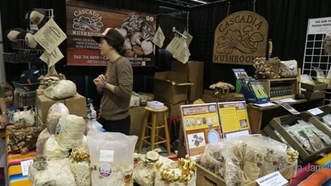
New plant introductions were featured in many of the contestant gardens, as well as many of the over 350 vendors in the Marketplace. One plant that caused quite a stir was the Edgeworthia chrysantha, with its round, drooping flower clusters on leafless stems. This was also the place to grow for mushroom kits, edible plants, miniature conifers and dahlias.
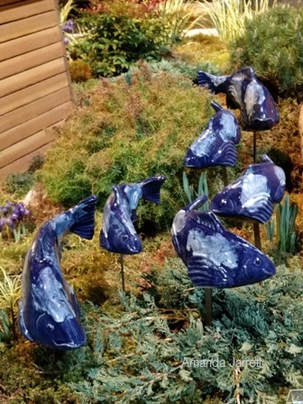
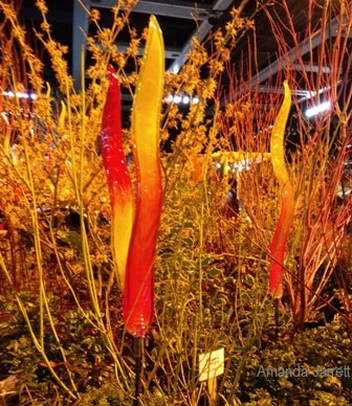
Glass was a huge garden trend. Spirals of vividly coloured vertical glass spires boldly broke through the competing designer gardens. They reminded me of the beautiful and dramatic coloured blown glass of the American glass sculptor Dale Chihuly. There were many vendors that carried these dramatic glass pieces.
It was good to see emphasis on sustainable gardening, urban landscaping, container gardening, biodiversity and food growing by vendors and designers, and the festival's organizers alike. To inspire and educate, 100 free garden and plant related seminars were offered by professional gardening gurus, authors, prize winning landscape designers, horticulturists and naturalists. There were many lovely things to see and buy. It is not for the faint of heart or the light of wallet. For us Canadians, there was a special booth that provided information, documentation and forms to get through Canadian customs. Organizers had thought of everything to make the process easier. Here are some photo highlights of the show. Award winning Garden Designs from the Pros
From the Marketplace
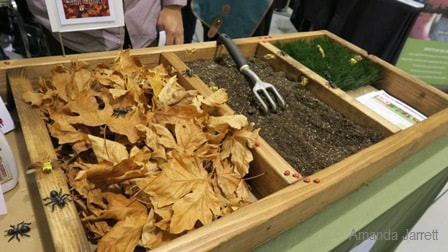 King Conservation District demonstrated the importance of sustainable gardening, biodiversity and the importance of soil health. Wonderful Plants...
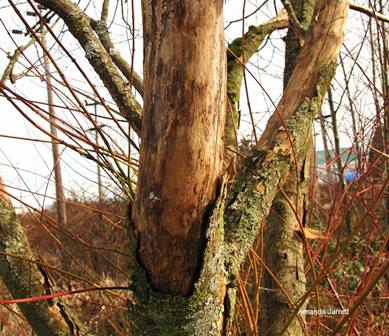
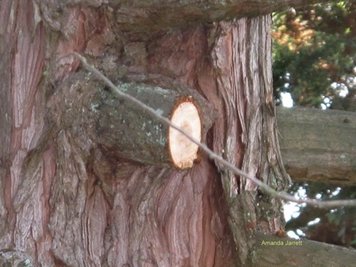
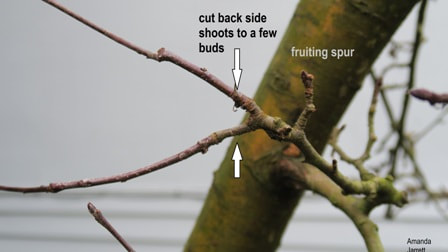
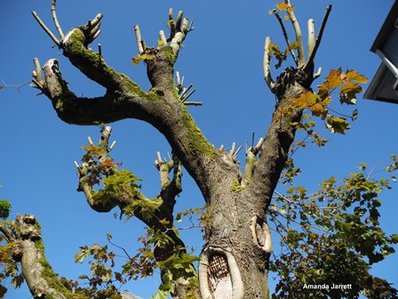
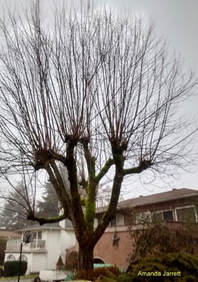
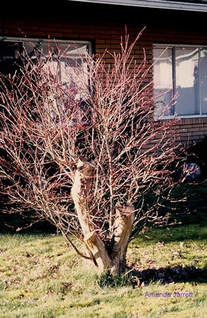
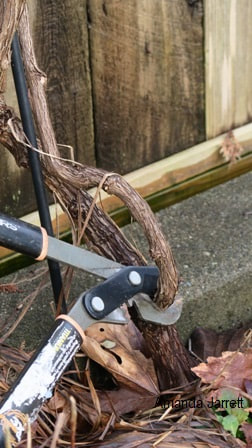
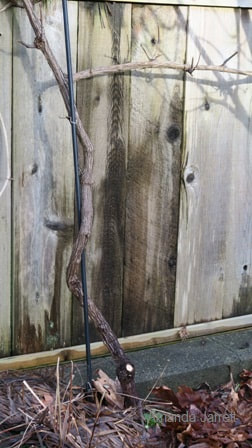
 Necta Zee, a dwarf nectarine, Prunus persica 'Necta Zee' only grows to 6ft.  Pruning in winter promotes growth, while summer pruning limits growth. There’s a few thing to keep in mind before cutting back your trees and shrubs this winter. Here’s a list to follow to make things a tad easier and more doable. Keep in mind that winter pruning promotes growth as well as watersprouts and suckers - so don't go crazy. If you want to restrict growth while reducing watersprouts and suckers, then go easy now and prune in summer. Not all trees and shrubs need to be pruned. If it is flowering well, looks good, isn’t in the way and is doing what it is supposed to do, leave it alone. For more on pruning click here to go to my website. For rose pruning, click here. What To Remove
What To DO
Where TO Cut
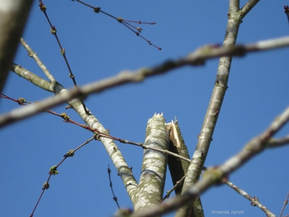
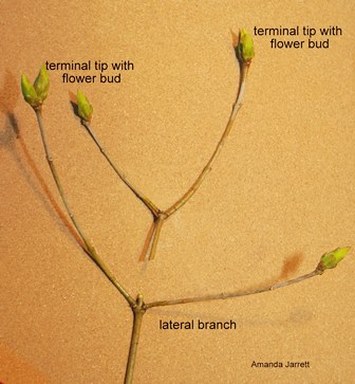
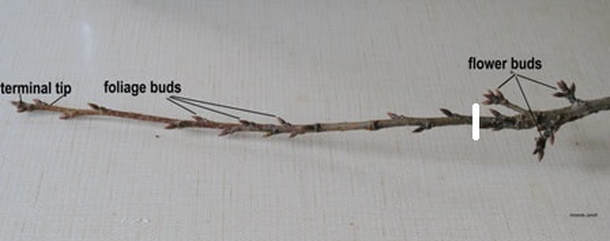 To shorten this apple stem, cut it back to the flower buds. They are fatter than leaf buds and are held in clusters PLease Don't....
Safety
 Wear gloves as they protect the hands from blisters and thorns. They also give you a solid grip. Tree too tall?Don't be worried about a tree becoming too tall and falling over. Nature isn't stupid. A tree's roots are at least the same size of its canopy. In fact roots reach out far beyond the canopy especially if there is room for the roots to spread out. When you prune off the top, the roots also die back in proportion to what was removed. So if your worried that your tree is too tall, cutting the top off is going to make an otherwise safe tree - unsafe. If it a tree is interfering with any overhead structures such as power lines, then cut back the offending branches to a side branch or removed the entire limb. Don't behead it! Cutting back or removing all a tree's branches encourages even more growth. The tree needs foliage to make food, so it pumps out suckers to replace the lost stems and leaves. Suckers originate from the dormant buds from under the bark, not from the tree's core. They are easily broken off, especially in high winds and as they get longer. Suckers are not branches. Pruning is to maintain health of trees and shrubs and should not be used to continuously reduce the size of a plant. If constant pruning is necessary, consider removing the plant and replacing with a plant of smaller stature keeping in mind its width and height at maturity. Select the right size of plant for the space.  Keep the tops of trees in tact. Why mess with perfection? 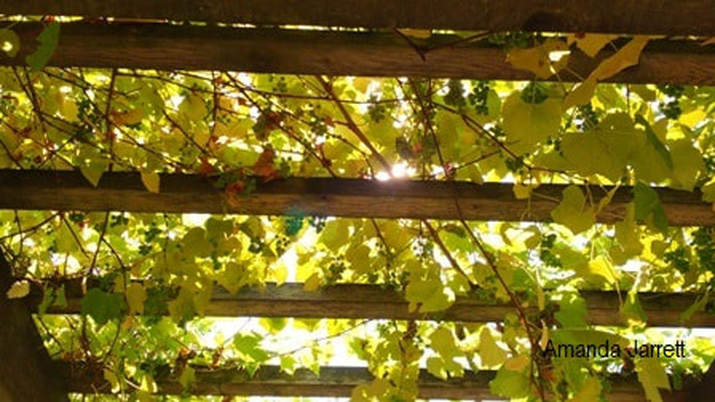 Grape vines grow quickly and are very productive so proper pruning and training is a good idea. Pruning grapes is not a fine art as they are tough little cookies, but they are more productive and less unruly with correct pruning and training. Harvesting becomes easier, grapes are fewer but are larger, there's less problems with diseases plus they ripen faster. Let’s start at the beginning when you first bring a grape plant home. Although it is maybe tempting to give it a good haircut, don’t. It is important for the plant establish a good framework and a good root system before any trimming takes place. 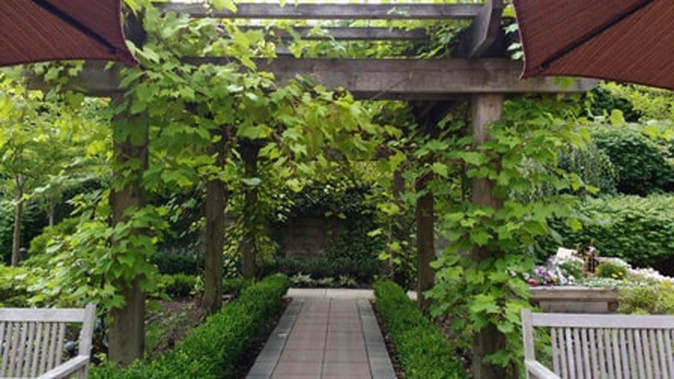 Grape vines grown on an arbor is so Mediterranean, however pruning them is a bit arduous. Grape plants are woody vines and need a support such as a fence, arbor or horizontal post system. I have mine growing along a 6 foot fence and it works quite well. I initially used a thin gauge wire to train the vining stems, however, this proved inadequate. In just a couple of years, the wires sagged and broke under the weight of the fruit laden stems. Arbors are another alternative and evoke images of a Mediterranean garden as the grape clusters dangle down from a leafy canopy. Pruning and securing the plant is more arduous though as you need a ladder to maintain it.
An efficient grape support is a wire trellis. To make one, sink sturdy posts into the ground 10 feet apart with intermediate posts every two feet. The posts should be 5 feet above the ground. Run one 9 gauge wire horizontally between the posts a couple of feet apart at the top. Add another one about 2 feet above the ground if you wish to another level for the vines to grow upon. 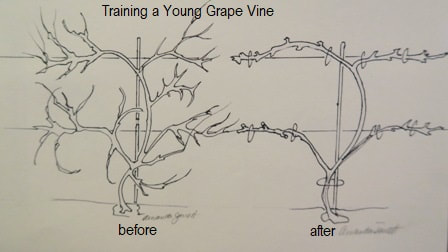 Remove all branches except for the one or two sets of branches at the first initial pruning. Then remove all side shoots to a few buds. The first pruning should be done in winter. This is to establish a basic framework. Select the sturdiest stem that is growing more or less upright to become the main trunk. Tie it to the main support. Once the main stem reaches the top wire, cut it back to two strong buds. Those buds will become the 'arms' reaching in opposite directions along the wire. As the buds develop into stems, tie them to the wire as they grow. If you have a two wire system, look for two strong stems that arise closest to the lower wire and tie them to their support.
As the 'arms' grow, new shoots will grow along their stems. These new stems will grow with gusto producing many grape clusters. If they are not cut back, the grapevine will become a monster and the grape clusters will be many but the grapes themselves will be small. To increase the size of the grapes and to control its growth,cut back any side shoots to a couple of buds (nodes) on each of those side stems. 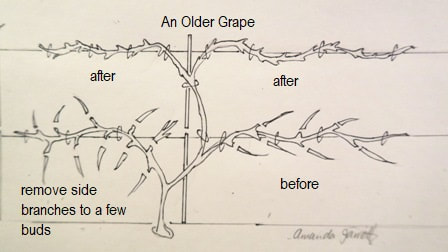 Cut back all side shoots to a few buds and any extra branches. If your grape plant is more mature, and it needs remedial pruning, determine which stem is your main upright trunk and which are its ‘arms’. Select the most vigorous stems. Remove all other growth; just keep the main trunk and the horizontal arms. Tie them to their support if they are not secure. Cut back all the side branches emerging from the arms to 2 to 4 buds. These buds should develop into fruiting spurs, where the grapes will develop. Once all the side shoots are cut back to a 2 to 4 buds, thin the side shoots so they are about 10 to 12 inches apart.  Cut back side shoots to a few buds. This is where future grapes will develop. When it comes to training a grape vine on an arbor, pergola or other overhead structure, plant at least one on each side of the structure. That is all you need if the structure is small, however for larger ones, consider planting one at each support post or every other one depending on the distance between the posts. Prune the winter after planting. Cut back the main stems to just beyond where you want the plant to branch out, about 2 feet off the ground. Remove all the remaining side shoots. When the main trunk starts to branch out, select the most robust ones and tie them to their support. For remedial pruning and training for older grape vines, select the healthiest main stems. Keep one or two main stems on each plant and tie them to their support (or just twine the vines around their support). Remove all the side shoots of the main stems to a 2 to 4 buds (nodes). If any of the main stems are long enough, guide them over top the trellis and secure. There are numerous methods of pruning grape plants, but this method is not too complicated and it works. More on pruning grapes as the season progresses. 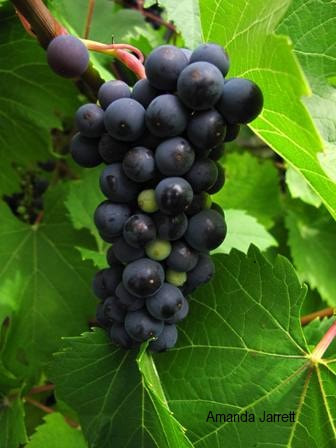 My Coronation grapes look as good as they taste.  Apply dormant oil and lime sulfur before bud break to prevent overwintering pests & diseases. To control overwintering insects and diseases on fruit trees and other deciduous (non-evergreen) trees and shrubs, spray them with a mixture of dormant oil and lime sulfur during their winter’s sleep. This organic pesticide works to kill any exposed insects AND diseases. Common targeted insects include scale insect, spider mites, caterpillars and their exposed eggs. It also does a great job controlling common diseases on fruit trees such as peach leaf curl, apple scab and powdery mildew. Use on roses to reduce black spot. This dormant spray solution is less harmful to pollinating insects and other beneficial bugs as they are not around this time of year. And unlike other pesticides, the insects and fungi do not develop a resistance; a common issue especially when using fungicides. Apply while plants are still dormant and have not yet sprouted foliage or buds. Spray when there is no rain, snow or frost predicted for 24 hours. Temperature should remain at 0°C (32°F) or above for at least 24 hours. Avoid spraying on evergreens (cedars, rhododendrons etc.) as it may injure them. Apply in the morning so the plant will be dry by evening. Don’t apply if frost is predicated overnight. Although this sounds like the window of applying this organic pesticide and fungicide is rather narrow, it's usually doable. And it works. I have noticed a huge difference in my apple tree especially when I neglect to get the dormant oil solution in time - like last year. My poor apple had lots of issues, much more so than previous years when I managed to get the job done. Usually the end of January to the beginning of February is the window of opportunity, however, since I live in the temperate climate of southern British Columbia, spring sometimes come early, catching me off guard (in a nice way). There's been a couple of years when I the plants sprouted at the very beginning of February. Oh no! For most of Canada the window of opportunity is usually late February and into March. Look for the dormant oil, lime sulfur duo packaged together at home hardware stores and garden centres. Get an extra box for next year as sometimes they are not in stores in time for us here in temperate and balmy B.C. Also don't store dormant oil/lime sulfur outside during the winter. I kept mine in my shed and it froze, becoming totally useless. With any product, read the label thoroughly for how to use it, rates of application and cautions etc. Don't spray on a windy day for obvious reasons and avoid getting in the way of the spray while applying. Don’t mix more than you need as you cannot store it for later use. It will stain stone and concrete so cover them with a tarp or plastic before applying. Avoid using dormant oil, lime sulfur on beech, hickory, Amur, sugar and Japanese maples, walnuts as well as redbuds and evergreens, especially Colorado blue spruce and holly. If you are worried about spray drift getting on these sensitive plants, temporarily cover them before spraying with a tarp or plastic. Although dormant oil/lime sulfur is not 'toxic' to humans, cover yourself up as it's rather stinky. Wear rubber boots, cover your arms and legs, a hat, wear glasses (don't want it in your eyes) and rubber gloves. Wash your hands and face after applying even if you use a face mask. Cover the plant entirely so it is dripping off and spray the ground too as it also harbours overwintering pests and diseases. To apply this product to tall plants, I use a trombone sprayer, but a backpack sprayer would be suitable. It makes a fine mist that goes quite high into the tree canopy. You can also use a hose end sprayer for smaller plants, but use the mist setting. This one time application per year works wonders so consider it if you have buggy and diseased fruit trees, roses and other deciduous shrubs and trees.
Ask AmandaHi Amanda, How come my Christmas cactus didn't flower at Christmas? Kathy Hi Kathy, I’ve also had a few Christmas cacti that didn’t flower at the right time or not at all. The reason why was because I was not providing adequate darkness at night and not restricting their water at the right time of year. It’s not difficult to give them what they need to set bud, but you do have to mindful.
In October, allow the top inch of soil to dry before watering and keep them in total darkness for 12 to 14 hours. Cool evening temperatures also spur on blossoms, although I've found it's not essential. After 6 to 8 weeks pink buds should be on the ends of their leafy stems. Once in the plant has lots of buds, increase its water and don’t worry about keeping the lights off at night - but don’t move it to another location as this is a sure-fire way to make them all fall off – oh my! Bud drop and a lack of flowers may also be caused by full sun. Surprisingly, these succulents from the jungles of Brazil don't like it. They prefer bright filtered sun as though they were sitting in the tree canopy of their native habitat.
There also could be another reason your Christmas cactus doesn’t flower at Christmas besides their care, maybe it isn’t a Christmas cactus at all! It could be one of its cousins the Easter cactus (Rhipsalidopsis gaetneri) or the Thanksgiving cactus (Schlumbergera truncata). Thanksgiving cactus flower in fall, about a month before the Christmas cactus (Schlumbergera bridgesii). Easter cactus bud in February and flower around Easter. There are also hybrids, which are a combination of any two of them, especially the Thanksgiving and Christmas cactus. 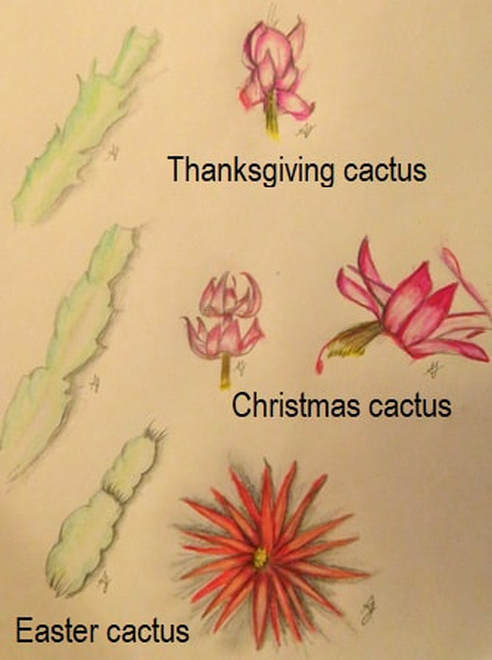 The three Holiday Cactus. Although all these Holiday Cacti and flower look the same, they are not identical. All bear similar leaves, which are actually stems that look like links on a chain. The Christmas cactus leaves are the smallest and have the smoothest edges. The Thanksgiving cactus leaf edges are hooked, resembling claws hence their other common names - the lobster or crab cactus. The Easter cactus distinguishing feature is their bristle-like hairs that are located between the leaf segments. Christmas and Thanksgiving cactus flowers are very similar, but the Christmas cactus anthers are a brownish purple. The anthers of the Thanksgiving cactus are yellow. The Easter cactus has a totally different flower resembling a star. They all require similar care to promote flowering. Give them 12 to 14 of darkness and limit their water for two months before they are supposed to flower. All holiday cactus are easy to propagate. Just snap off a a leaf and stick in a pot with sterile soil or vermiculite. 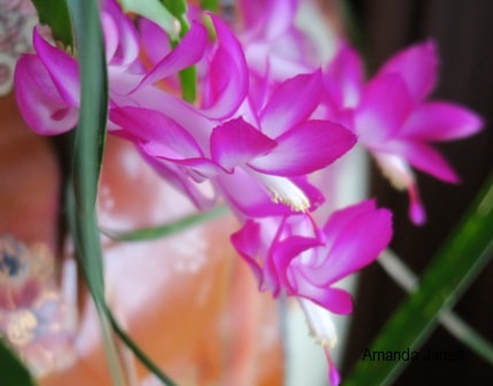 A Thanksgiving cactus. If you decide to purchase another holiday cacti, I suggest you keep the label. Not only will it identify the plant for you, it will list its care. This takes the guesswork out of growing these lovely long-lived houseplants. I hope this helps. Good luck. Amanda |