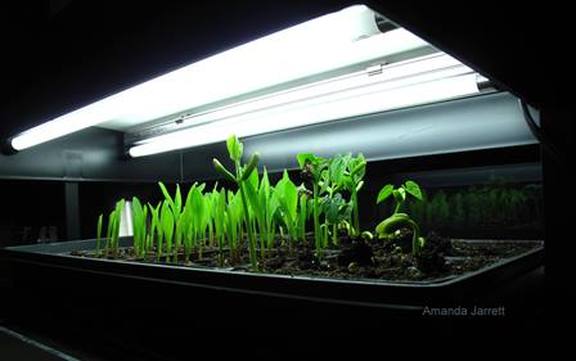
Corn seedlings get a head start when sown indoors. Photo Amanda Jarrett
Starting Seeds indoors
Indoor Sowing Tips & Tricks -Sowing the Seeds - Hardening Off
Damping Off: Sudden Seedling Death
Sowing Seeds Indoors
Soil - Germinating Seeds - Light - Water - Heat
Damping Off: Sudden Seedling Death
Sowing Seeds Indoors
Soil - Germinating Seeds - Light - Water - Heat
Here are some essential tips to get you going:
- Read the seed packet for when to sow, seed depth, and spacing. Not all seeds should be planted indoors, some must be planted outside such as carrots.
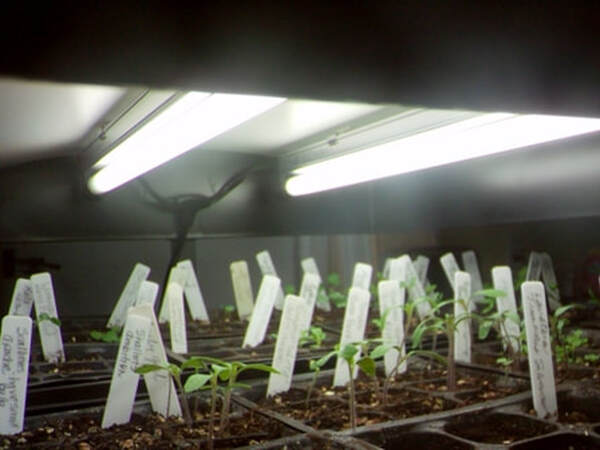
- Provide adequate light: grow lights 2 to 4 inches above the seedlings. If seedlings are long and lanky, the light is too far away. It also helps to place them in front of your sunniest window.
- Provide adequate hours of light: 12 to 16 hours (use a timer).
- Provide bottom heat: place heating mats under the pots. They are available were seeds are sold. Leave them on 24/7.
- Provide drainage & trays: Containers must contain holes in the bottom for the water to drain. Place drainage trays underneath the containers to catch any extra water.
- Use the right soil: Use seed starting soil mix, not garden soil nor planter mix.
- Moisten the mix: Slightly moisten growing media with warm, clean water.
- Fill pots to within 1/4 inch with the warm, moist potting mix.
- Gently firm the soil with the bottom of another pot, a ruler or your fingers, but make sure the surface is flat for the seeds to rest on evenly.
- Sow seeds thinly: Sow seeds according to the instructions on the seed packet.
- Cover & firm: Cover the seeds as recommended on the seed packets and gently press them into the mix. Use a pencil or chopstick to push for large seeds.
- Water ever-so gently: Use warm, room temperature water. Don’t use cold as it promotes rotting.
- Keep moist: Keep evenly moist, not wet. Don’t allow soil to dry out as this kills germinating seeds.
- Cover (optional): Use clear plastic or glass panes to cover seeds to prevent them from drying out. It must be removed once seeds germinate. Condensation: If condensation develops remove the cover and replace when cover is clear.
- Mist daily: Once the cover is removed permanently, mist a couple of times a day with room temperature, diluted chamomile tea or hydrogen peroxide to reduce damping off.
- Water: Use a watering can with a small spout and gentle flow. Use warm, or room temperature water when necessary. Misting is usually adequate before germination, but as the seedlings continue to grow, they will use more water. Go easy and just add a wee bit when the top of the soil is dry.
- Thin: Overcrowded seedlings need to be thinned out by cutting off the spindly ones with manicure scissors. For those you want to save, use a toothpick or chopstick to wedge them out and replant into another cell pack or container.
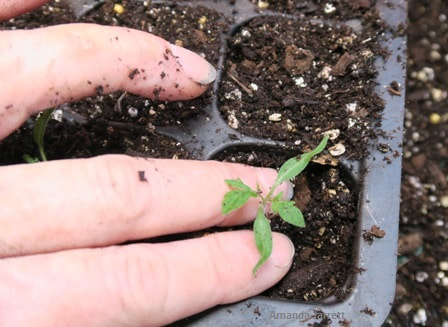
- Repot: When seedlings have two sets of leaves repot into a slightly larger pot. Pry them out with a chopstick or pencil, and hold them by a leaf, not their stem. If the stem breaks, it will not regrow.
- TLC: After re-potting, turn off the lights (and away from direct sun) for a few days until they have perked up. Mist a few times a day.
- Move to bigger pots: When seedlings outgrow their pots, transplant into individual pots and water gently. Avoid direct sun and grow lights for a few days until they perk up.
- After care: Continue to take care for them indoors. Repot the seedlings as they grow into bigger pots, just one size larger than the previous one. This promotes a vigorous healthy root system and healthier plants. You might have to transplant them a few times until they are ready to be planted outside.
- Prepare them for the outdoors: Harden them off before planting by taking them outside for an hour at first. Increase the duration, sun and wind until they are hardy enough to stay outside through the night.
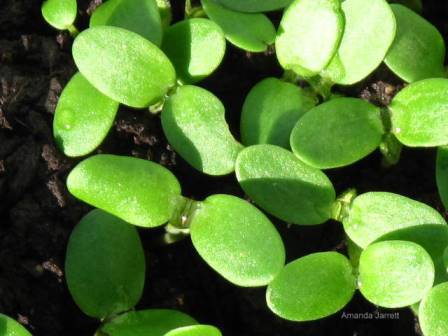
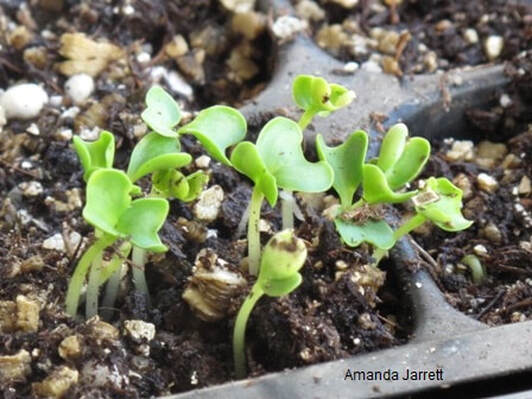
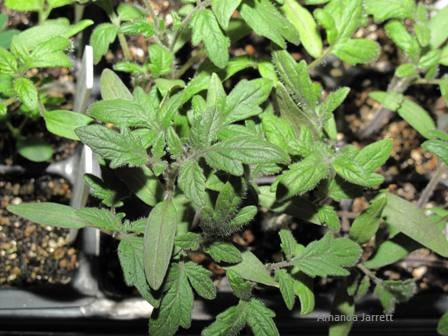
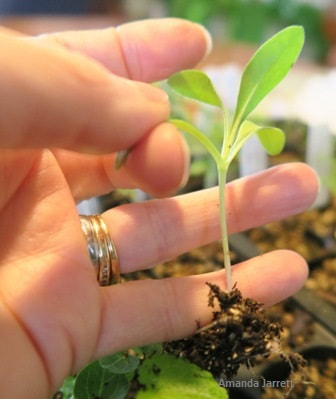
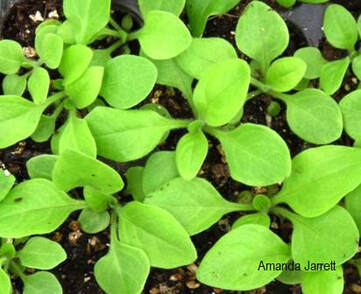
These seedlings have healthy, robust green seed leaves (cotyledons).
|
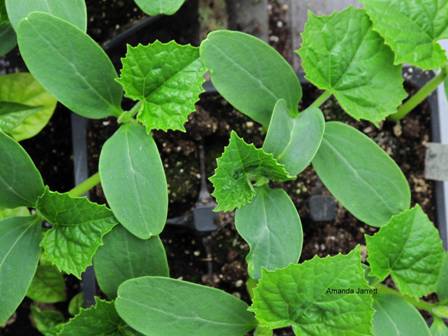
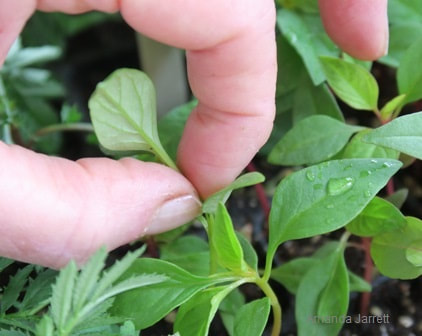
These cucumber seedlings have grown their first set of true leaves and should be potted on to a larger pot.
|
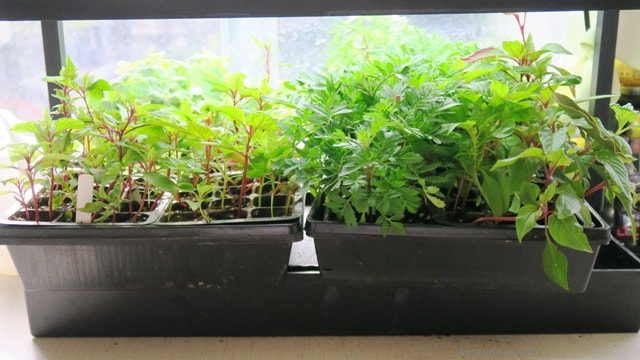
Sowing Seeds Indoors
Robust marigold seedlings. So far so good.
Timing:
If you have tried to grow seeds with limited success you are not alone. I’ve killed a few seedlings in my time, but I have learned a few lessons along the way. To find out when to plant seeds, look at the back of the seed packet. It states how many weeks it takes for the seedlings germinate so they will be ready to plant outside. Some plants need 6 weeks or longer, while others are frost tender and must be planted outside after the danger of frost has passed (and after they have been hardened-off).
If you have tried to grow seeds with limited success you are not alone. I’ve killed a few seedlings in my time, but I have learned a few lessons along the way. To find out when to plant seeds, look at the back of the seed packet. It states how many weeks it takes for the seedlings germinate so they will be ready to plant outside. Some plants need 6 weeks or longer, while others are frost tender and must be planted outside after the danger of frost has passed (and after they have been hardened-off).
Start broccoli, a cool season crop, inside or outside or try both to see which method work best for you.
Read seed packets to know when and how to plant.
|
It's all about the frost date:
To figure this out, find out when the last day of frost is in your area. Here, in Vancouver, B.C., our last frost date is the end of March. If I count backwards 6 weeks from the frost date, I should be sowing my tomato seeds around the last week of February. It's a good idea to write it on your calendar when to sow specific plants by using the seed packet information as a guide. It takes the guesswork out of the timing issue. Some seeds also need a chilling period before they are sown, others need an overnight soaking, so read the instructions on the packet to make sure you don't miss any steps. |
|
Once seeds germinate:
Sowing the seeds is just the first step of a process. Once germinated, the seedlings must receive adequate light and moisture. Set up extra lighting such as grow lights and propagating heating mats to encourage vigorous root growth. Once they grow a couple of sets of true leaves and are large enough to transplant, each seedling needs to be potted into it's own pot. For really tiny seedlings like alyssum, that would be practically impossible, so just separate a small clump and plant a few in a pot, instead of just one. |
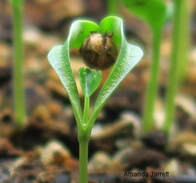
Like Atlas, a rue seedling holds the weight of its world.
|
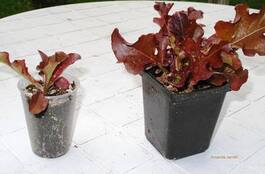
Both these lettuce plants were sown at the same time but one was transplanted to a bigger pot while the smaller one wasn't.
|
Transplanting:
Once the little darlins' are in their own wee pots (usually a 2 inch pot is adequate), they will start to grow (hopefully). Once they have outgrown their pots, transplant into a pot one or two inches larger, no more. As the plants grow and fill their pots, repot them in containers one size up. Avoid over-potting, where you plant a small plant in a huge pot often results in overwatering and oftentimes, plant death. |

These seeds are stretching towards the light because this sunny south facing window is not providing adequate light.
|
Grow light help make sturdy plants that stand upright and don't lean.
|
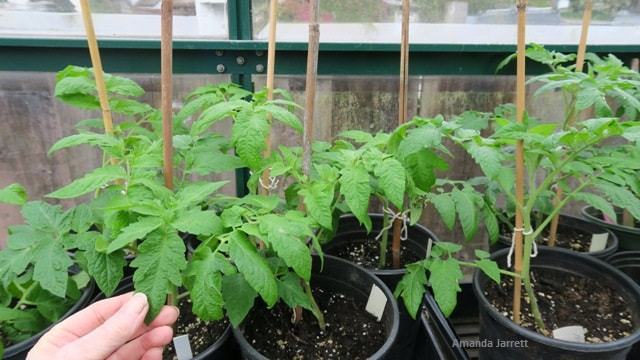
It's time to move these tomato seedlings into bigger pots.
|
Transplanting a tomato seedling into its individual cell pack.
|
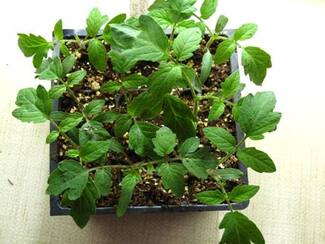
Tomato seedlings once they have been transplanted into cell packs. They are planted in cell packs for the time being to save room on my kitchen counter.
|
Eventually by May, the tomato seedlings have been potted up from 2", 4" 6" and eventually one gallon containers.
|
A calendula seedling is ready to plant into a 2 inch pot.
|
Pinch the tip of flower seedlings when they are robust and have at least four sets of leaves. Celosia pictured.
|
Touch and blow:
As seedling grow touch them! By gently brushing your hand over the seedlings daily, they will become stronger and more vigorous. Breath on them too, as that gives them more air and a wee bit of wind, which will toughen them up.
Although touching the seedlings and blowing on them makes them tougher, they need to prepare the the big outdoors. This is done by hardening them off. It's takes a week or two as you take them outside for a little longer each day providing them with less protection and more sun and wind until they can stay outside all day and night. It's not a difficult process but it does take time. Even cool season crops, need to be slowly acclimatized to the outside world. See below for how to harden off plants so they don't succumb to the fluctuating temperatures, wind and other conditions of the outside world.
Damping Off: Sudden Seedling Death
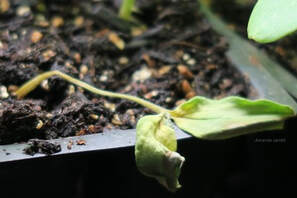
This seedling was fine the day before but quickly succumbed.
|
Use chamomile tea to protect seedlings from damping off disease.
|
Once seeds germinate, they are vulnerable to a prevalent fungus called Damping Off. Once infected, seedling stems become thin and thread-like, then they fall over and die. It is a quick death.
- Cleanliness: Sterilize any reused pots and cell packs in bleach and water before using.
- Drainage: All containers must have holes in the bottom for water to drain freely.
- Soil: Use a free draining sterile potting mix for seedlings. If the mix contains mostly peat and is difficult to wet, and once wet, absorbs too much water, mix in one part of sand or vermiculite.
- Avoid peat pellets: They are made from pure peat surrounded by netting. Although they are convenient they absorb too much water and often become infected.
- Monitor Moisture: Avoid keeping the soil too wet. Test the soil for wetness by touching it. Overwatering also causes seedlings to wilt and is the number one reason for seedling death.
- Avoid Cold Water: Room temperature water is best from 20 to 22°C (68 to 72°F).
- Warm Roots: Use a propagating heated mat available at home hardware stores and garden centres. Plug it in and place your potted seedling on top. Keep it plugged in night and day.
- Warm Conditions: Room temperature should be at least 15.5 to 21.1°C (60-70°F)
- Adequate Light: Seedlings should receive 12 to 16 hours of light per day. Grow lights ensure plants are receiving adequate light. Place the light a couple of inches above the seedlings. As they grow, lift the lighting fixture so it is always a few inches above the seedlings.
- Avoid Overcrowding: Don’t sow seeds too thickly; follow packet instructions for seed spacing. To thin seedlings, use a chopstick to gently lift out the weakest ones so only strong ones remain and they are adequately spaced. Another option is to thin by using small scissors to snip them off.
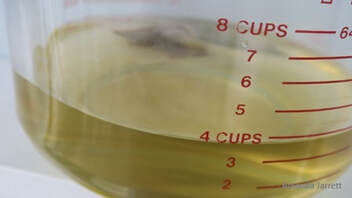
- Chamomile tea: Steep a bag of chamomile tea in four cups of boiling water allow to cool. Mist seedlings daily. Chamomile tea contains anti-fungal properties.
- Hydrogen peroxide: Water seedlings with a mix of 1 tsp. of hydrogen peroxide to 2 cups of water. It oxygenates soil, which kills bacteria and fungi.
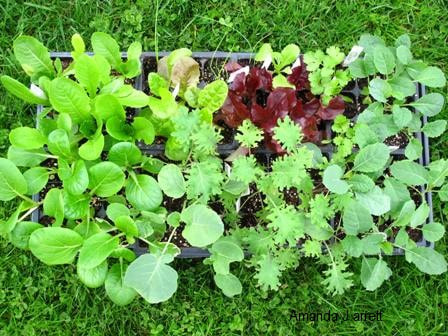
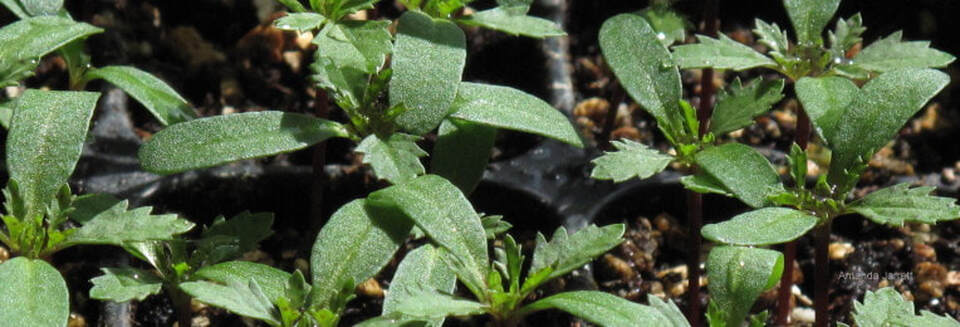
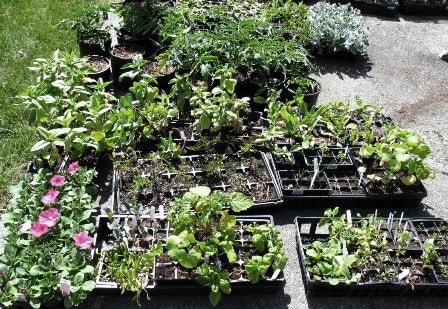
Some of these seedlings are ready to transplant into larger pots, while others will be hardened off and planted outside.
|
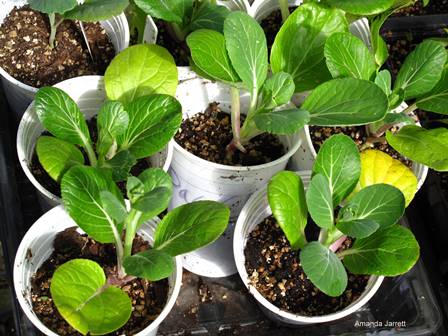
These baby pac choy have been hardened off and are ready to be planted outside.
|
Sowing Cool Season Crops Indoors
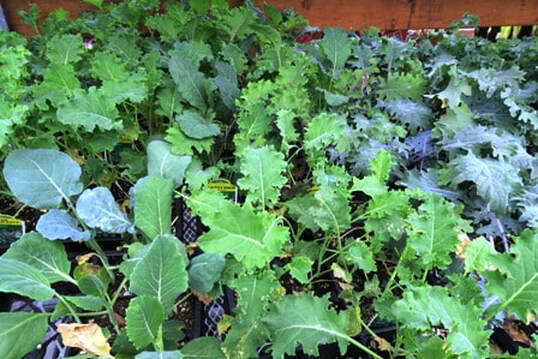
Kale and broccoli ready to plant.
Cool season crops obviously prefer cool temperatures. They germinate and grow best with temperatures of 15 to about 18 degrees C (60 to 65 F). They tolerate light frosts, but fade quickly when the mercury rises. Heat promotes bolting (flowering) and bitter foliage of lettuce and other cool greens, while peas fail to flower or they ripen so fast, they aren’t sweet. Sow peas, lettuce and their chilly counterparts inside or in a greenhouse as early as February in temperate climates like the Pacific Northwest. You can either direct seed them (read the instructions on the seed packet) or start them early indoors. I like to start many cool season plants indoors so the slugs don't get them, plus I have more control over the conditions. Feel free to experiment by planting the same crop inside as well as outside. It's a great way to learn and its rather fun to experiment.
Cool Season Crops: arugula, broad (fava) beans, beets, broccoli, Brussels sprouts, cabbage, collards, carrots, cauliflower, celery (mild winters), chard, fennel, kale, kohlrabi, lettuce, mustard greens, onions, pak and bok choy, peas, potatoes, radishes, spinach, coriander, cilantro, garlic cloves, endive.
Cool Season Crops: arugula, broad (fava) beans, beets, broccoli, Brussels sprouts, cabbage, collards, carrots, cauliflower, celery (mild winters), chard, fennel, kale, kohlrabi, lettuce, mustard greens, onions, pak and bok choy, peas, potatoes, radishes, spinach, coriander, cilantro, garlic cloves, endive.

Start broccoli inside in February to get a jump on spring.
|
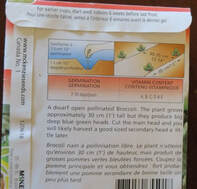
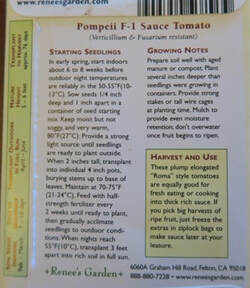
The back of the broccoli seed packet contains pertinent information for seeding success.
|
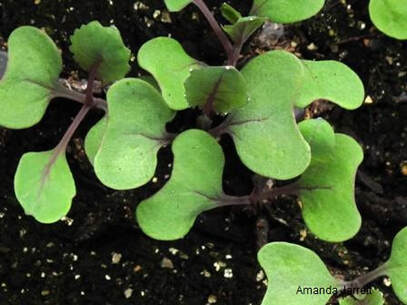
Newly emerged broccoli seedlings have only their seed leaves (cotyledons).
|
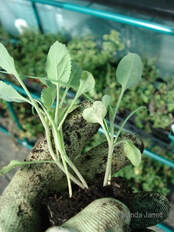
Separate seedlings and pot them up separately.
|
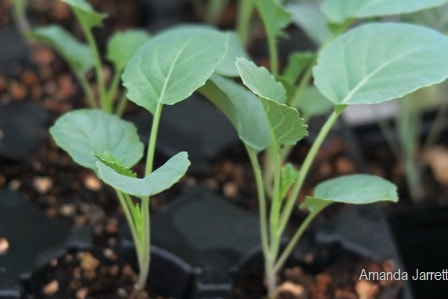
These broccoli seedlings have been repotted into their individual cell packs.
|
Sowing Warm Season Crops Indoors
Petunia seedlings are a warm season 'crop'.
|
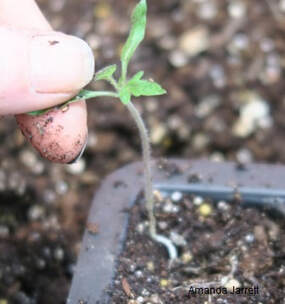
Hold seedlings by their foliage, not their stem when transplanting to a larger pot.
|
Tomatoes, beans, corn, cucumbers and other warm season crops are easily killed by frost and must be planted outside after the danger of freezing temperatures has passed. Some must be sown early indoors so they will have time to produce before winter arrives. To encourage strong roots and vigorous growth, warm season plants benefit from a heated propagating mat. Place underneath the flat, trays or pots and keep it plugged in 24/7.
Some warm season plants can be planted directly outside. I often start some beans inside while sowing some seeds directly in the garden in May. I start cucumber plants inside too, not because I need to, but because I get to harvest them earlier than direct seeding and they don't get eaten by slugs. Experiment and see what works for you. By the time I harden them off and plant them outside, they are mature enough that they are not the tasty delicacies that slugs and snails crave.
Warm Season Crops: bush and pole beans, celery, cucumbers, soybeans, eggplant, peanuts, corn, melons, okra, peppers, pumpkins, squash, tomato, zucchini, basil

Peppers are a warm season crop, which is indicated on the back of the seed packet.
|

Don't throw out the seed packets even if all the seeds are sown as tells you when and how to plant them outside and harvesting tips.
|
Soil & Mixes
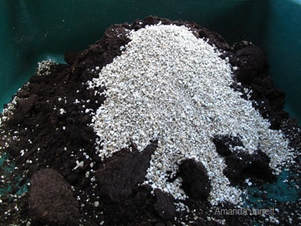
To lighten a peaty mix, add vermiculite, sand and/or coir.
|
Moisten the mix with warm water so it is moist not wet.
|
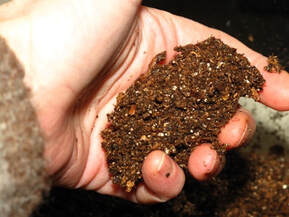
This soilless mix is designed for seedlings, however, it is a tad too peaty.
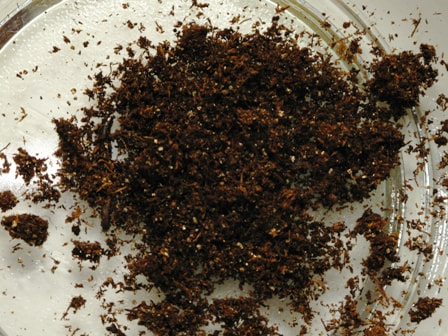
Seed mixes don't contain soil and have a fine texture.
|
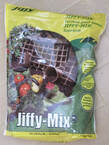
Use sterile seed starting mix, not garden soil to reduce insects, diseases and weeds. There are commercial soil-less products just for seeds, but they often contain too much peat moss. It acts like a sponge retaining too much water for most seeds. Peat moss also repels water when it's dry so it takes a while to become wet again. I often use a commercial seedling mix but I amend it with equal parts sand, vermiculite and coir (shredded coconut husk). I am not too keen on perlite as it floats to the surface of the soil mix, the chunks are often too large and creates lots of dust when dispensing it - achoo!
Make your own: To make your own mix from scratch combine 1 part each of coir, potting soil, sand, part vermiculite. Mix it all together very well and moisten it so it forms a ball in your hand. There are many different soilless mixes for seedlings. You may have own recipe that works for you. If you haven't mixed soil yourself, then experiment. See how different rations of sand etc, or omitting one of them, affects how the water drains through the mix. |
Peat pellets are another option. These small flattened disks are made of pure peat surrounded by netting. Since they are made of peat moss, they are prone to becoming too wet and drying out too quickly. Although I am not too keen on peat pellets, there are many people who like to use them. If you do, soak them with warm water (not cold) until they swell fully. Pull the netting away from the top so the seeds have enough space to grow. I usually scuff up the surface a bit as it usually is quite compacted. To bury seeds to correct depth, use a chopstick or pencil to make holes in the pellet. You can also apply sand, grit or vermiculite on top to cover the seeds.
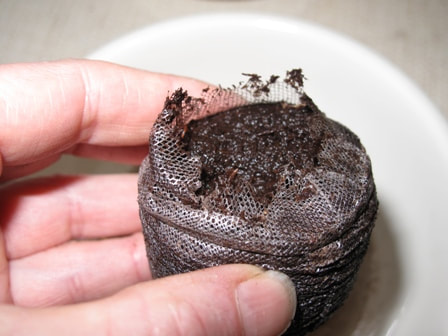
Moisten peat pellets first then loosen the netting on the top.
|
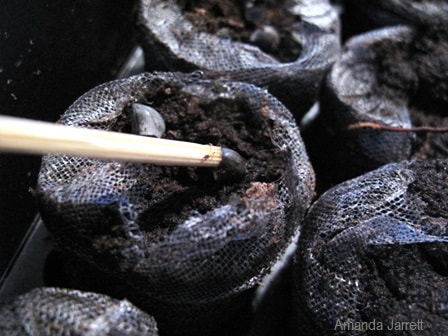
Use a pencil or chop stick to bury seeds to the appropriate depth.
|
Sowing the seeds
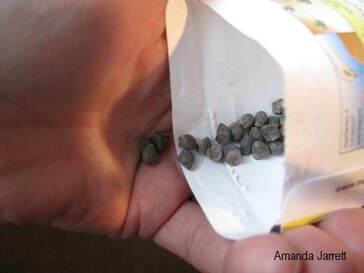
Sow seeds according to the directions on the packet.
Before I start sowing the seeds, I write their labels and place them in the seed packet. I include information I will need such as the name, date, height, colour etc. This makes the process of sowing seeds easier, without seeds getting the wrong label.
Old seeds, new seeds:
Use new seeds as the percentage of viable seeds deteriorate over time. See below on how to test your seeds for viability.
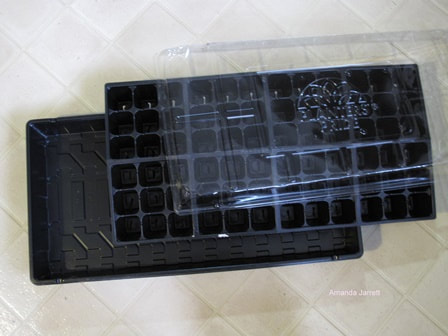
Use clean, dry containers with drainage holes. Sterilize recycled pots with 1/4 cup of bleach to 1 gallon of water. Pre-soak fibre and peat pots before adding soil to prevent water being wicked away from roots and soil. I prefer to use plastic cell packs and reuse them year to year. I also recycle cell packs that often come with bedding plants.
Sow the seeds:
Sow a few seeds in each cell to the depth indicated on the seed packet. When they grow the third set of true leaves transplant each one to another cell pack or a 1 inch pot. Planting each seedling into their own cell or wee pot ensures they will not be overwatered and will develop a good root system. Be careful not to overpot, which means planting a small plant with a small root system in a pot that is too large. Just go one or two sizes larger, for example transplant from a 2 inch pot to a 4 inch pot at most, not a 6 or 8 inch one to avoid overwatering. The bigger the pot and the smaller the root system, the more chance of root rot and damping off.
Old seeds, new seeds:
Use new seeds as the percentage of viable seeds deteriorate over time. See below on how to test your seeds for viability.
Use clean, dry containers with drainage holes. Sterilize recycled pots with 1/4 cup of bleach to 1 gallon of water. Pre-soak fibre and peat pots before adding soil to prevent water being wicked away from roots and soil. I prefer to use plastic cell packs and reuse them year to year. I also recycle cell packs that often come with bedding plants.
Sow the seeds:
Sow a few seeds in each cell to the depth indicated on the seed packet. When they grow the third set of true leaves transplant each one to another cell pack or a 1 inch pot. Planting each seedling into their own cell or wee pot ensures they will not be overwatered and will develop a good root system. Be careful not to overpot, which means planting a small plant with a small root system in a pot that is too large. Just go one or two sizes larger, for example transplant from a 2 inch pot to a 4 inch pot at most, not a 6 or 8 inch one to avoid overwatering. The bigger the pot and the smaller the root system, the more chance of root rot and damping off.

Cell packs are a great way to plant lots of seedlings in a small space.
|
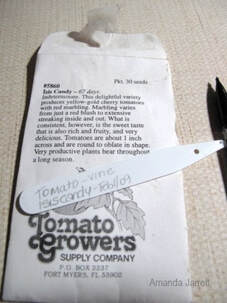
Make the plant tag before sowing all your seeds to make the process easier. Pencil works better than a marker as it lasts longer.
|
Testing for Germination
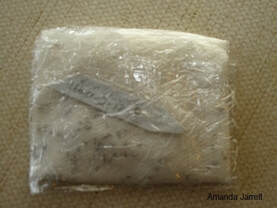
To test the viability of old seeds, place a few in a wet paper towel then wrap with plastic.
|
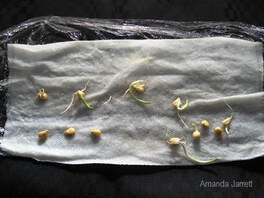
The percentage of germinated seeds indicate if they are still viable.
|
Have you got old seeds from previous years? I do, in fact I have lots of seed packets with seeds that I don't know are still viable. One way to find out, is to place a few of the seeds in a wet paper towel that is not dripping wet, but more than damp. Fold the paper towel with seeds inside and wrap in plastic wrap or zip lock bag. Label with the seed name and the date. Keep in a warm place out of the sun and check every few days until germination starts. Check the seed packet for suggested germination times. If germination is low, then sow more seeds. If there is no germination, I put them in the garden for the birds.
Germinating Seeds
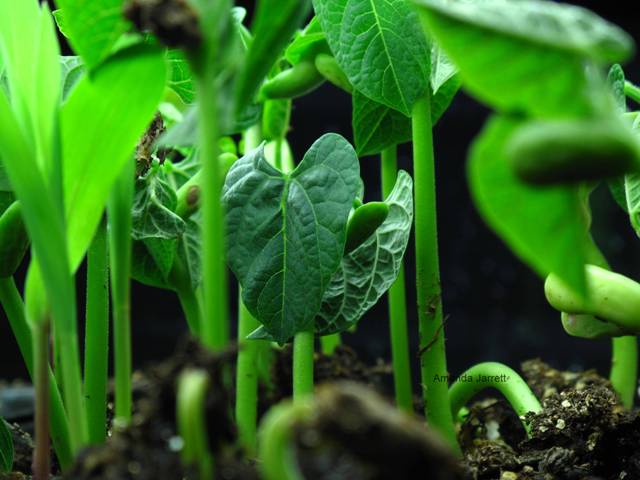
Germinating bean seedlings.
Germination Issues
If you are having problems with seeds germinating make sure you follow the planting depth on the seed package. Some seeds, especially teeny ones, don’t need to be buried. Keep the soil evenly moist at all times as germinating seeds will die without water. Tiny seeds, such as lettuce, that are not buried tend to dry out quickly so be prudent with watering and misting.
One efficient way to keep soil moist by increasing the humidity and reducing evaporation is to place pots in clear plastic bags. Make mini-greenhouses by blowing air into them and quickly tying them closed. Or buy kits that come with plastic cell packs, a drainage tray and a clear plastic dome lid. Check daily for too much condensation, which promotes seeds to rot. There shouldn't be large beads of water on the lid or cover. Fussy growth on the soil surface on seeds, soil and seedlings, indicate that it is too wet. If this happens, remove the cover, and maybe if you caught it soon enough and the fuzzy growth is gently removed, remaining seeds might grow. Or just bite the bullet, and start again, but do disinfect everything and use fresh soil.
If all goes well and seedlings sprout (yippee!) then remove the cover once the seeds have germinated. I like to mist my seedlings with lukewarm chamomile tea. It is a natural fungicide that reduces damping-off, a seed killing disease, see below.
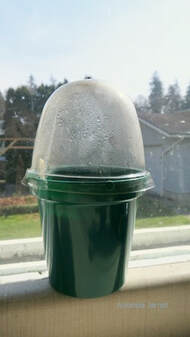
Purchased at a dollar store, this pot came with a ventilated domed lid.
|
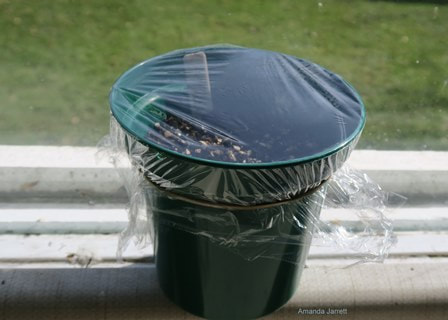
Clear plastic wrap helps keep plant moist, but must be removed when seedlings emerge. Poke a few holes with a fork if condensation is an issue.
|
Adequate Light is critical for success
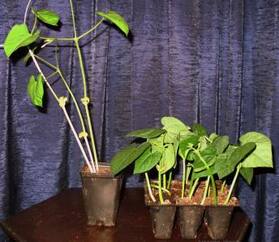
The bean seedling on the left was grew on a sunny windowsill, while the one on the right was placed under grow lights for 12 hours a day.
|
Extra lighting helps seedlings grow strong, stocky and straight.
|
Light
Once the magic of germination has occurred, adequate lighting is essential. Without it, seedlings are weak and spindly. Light intensity and its duration is key. A sunny window is just not enough. Use grow lights or fluorescent set on a timer for 12 to 16 hours. The light should sit quite close to the seedlings, only 2 to 4 inches. If the seedlings are leggy, even while under the lights, then lower the light. As the seedlings grow, raise the light so it is always 2 to 4 inches from the top of the seedlings. Put the lighting system on chains to adjust its height to accommodate the seedlings.
Watering
Keep soil moist, neither wet nor dry. Water should be at room temperature (20ºC, 68ºF.) and allow it sit overnight. If you have a cool house, add some hot water if necessary. Cold water reduces germination and promotes fungus. Spray seedlings daily with room temperature water, not cold as it encourages damping off disease.
Heat
Seedling roots love warmth especially warm season crops. Provide bottom heat with a propagating heated mat under the pots and trays and plug it in 24/7. This stimulates root growth, which results in vigorous and healthy plants. Find them at garden centres and home hardware stores. You will have to water more frequently as the soil does dry out faster, but your seedling will germinate and grow faster, plus they will be more robust. It is not necessary to provide cool season crops with bottom heat.
Handy seed starting kits come with cell packs or peat pellets, a drainage tray and a clear plastic cover.
|
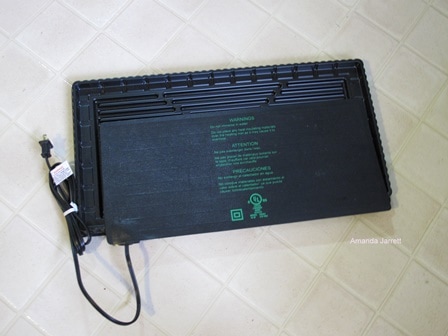
Propagating heated mats promote rooting, vigorous growth and deter damping off.
|
Hardening Off
The first day of hardening off means they are just on the stairs by the back door. There is no direct sunshine and no wind. The next day, they will stay out another hour.
Preparing for the Outside:
Before planting your ‘babies’ outdoors, they need to be acclimatized or ‘hardened off’. One or 2 weeks before planting them permanently outside, move them to a shady area where there is no sun and wind for one hour. The next day, take them out again giving them more wind, more sun and more time outside. Once they stay out all day and all night, usually 1 or 2 weeks, they should be strong enough to be planted outside.
Be mindful of the weather during this process. If the weather is inclement; too hot or too cold, very windy or with driving rain, wait until the weather and conditions improve.
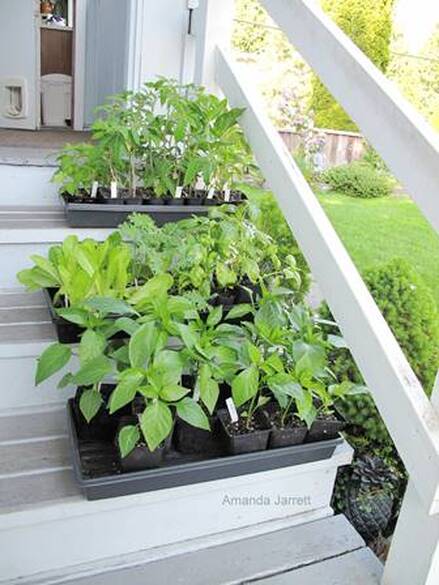
After a couple of weeks of hardening off, these babies are ready to plant outside.
Check out:
|
|
Love plants, love to garden.
Amanda's Garden Consulting Company The Garden Website |
Copyright 2017 The Garden Website.com, Amanda's Garden Consulting Company - All Rights Reserved